
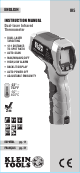
Product Overview


6
ENGLISH
OPERATING INSTRUCTIONS
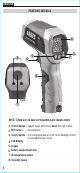
TEMPERATURE MEASUREMENT
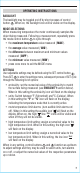
To measure temperature with the IR5, aim the meter at the object to
be measured, pull the trigger
5
and hold it depressed for at least 2
seconds. Releasing the trigger initiates Data Hold, "HOLD" will show
on the display, and the measurement will be held on the display.
If the display shows "OL" or "–OL" following a measurement, this
indicates that the surface temperature of the object being measured
is either above or below the measurement range of the meter.
TARGETING
The IR5 features dual lasers
8
to assist in targeting the
measurement area. The distance between the two laser spots on the
surface of the object being measured approximates the diameter
of the circular measurement area from which the infrared sensor is
collecting data. Measurement areas located far away from the meter
will be larger than those close to the meter.
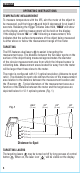
The meter is configured with 12:1 optical resolution (distance-to-spot
ratio). The distance-to-spot ratio defines the size of the measurement
area relative to the distance between the measurement location and
the IR sensor
7
. Typical diameters of the measurement area as a
function of the distance between the meter and the target area are
depicted below for 12:1 optical systems (Fig. 1).
Ø
0
.5"
(13 mm)
Ø
1"
(25 mm)
Ø
2"
(51 mm)
6"
(152 mm)
12"
(305 mm)
Ø
4"
(102 mm)
24"
(610 mm)
48"
(1219 mm)
Fig. 1
Distance-to-Spot
TARGETING LASERS
The targeting lasers
8
may be turned on/off by long presses of control
button
3
. When on, the laser icon " " will be visible on the display.