
Installation Instructions


Additional Materials Needed
- 1-1/4" Wood Screws
ATTACHING COVER PANELS TO ISLANDS AND
PENINSULAS
Attaching cover panels to the back of an island or
peninsula will require some additional steps than standard
cover panel installation.
Note: When island or peninsula length requires 2 cover
panels, a seam will be required. Measure and cut so seam
is in center of cabinet run.
COVER PANEL INSTALLATION
To attach cover panel to back of cabinet, clamp into
place and secure using 1-1/4" screws (not provided)
through the interior of the cabinet into the top & bottom
fastening strips.
Using screws longer than 1-1/4" put you at risk of a
screw going through your cover panel. If you have a
Lazy Susan corner base cabinet with a solid back, you
will want to use the screws that are provided with your
cover panel.
!
TALL CABINETS & BUILT-IN APPLIANCES
Tall cabinets boxes (80"H and 90"H) do not come pre-
assembled. They require assembly on site for easier
handling and transportation.
Your tall cabinet will include three items needed assemble
the tall cabinet before you can configure it:
- Two Tall Cabinet Side Walls
- One Tall Component Kit
The Tall Component Kit will include the instructions on
how to assemble this cabinet. Once assembled, it can be
secured to the wall.
TALL CABINETS
PICTURED
1) Cabinet Side Wall
2) Top Piece
3) Bottom Piece
4) Shelf
5) Backer
6) Door
7) Drawer
8) Reinforced Shelf
9) Filler
10) Appliance Filler
11) Major Appliance
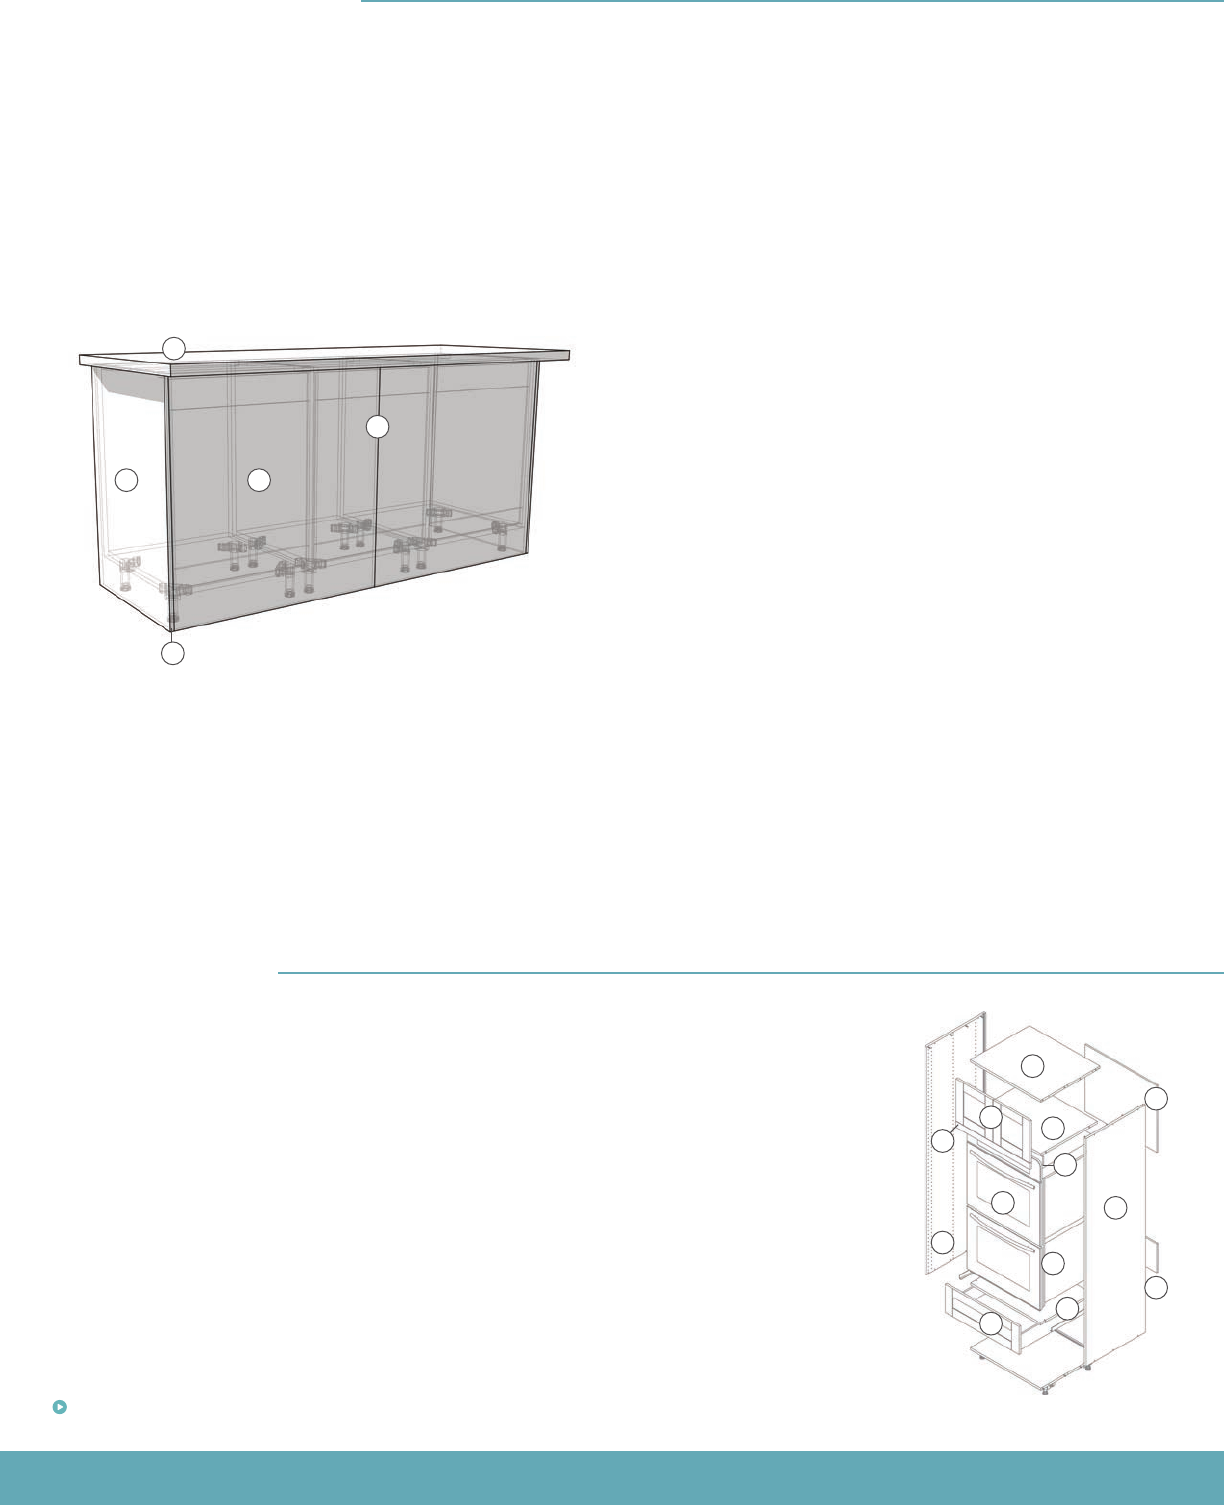
Pictured
1) Countertop
2) Cover Panel
3) Cover Panel Seam
4) Finished End
10
11
2
1
2 2
3
4
5
5
9
1
1
4
3
8
6
7
8
ISLAND & PENINSULA
1
Video: Tall Utility Cabinet Assembly - klearvuecabinetry.com