
Installation Instructions

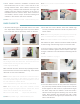
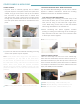
The next cabinet will be set into place and clamped to
the previously installed cabinet. Clamp the two cabinet
boxes together so that the front, top and bottom edges
are flush. Verify that the cabinet is level and install 4
cabinet screws through the fastening strips into the
wall studs. With cabinets still clamped and flush, install
cabinet connectors through the pre-drilled holes on the
side of the cabinets.
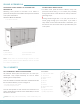
CABINET CONNECTOR INSTALLATION (478-3872)
Before you begin installing cabinet connectors, it is
important to note the pre-drilled holes that are used in
building your cabinet configurations. We have found it
common to use the fourth hole from the top and bottom
for cabinet connector installation, however, some
configurations require use of these locations. Use the
installation instructions included with drawer kits and
hinges to determine hole locations your configuration
will use.
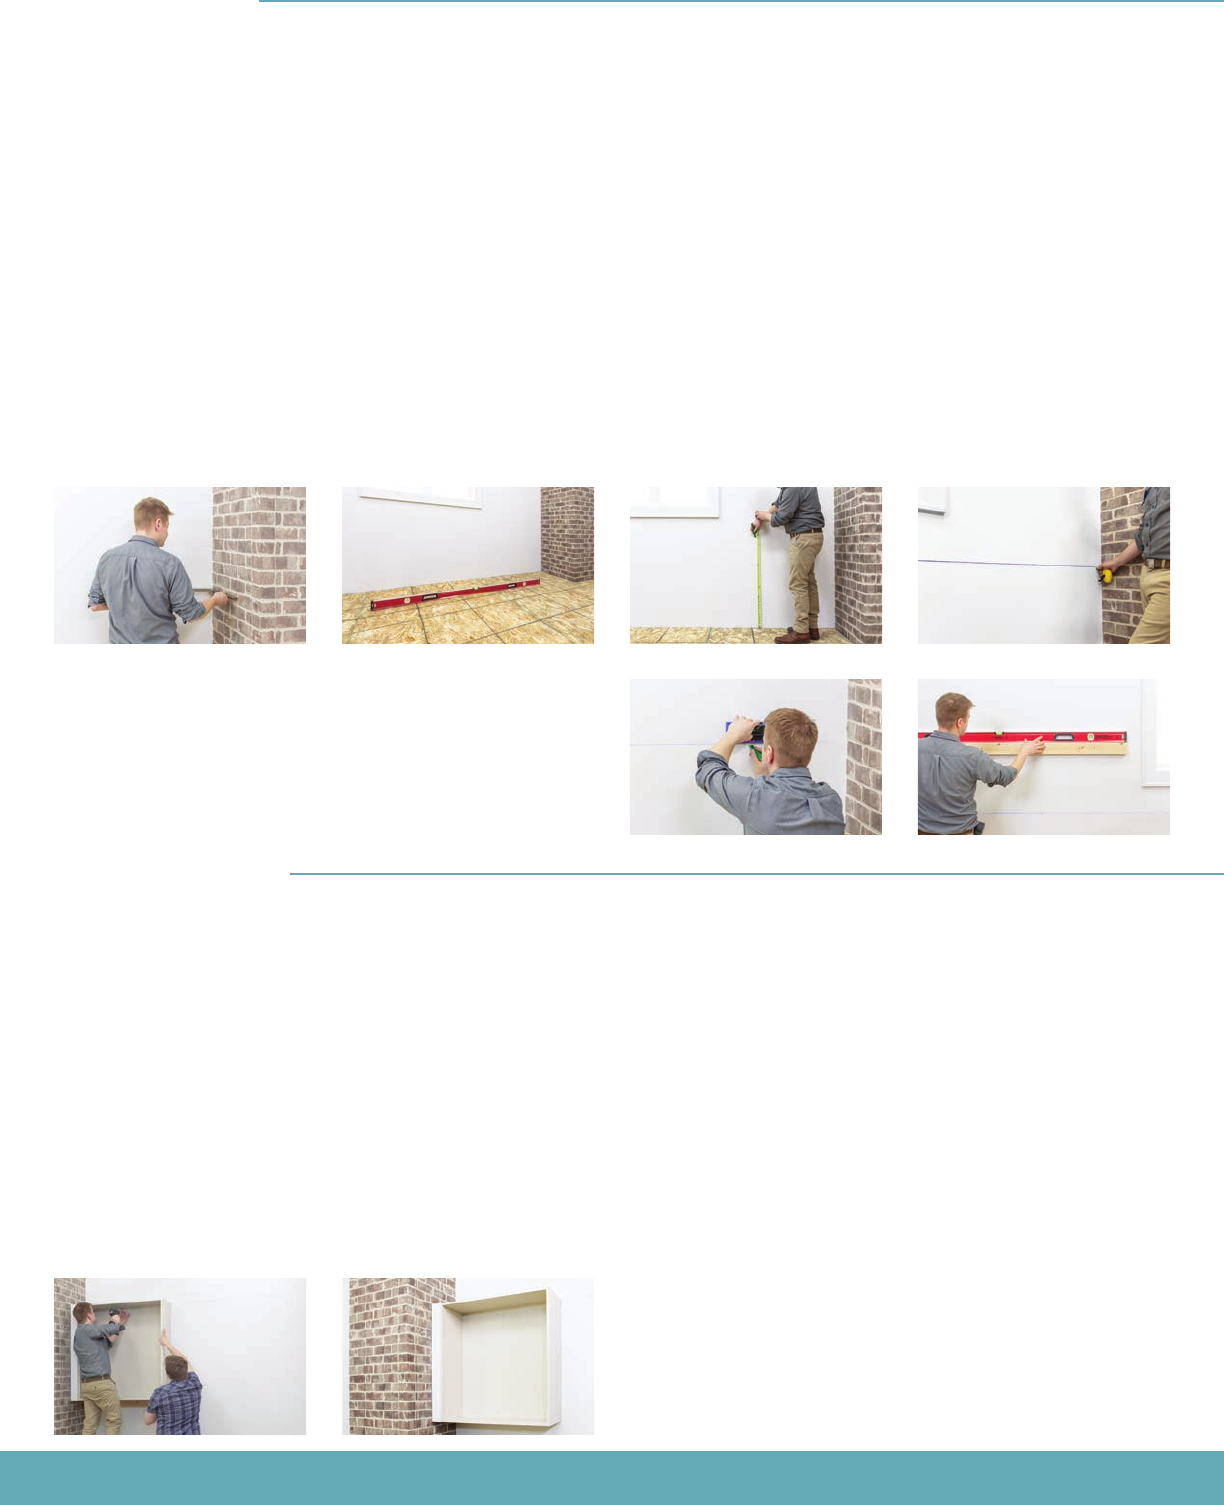
Starting with the corner wall cabinet, install 4 cabinet
screws through the fastening strips on the cabinet
into the wall studs. Be sure to check for level before
fastening cabinet into place.
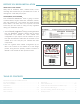
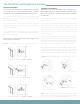
Snap a chalk line or draw a level line at 34-3/4" from
the highest point of your finished floor. Your base
cabinets will be adjusted up to that line (top of base
cabinet without countertop). Snap another chalk line or
draw a level line at to 84-3/4" or 94-3/4" (depending if
you have 30" or 40" high wall cabinets). Your wall and
tall cabinets will be adjusted up to that line. It may be
helpful to draw out your cabinet layout on the wall. This
will give you a guide to follow as you go.
PREPARATION
1
4
2
1
2
3
3
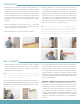
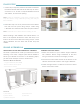
WALL CABINETS
Cabinets fit best on square walls. Walls that are out
of square will require modification to ensure cabinet
installation goes smoothly. For proper cabinet operation
and overall appearance, it is essential for the cabinet
to be mounted level, plumb, and square in relationship
to the floor and walls. If there is any unevenness, your
cabinets must be shimmed and adjusted for proper
function.
Start by checking how level your floor is, and make
note of the highest points before installing cabinets.
Snap a chalk line or draw a level line.
Use a stud finder to mark any studs in the wall.
4
Note: If you choose, install a 1x4 or 2x4 ledger board onto
the wall at the bottom of your wall cabinet height. This will
give you a ledge to set your wall cabinets on when installing
and can assist in keeping them level. This method requires
you to screw into your wall and could require hole patching.
See filler installation on page 7.
Note: Wall corner cabinets include specialty hinges packaged
inside the cabinet box. These will be used to install the
door front to the box. (478-3894)
If you do not have a corner, start with the end closest to a
wall. Cabinets against wall will require a filler strip to begin.
Install filler onto cabinet before installing cabinet to wall.