
Assembly Instruction
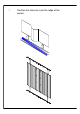

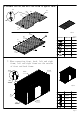
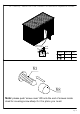

10. Put the TOP on the roof, and tighten it at pre-punched
location with screws.
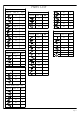
QTY
PART NO.
SKETCH
TOP 1
W3
42
W3
TOP
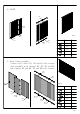
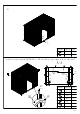
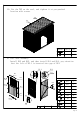
11. Left door assembly
Install DL3 and DL5, and then install DL1 and DL4, pay attention
that the left of W2-1 is inserted into gap of DL3.
QTY
PART NO.
SKETCH
DL1 1
1
DL3
1
DL2
DL4
1
DL5
1
W1
DL7
W3
2
1
42
DL2
DL3
DL5
W3
DL4
DL1
W1
W3
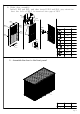
DL6
DL6
2
W3
W2-2
2
W2-2
W2-2
DL7
Page 10
W4
W4 4