
Product Manual


Page 28
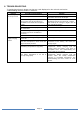
6. TROUBLESHOOTING
To troubleshoot the unit, please note the error code displayed on the main unit and review
“Understanding the Error Codes” in section 5.
Problem
Possible Cause/Condition
Solution
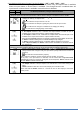
No AC Output at
AC Output Socket
The thermal breaker on the unit is tripped
Reset the thermal breaker
The AC Output switch is turned Off.
Press and hold the ‘ESCAPE’ button for 5
seconds to turn On the AC Output.
With unit running from AC Input Source or
shore power, the AC Input Source is
available but is outside the acceptance
range.
Check AC Input Source.
Operating range of AC Input is 95 – 139Vac.
Unit Start-up AC Voltage is higher than 99
Vac and below 132VAC.
Unit is set to Inverter Off
Check unit ‘Int’ setting.
Check Error code on display. Inverter may
be overloaded.
Reduce AC load. Inverter may be overloaded.
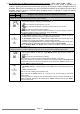
DC over-voltage, under-voltage, or other
shutdown type errors in addition to
overload.
Check battery voltage.
For 120V model, GFCI may have tripped
Reset GFCI
Charger did not
supply charging
current
Check charger setting. Charger may be
set to Off.
Set Charger function ‘CHG’ to On.
Unit had determined the battery is bad.
See also description in Error Code E01
(By-Pass Mode) and E11
Check battery and remove the DC load
connected to the battery and restart the
charger again
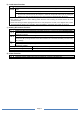
Battery is with BTS installed and it senses
the battery temperature is high (E19)
Check battery temperature or environmental
temperature. Battery charging cycle will
resume when the battery cools down to
acceptable level. See Understanding the
Error Codes for more details.
Battery is with BTS installed and it senses
the battery temperature is too low to
accept charge (E21)
Check battery temperature or environment
temperature. Battery charging cycle will
resume when the battery temperature
increase to acceptable temperature. See
Understanding the Error Codes for more
details.