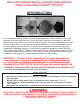
English OUTDOOR COOKERS PORTABLE PROPANE OUTDOOR COOKER WITH TIMER, TURKEY POT AND FRY PAN ASSEMBLY INSTRUCTIONS AND USE AND CARE MANUAL MODEL/SERIAL # __________ THE INSTRUCTION MANUAL CONTAINS IMPORTANT INFORMATION NECESSARY FOR THE PROPER ASSEMBLY AND SAFE USE OF THE APPLIANCE. READ AND FOLLOW ALL WARNINGS AND INSTRUCTIONS BEFORE ASSEMBLING AND USING THE APPLIANCE. FOLLOW ALL WARNINGS AND INSTRUCTIONS WHEN USING THE APPLIANCE. KEEP THIS MANUAL FOR FUTURE REFERENCE. METAL FUSION, INC. 712 St.
FOR YOUR SAFETY DANGER If you smell gas: 1. Shut off gas to the appliance. 2. Extinguish any open flame. 3. If odor continues, keep away from the appliance and immediately call your Fire Department. FAILURE TO FOLLOW THESE INSTRUCTIONS COULD RESULT IN FIRE OR EXPLOSION WHICH COULD CAUSE PROPERTY DAMAGE, PERSONAL INJURY OR DEATH. DANGER 1. Never operate this appliance unattended. 2. Never operate this appliance within 10 feet (3.05m) of any structure, combustible material or other gas cylinder.
READ AND UNDERSTAND BEFORE USING THIS PRODUCT Throughout this manual the words appliance, cooker, fryer/boiler, burner and stove will be used interchangeably to refer to the King Kooker® Outdoor Cooker. 1) 2) 3) 4) 5) 6) 7) 8) 9) 10) 11) 12) 13) This is an ATTENDED appliance. The timer located on the hose/regulator is NOT a replacement for proper monitoring. Do NOT leave this appliance unattended while the burner is lit or while heating oil, grease, water, or cooking food.
14) Introduction of water or ice from any source into the oil/grease may cause overflow and severe burns from hot oil and water splatter. When frying with oil/ grease, all food products MUST be completely thawed and towel dried before being immersed in the fryer. 15) Never drop food or accessories into hot cooking liquid. Lower food and accessories slowly into the cooking liquid in order to prevent splashing or overflow.
READ AND UNDERSTAND ALL INSTRUCTIONS BEFORE USING YOUR KING KOOKER® PRODUCT TABLE OF CONTENTS Warnings. . . . . . . . . . . . . . . . . . . . . . . . . . . . . . . . . . . . . . . . . . . . . . . . . . . . . . . . . . . . . . . . . . . . . . . . . . . . . . . . . . . . . . . . . . . . . . . . . . . . . . . . . . . . . . . . . . . . . . . 2-4 Table of Contents. . . . . . . . . . . . . . . . . . . . . . . . . . . . . . . . . . . . . . . . . . . . . . . . . . . . . . . . . . . . . . . . . . . . . . . . . . . .
METAL FUSION, INC. LIMITED ONE-YEAR WARRANTY WHAT THIS WARRANTY COVERS This warranty covers all components of this outdoor cooker to be free from defects in materials and workmanship, with the exceptions stated below. HOW LONG COVERAGE LASTS This warranty runs for one year from the date of purchase. Please keep your receipt with this manual for future reference. WHAT IS NOT COVERED This warranty does not cover the following: Incidental and Consequential Damages.
OWNER’S REGISTRATION Dear Customer, Thank you for purchasing a King Kooker®! Please take a moment to fill out your registration form and return it to us. We are always happy to hear suggestions and comments from our customers about our products. Completion of this registration allows us to contact you if the need arises. Please keep your receipt with your instruction manual. It will be necessary as a proof of purchase for us to help you if there is a problem with your cooker.
TAPE HERE FOLD ________________________ ________________________ ________________________ Place Stamp Here METAL FUSION, INC. 712 St.
READ AND UNDERSTAND ALL INSTRUCTIONS BEFORE USING YOUR KING KOOKER® PRODUCT INTRODUCTION Your new King Kooker® Outdoor Cooker is equipped with a timer located on the hose/ regulator (see above picture) and 2 pots (a turkey frying pot and a smaller fry pan with strainer basket for cooking food cut into smaller pieces). The timer is designed to shut-off the flow of gas after a pre-set time period (approximately a 15 minute operational cycle) unless manually reset by the user.
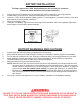
BATTERY INSTALLATION The timer requires two “AAA” alkaline batteries (not included) for operation. Follow the below instructions for proper installation. 1. 2. 3. 4. 5. Always disconnect regulator from the propane tank before installing or removing batteries. Locate battery cover on timer. Press and slide battery cover off as shown. Install two “AAA” alkaline batteries. Match positive (+) and negative (-) symbols located on the case and batteries to insure proper installation. Replace the battery cover.
SECTION I OUTDOOR COOKER ASSEMBLY THE USE AND CARE MANUAL MUST BE READ AND UNDERSTOOD BEFORE USING THE APPLIANCE Throughout this manual the words appliance, cooker, fryer/boiler, burner and stove will be used interchangeably to refer to the King Kooker® Outdoor Cooker. TOOLS REQUIRED: TORQUE WRENCH or ADJUSTABLE WRENCH, LEAK TESTING SOLUTION 1. Before assembling, check that all cooker components are included in the shipping carton. Identify these cooker parts from the assembly drawing.
HOSE ASSEMBLY INSTRUCTIONS * Model May Vary From Picture COOKING POT 1/8 MALE PIPE THREAD WITH ORIFICE TIMER ADJUSTABLE REGULATOR BURNER AIR SHUTTER VENTURI TUBE TYPE 1 CONNECTION 20 lb. LP Gas Cylinder 1. Tighten the hose fitting into the venturi with a torque wrench, up to a torque of 95 to 105 lb./in. Alternatively, hand tighten securely and then, using a wrench, tighten an additional 1-1 1/2 turns. 2. Go to the Use and Care section for further instructions.
SECTION II USE AND CARE Throughout this manual the words appliance, cooker, fryer/boiler, burner and stove will be used interchangeably to refer to the King Kooker® Outdoor Cooker. READ AND UNDERSTAND BEFORE USING THIS APPLIANCE FAILURE TO FOLLOW THESE INSTRUCTIONS AND WARNINGS COULD RESULT IN FIRE, EXPLOSION, BURN HAZARD OR CARBON MONOXIDE POISONING WHICH COULD CAUSE PROPERTY DAMAGE, PERSONAL INJURY OR DEATH. THERMOMETER INSTRUCTIONS AND SAFETY PRECAUTIONS FOR DEEP FRYING WITH OUTDOOR COOKERS 1.
DETERMINING PROPER FILL LEVELS FOR COOKING VESSELS Your cooker includes pots which have been stamped with a line or lines which indicate the level to which the oil should be filled for cooking. These lines are labelled on the pots. Fill the pot with oil to the appropriate level before lighting the cooker or adding food. Never overfill the cooking vessel with oil, grease or water. Never fill a pot beyond the maximum fill line. Always fill to at least the minimum fill line when cooking with oil.
CONNECTION INSTRUCTIONS 1. Check that your hose assembly is set to not allow gas flow. Turn the regulator control counterclockwise until it stops. This is the OFF position. 2. Attach the regulator to the cylinder valve by turning the Type 1 fitting clockwise. Hand tighten with the regulator positioned upright. Refer to the appropriate assembly diagram for the appliance, page 12, 3.
LIGHTING AND OPERATING INSTRUCTIONS THE COOKER MUST NOT BE LIT UNTIL THE PRECEDING PLACEMENT INSTRUCTIONS HAVE BEEN COMPLETELY FOLLOWED. (ILLUSTRATIONS PAGE 17) 1. Check the casting to make sure it is set up as per the illustration (Figure 1). 2. Make certain that the regulator control is turned to OFF by turning it counterclockwise until it reaches the stop. 3. Open cylinder control valve by turning it counterclockwise as per the diagram (Figure 2). 4.
LIGHTING AND OPERATING INSTRUCTIONS (continued) Timer FIGURE 1 ADJUSTABLE REGULATOR Turn Cylinder Handle Turn Regulator Control toward ON toward ON Next (Counterclockwise) (Clockwise) * Model may vary from picture. 20LB. LP GAS CYLINDER AIR SHUTTER FIGURE 2 FIGURE 5 FIGURE 3 FIGURE 4 NEVER PUT HANDS OR FACE DIRECTLY OVER BURNER WHILE LIGHTING OR WHILE THE APPLIANCE IS LIT.
TURNING OFF AND STORING THE COOKER AFTER USE NEVER MOVE THE COOKER OR POT WHILE IN USE OR STILL HOT [ABOVE 100°F (38°C)]. 1. 2. 3. After each use turn OFF the King Kooker® at the regulator first, then at the gas cylinder valve. Check to make sure there is no flame and all valves are off. Do not leave the cooker until it has cooled completely. When removing food from the cooker wear protective mitts.
7. Cleaning of the appliance: Cooker Frame, LP Hose/Regulator and Timer: If necessary, remove any oil or liquid which has spilled onto the unit during cooking with mild soapy water on a rag and towel dry. Do not let water enter or collect in housing of timer. Do not immerse the burner unit or hose/regulator as this will cause rust and damage components of the timer. Aluminum or Stainless Steel Pots: Clean after each use according to the directions below.
SECTION III COOKING SPECIALTIES The following warnings and directions apply particularly to cooking with oil and deep frying. Read ALL of the warnings and directions in the manual before using your cooker. DEEP FRYING COOKING WITH OIL IS NOT SIMILAR TO ANY OTHER COOKING METHOD. Cooking oil is very combustible at high temperatures, and special precautions must be taken to avoid a dangerous grease fire. 1.
INSTRUCTIONS FOR USING YOUR FRY PAN FOR DEEP FRYING READ AND UNDERSTAND ALL INSTRUCTIONS BEFORE USING YOUR KING KOOKER® PRODUCT 1. The fry pan supplied with your unit includes a fill line on the side of the pot. This indicates the exact level to which the oil should be filled before it is heated and food is added. ALWAYS fill to this fill line when cooking with oil. Never overfill or underfill the cooking vessel. 2. Pour the necessary amount of cooking oil into the pot. 3.
INSTRUCTIONS FOR USING YOUR TURKEY POT FOR DEEP FRIED TURKEY ONLY PROCEED TO PREPARE YOUR TURKEY FOR FRYING IF YOU HAVE READ ALL THE INSTRUCTIONS IN THIS MANUAL 1. 2. 3. Check pg. 14, “Determining Proper Fill Levels for Cooking Vessels,” to determine the amount of oil and size of turkey recommended for your turkey cooker model.
INJECTING TECHNIQUES FOR TURKEY, CHICKEN AND ROAST IMPORTANT: BEFORE INJECTING, POUR MARINADE INTO A SEPARATE CONTAINER TO KEEP FROM CONTAMINATING MARINADE. CHICKEN BAKED BREAST 1. Remove giblets and rinse chicken with warm water, drain cavity LEG completely. 2. Fill Injector with desired amount of marinade. 3. Inject FULL amounts of marinade (approximately 1 oz.) at the indicated points, (breast, thigh, leg). Inject marinade slowly while pulling needle out of meat.
OPERATION OF SPIGOT POT Some models of turkey pots include a spigot for draining the cooking liquid. If your model includes a spigot, read and understand this section along with the entire Use and Care manual before using this product. ALWAYS ALLOW COOKING LIQUID TO COOL BEFORE OPERATING VALVE (BELOW 100°F (38°C)). COOKING LIQUID CAN REMAIN DANGEROUSLY HOT HOURS AFTER USE. ALWAYS USE A THERMOMETER TO CHECK TEMPERATURE OF THE COOKING LIQUID BEFORE OPERATING THE SPIGOT.
USE OF KING KOOKER® DRAIN RACK MODEL # KK168 (SOLD SEPARATELY) READ AND UNDERSTAND ALL WARNINGS AND INSTRUCTIONS BEFORE USING THIS PRODUCT! Directions: 1. Use the drain rack for draining a fried turkey on a stand which has a round disk type base as pictured below (not a wire formed base) or for draining food cooked within a strainer basket. 2. Always turn OFF the outdoor cooker before removing the turkey from the pot or before raising the strainer basket from the pot. Use mitts for protection.
SECTION IV RECIPES from The King of Outdoor Cooking® Boiled Seafood The King Kooker® Way! For a 22 to 32 quart pot, fill 1/2 full of water. Add 2 to 4, 16 ounce King Kooker® Complete Crab, Shrimp, Crawfish Boil (complete, nothing to add). Bring water to a rolling boil. Add seafood. Gently stir. Cover the pot and return to boil. Boiling times: Shrimp - 2 minutes; Crawfish - 5 minutes; Crabs - 5 minutes. Cut off the fire. Gently stir the seafood again and let it soak.
King Kooker® Jambalaya Ingredients: 2 cans chicken broth, Tabasco, minced garlic, 4 oz. Kitchen Bouquet, 2 cans sliced mushrooms, 2 onions finely cut, 2 bell peppers finely cut, 2 lbs. smoked sausage, 1 lb. hot sausage or andouille, 8 small bags King Kooker® (8 oz.) jambalaya mix, 1 lb. bacon, water. Fry off 1 lb. bacon (cubed) in small amount of cooking oil, then remove. Brown all meat, then remove. Place onions and bell peppers into pot and cook until soft. Put all meat back in except bacon.
Deep Fried Turkey Breast Prepare the turkey and oil as per the directions for Deep Fried Turkey on page 22 . Deep fry the Turkey Breast for 5 minutes per pound at 350°F (177°C) . When the calculated time for cooking has past, turn off the flame, remove the Turkey Breast from the oil and check for doneness by slicing through the breast. Southern Fried Chicken Ingredients: Chicken, oil, milk, eggs, King Kooker® Seasoned Fish Fry. Cut, wash and drain chicken pieces.
Deep Fried Boston Butt Ingredients: 5 lb. Boston Butt Roast, thawed, rinsed and dried, King Kooker® Marinade of Choice, King Kooker® Cajun Seasoning, cooking oil. Inject the thawed roast with the marinade of choice. Refer to the injecting directions, page 23, for information about injecting. Sprinkle King Kooker® Cajun Seasoning on the outside of the roast as desired. Heat the cooking oil to 350°F (177°C) and immerse the roast in the oil. Allow the roast to cook for approximately 8 1/2 minutes per pound.
SECTION V READ AND UNDERSTAND ALL INSTRUCTIONS BEFORE USING YOUR KING KOOKER® PRODUCT FREQUENTLY ASKED QUESTIONS AND ANSWERS 1. What is the problem if the cooker takes too long or will not heat oil or cooking ingredients to desired temperature? My cooker’s flame appearance is very weak. Answer: If the hose assembly has a Type 1 Connection (black/green knob), it is equipped with a flow limiting device.
NOTES 31
Outdoor Cooker Safety Precautions FAILURE TO FOLLOW THESE INSTRUCTIONS AND WARNINGS COULD RESULT IN FIRE, EXPLOSION, BURN HAZARD OR CARBON MONOXIDE POISONING WHICH COULD CAUSE PROPERTY DAMAGE, PERSONAL INJURY OR DEATH. Read and understand the entire Assembly Instructions and Use and Care Manual before using this product. If you lose your manual and need a replacement, or have questions, please contact us at 1-800-783-3885 between the hours of 7:30 A.M. and 3:30 P.M. CST Monday-Friday, or go to www.