
Owner's Manual
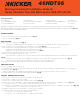


FINAL ASSEMBLY
NOTE: If a Kicker 46HDS962 or 46HDR982 kit has been installed on this bike, go to step 21 and 22. If a Kicker kit has not been installed
please see 22a.
21. Under the seat, install a piece of heat shrink over the blue wire terminal and plug the male blue end into the female blue end from the front
amplifi er harness.
22. Activate the heat shrink over that connection to reduce the risk of a short. (Fig. 13 & 14)
a. If the front KICKER harness is not installed, the blue wire needs to be connected to a switched +12V source.
23. Connect power leads to the battery, install fuse and check system operation.
NOTE: KICKER recommends that the dip switches be set up as follows:
Auto turn-on - 12V Input level - HI HI-PASS – 80 Hz Input Gain control – 0
24. Ensure that none of the wires are stressed or pinched during installation.
25. Reinstall seat and enjoy your KICKER audio system!
For questions, please contact KICKER Technical Support at 800-256-0808, M-F 8:00 am – 5:00 pm CST or email at support@kicker.com.
For installation videos please go to our Kicker YouTube channel.
KICKER cannot be held responsible for any damage to painted surfaces during removal or addition of KICKER parts.
46HDT96-B-20200228
1
2
3 4
5 6 7 8
9
10 11 12
13 14