
User guide

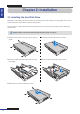
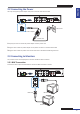
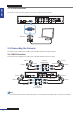
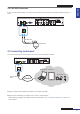
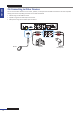
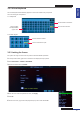
Table Of Contents
- About this Manual
- Chapter 1: Product Overview
- Chapter 2: Installation
- Chapter 3: Getting Started
- Chapter 4: Using the DVR
- Chapter 5: KGuard Web Client
- 5.1 Login
- 5.2 The Interface
- 5.3 Live Viewing
- 5.4 Searching and Playing Recorded Videos
- 5.5 Remote Settings
- 5.6 Local Settings
- Chapter 6: Using KView Series Software
- Chapter 7: Troubleshooting & FAQ
- Appendix: Specifications
ENGLISH
Chapter 2: Installaon
DVR User’s Manual
15
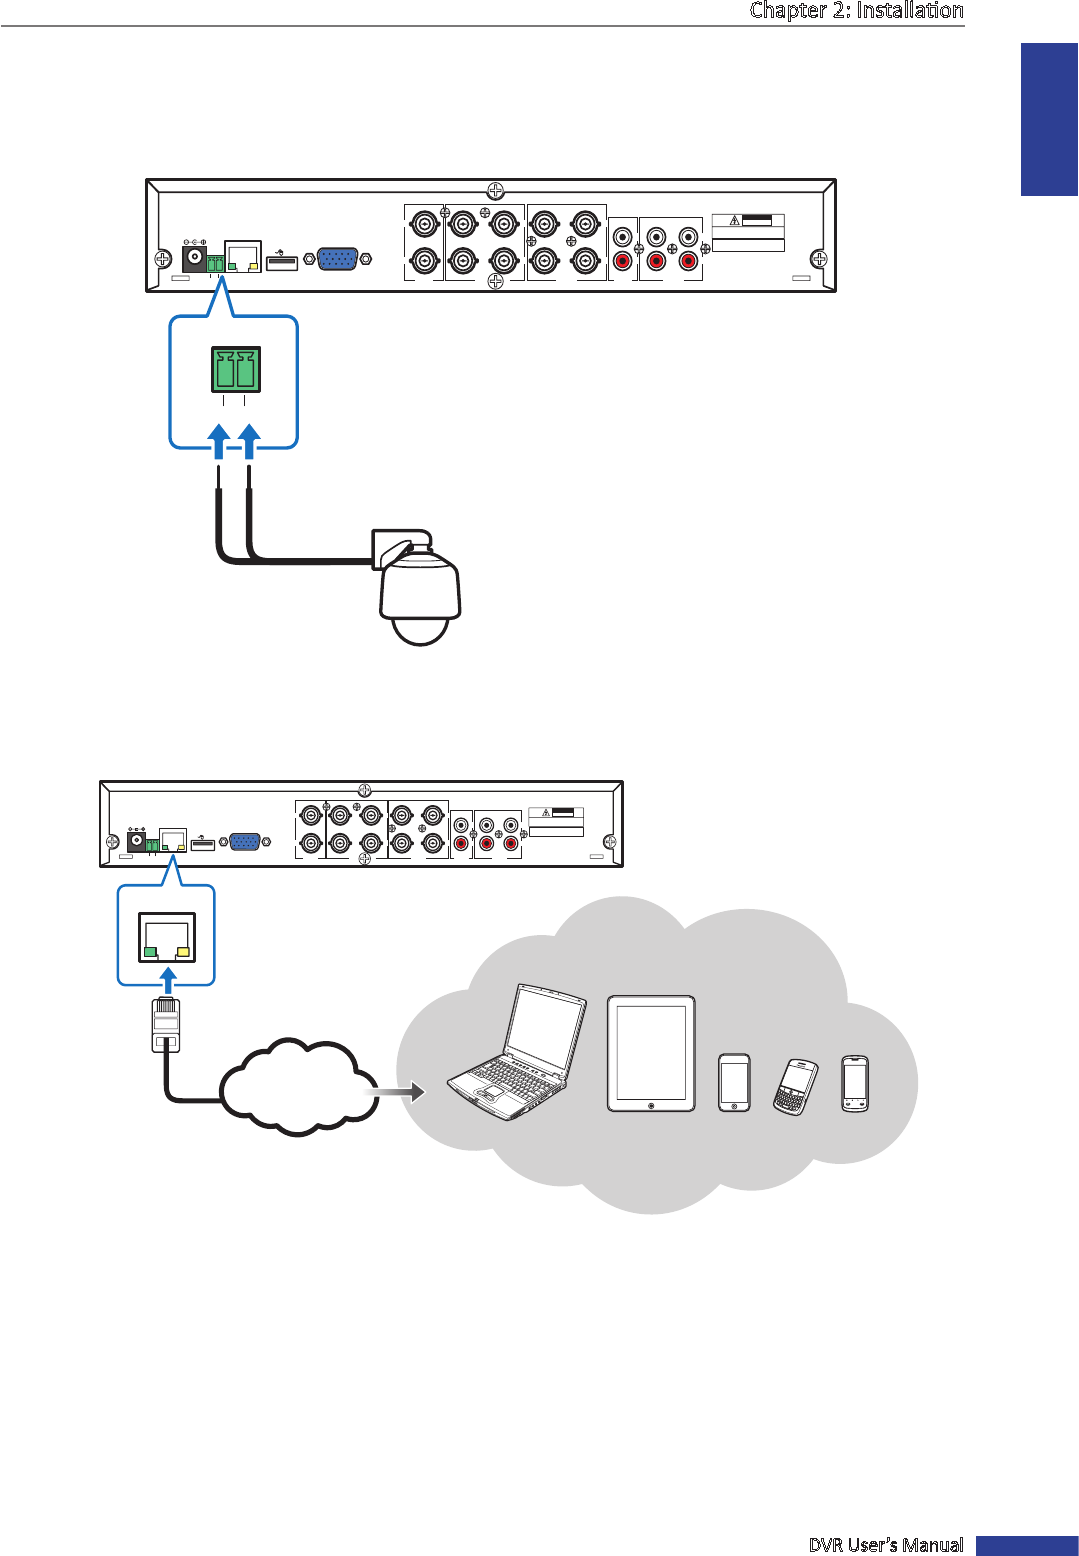
2.4.2 RS-485 Connecon
If you are using a PTZ speed dome, connect the camera cable to the video input of the DVR via RS-485 connector as
shown.
TX+ TX-
1
2
3
4
1
2
VIDEO
INPUT
VIDEO
OUTPUT
7
8
5
6
VIDEO
INPUT
2
1
2
1
4
3
AUDIO
INPUT
AUDIO
OUTPUT
VGA
DC 12V
LAN
CAUTION
RISK OF ELECTRIC SHOCK
DO NOT OPEN
CAUTION: TO REDUCE THE RISK OF ELECTRICAL SHOCK.
DO NOT OPEN COVERS. NO USER
SERVICEABLE PARTS INSIDE. REFER
SERVICING TO QUALIFIED SERVICE
WARNING: TO PREVENT FIRE OR SHOCK HAZARD. DO NOT
EXPOSE UNITS NOT SPECIFICALLY DESIGNED
FOR OUTDOOR USE TO RAIN OR MOISTURE.
TX+ TX-
2.5 Connecng to Network
For remote monitoring, connect the DVR to the internet via wired network connecon.
TX+ TX-
1
2
3
4
1
2
VIDEO
INPUT
VIDEO
OUTPUT
7
8
5
6
VIDEO
INPUT
2
1
2
1
4
3
AUDIO
INPUT
AUDIO
OUTPUT
VGA
DC 12V
LAN
CAUTION
RISK OF ELECTRIC SHOCK
DO NOT OPEN
CAUTION: TO REDUCE THE RISK OF ELECTRICAL SHOCK.
DO NOT OPEN COVERS. NO USER
SERVICEABLE PARTS INSIDE. REFER
SERVICING TO QUALIFIED SERVICE
WARNING: TO PREVENT FIRE OR SHOCK HAZARD. DO NOT
EXPOSE UNITS NOT SPECIFICALLY DESIGNED
FOR OUTDOOR USE TO RAIN OR MOISTURE.
LAN
Internet
1 Plug one end of the RJ-45 cable to the LAN port on the back of the DVR.
2 Plug the other end directly into a LAN port on a router or network switch.
Aer connecng, congure your DVR for network communicaon. See “4.2 Seng the Network” on page 31 for
further details.
Speed dome
RS-485 cable
Ethernet RJ-45
cable
Notebook/PC
Tablet PC
Mobile Phones