
User guide

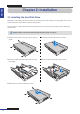
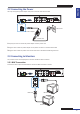
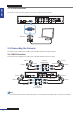
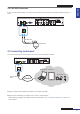
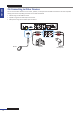
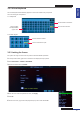
Table Of Contents
- About this Manual
- Chapter 1: Product Overview
- Chapter 2: Installation
- Chapter 3: Getting Started
- Chapter 4: Using the DVR
- Chapter 5: KGuard Web Client
- 5.1 Login
- 5.2 The Interface
- 5.3 Live Viewing
- 5.4 Searching and Playing Recorded Videos
- 5.5 Remote Settings
- 5.6 Local Settings
- Chapter 6: Using KView Series Software
- Chapter 7: Troubleshooting & FAQ
- Appendix: Specifications
ENGLISH
Chapter 2: Installaon
14
DVR User’s Manual
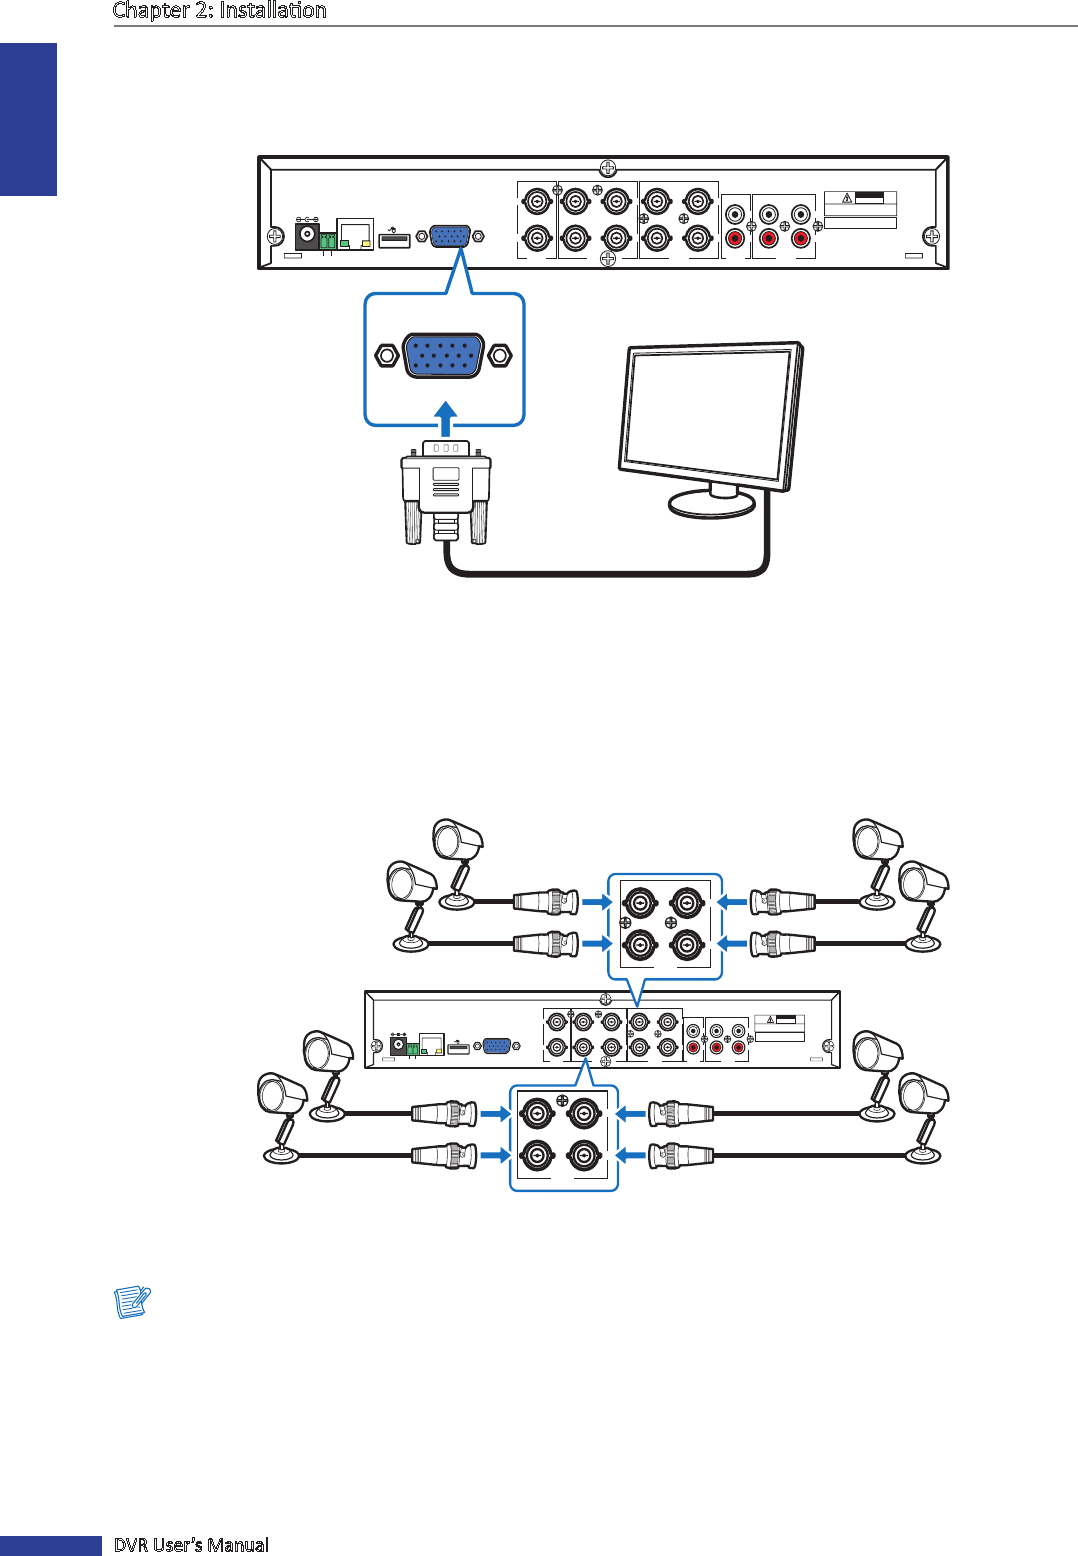
2.3.2 VGA Connecon
Connect the video output of the DVR to the monitor via VGA connector as shown.
TX+ TX-
1
2
3
4
1
2
VIDEO
INPUT
VIDEO
OUTPUT
7
8
5
6
VIDEO
INPUT
2
1
2
1
4
3
AUDIO
INPUT
AUDIO
OUTPUT
VGA
DC 12V
LAN
CAUTION
RISK OF ELECTRIC SHOCK
DO NOT OPEN
CAUTION: TO REDUCE THE RISK OF ELECTRICAL SHOCK.
DO NOT OPEN COVERS. NO USER
SERVICEABLE PARTS INSIDE. REFER
SERVICING TO QUALIFIED SERVICE
WARNING: TO PREVENT FIRE OR SHOCK HAZARD. DO NOT
EXPOSE UNITS NOT SPECIFICALLY DESIGNED
FOR OUTDOOR USE TO RAIN OR MOISTURE.
VGA
2.4 Connecng the Cameras
Connect the camera cable(s) to the video input of the DVR via BNC or RS-485 connecon.
2.4.1 BNC Connecon
Connect the camera cable(s) to the video input of the DVR via BNC connector as shown.
TX+ TX-
1
2
3
4
1
2
VIDEO
INPUT
VIDEO
OUTPUT
7
8
5
6
VIDEO
INPUT
2
1
2
1
4
3
AUDIO
INPUT
AUDIO
OUTPUT
VGA
DC 12V
LAN
CAUTION
RISK OF ELECTRIC SHOCK
DO NOT OPEN
CAUTION: TO REDUCE THE RISK OF ELECTRICAL SHOCK.
DO NOT OPEN COVERS. NO USER
SERVICEABLE PARTS INSIDE. REFER
SERVICING TO QUALIFIED SERVICE
WARNING: TO PREVENT FIRE OR SHOCK HAZARD. DO NOT
EXPOSE UNITS NOT SPECIFICALLY DESIGNED
FOR OUTDOOR USE TO RAIN OR MOISTURE.
3
4
1
2
VIDEO
INPUT
7
8
5
6
VIDEO
INPUT
Note:
• The above illustraon shows an 8-channel DVR. For a 4-channel DVR, only Video input 1-4 channels are available.
Monitor
VGA cable
Camera
BNC cable
Camera
BNC cable
Camera
BNC cable
Camera
BNC cable
Video IN
(1~4 channels)
Camera
BNC cable
Camera
BNC cable
Camera
BNC cable
Camera
BNC cable
Video IN
(5~8 channels)