
User manual

Calibration Procedures 1
Using the Front Panel for Adjustments
U1271A/U1272A Service Guide 29
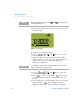
error number appears in the secondary display. The
primary display remains at the current calibration item.
10 Turn the rotary switch to the next function according to
the Test Function column shown in Table 1- 3. Repeat
step 3 to step 8 for each adjustment point shown in the
adjustment table.
11 Verify the adjustments using the “Performance Verification
Tests” on page 10.
Exiting the adjustment mode
1 Remove all the shorting plugs and connectors from the
instrument.
2 Record the new Calibration Count.
3 Press and simultaneously to exit the
Adjustment Mode.
4 Power off and on again. The instrument will then be
secured.
NOTE
If the adjustment fails, check the input value, range, function, and entered
adjustment value before repeating the adjustment steps.
S
h
i
f
t
V
i
e
w
E
s
c
A
u
t
o
T
r
i
g
H
o
l
d