
Installation guide

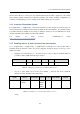

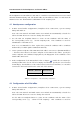
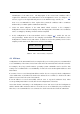


Table Of Contents
- Introduction
- Headquarters configuration
- Selection of IP addresses for LAN
- Configuration of network interfaces of the Internet gateway
- Kerio Control installation
- Kerio Control Administration interface and product activation
- Setting connection and basic traffic rules
- DHCP Server Configuration
- DNS configuration
- Web interface and SSL-VPN certificates
- Mapping of user accounts and groups from the Active Directory
- Address Groups and Time Ranges
- Web Rules Definition
- FTP Policy Configuration
- Antivirus Scanning Configuration
- Intrusion Prevention System
- Enabling access to local services from the Internet
- Secured access of remote clients to LAN
- LAN Hosts Configuration
- Viewing statistics of Internet usage and user browsing behavior
- Configuration of the LAN in a filial office
- Interconnection of the headquarters and branch offices
- Used open source items
- Legal Notices

Interconnection of the headquarters and branch offices
22
The headquarters uses IP addresses 192.168.1.x with the network mask 255.255.255.0 and
with DNS domain company.com. The branch office uses IP addresses 10.1.1.x with network
mask 255.255.255.0 and with the subdomain filial.company.com.
4.1 Headquarters configuration
1. In Kerio Control under Configuration / Interfaces select a VPN server, open its settings
dialog and enable it.
Note: The VPN network and Mask entries now include an automatically selected free
subnet for VPN. There is no reason to change the network.
2. Use the Edit SSL certificate button to create an SSL certificate with the name of
the corresponding server (e.g. server.company.com). This certificate is used for
identification of the VPN server.
Note: It is recommended to later replace this generated certificate with a certificate
authorized by a reliable public certification authority.
3. Create a passive endpoint of the VPN tunnel (the office’s server uses a dynamic IP address
— therefore there must be the active endpoint of the tunnel at the office). Specify the
remote endpoint SSL certificate’s fingerprint by the fingerprint of the certificate of the
branch office VPN server.
4. In the configuration of the DNS module (refer to chapter 2.7), enable the Use custom for-
warding. Define rules for the filial.company.com domain. Specify the server for DNS
forwarding by the IP address of the remote Kerio Control host’s interface (i.e. interface
connected to the local network at the other end of the tunnel).
Domain / Network DNS server(s)
filial.company.com 10.1.1.1
Table 4.1 Headquarters — DNS forwarding configuration
4.2 Configuration of a filial office
1. In Kerio Control under Configuration / Interfaces select a VPN server, open its settings
dialog and enable it.
Note: The VPN network and Mask entries now include an automatically selected free
subnet for VPN. There is no reason to change the network.
Use the Edit SSL certificate button to create an SSL certificate with the name of the
corresponding server (e.g. server.filial.company). This certificate is used for