
Instruction Manual

38
-> Operatn: AUTO
Brghtns: 40
On: 07:00
Off: 21:00
Back
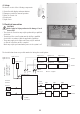
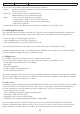
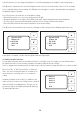
Navigate to a “C I R C T 1” to “C I R C T 4” display, to configure the circuit in question. When you press <- to confirm,
youwill come to the configuration screen for the selected circuit:
Select the operating mode with <- to change the value. The -> symbol changes to *. You can now set the desired control
mode for this light circuit using the ^ and v keys. Press <- again to confirm the change of value. The -> symbol reappears.
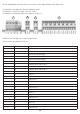
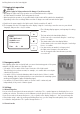
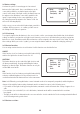
9.3 Sensor map
To ensure the light control processes the sensor readings
correctly, you must define which sensor influences which
light circuit. To do this, from the main menu navigate to the
“Settings” submenu, then to “Sensor map”.
The screen will look like this:
You can connect up to four sensors to the light control.
Determine which sensor is to be used to control which
circuit.
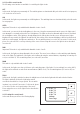
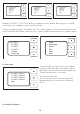
9.4 Setting the brightness
* Operatn: AUTO
Brghtns: 40
On: 07:00
Off: 21:00
Back
-> Operatn: DIM
Brghtns: 40
On: 07:00
Off: 21:00
Back
-> C I R C T 1: Sensor1
C I R C T 1: Sensor1
C I R C T 1: Sensor1
C I R C T 1: Sensor1
Back
Setup
-> Sensor map
Button
Time
Lang.
Back
-> C I R C T 1
C I R C T 2
C I R C T 3
C I R C T 4
Settings
Sensor stgs