Edge 28B INSTRUCTIONS FOR USE KENT model: 908 4703 010 INSTRUCTIONS D’UTILISATION Modèle KENT: 908 4703 010 INSTRUCCIONES DE USO Modelo KENT: 908 4703 010 INSTRUÇÕES DE USO Modelo KENT: 908 4703 010 ENGLISH FRANÇAIS ESPAÑOL PORTUGUÊS 146 3082 000(2)2007-06
INSTRUCTIONS FOR USE ENGLISH TABLE OF CONTENTS INTRODUCTION ......................................................................................................................................................... 2 MANUAL PURPOSE AND CONTENTS ................................................................................................................. 2 TARGET ...............................................................................................................................................
ENGLISH INSTRUCTIONS FOR USE INTRODUCTION NOTE The numbers in brackets refer to the components shown in Machine Description chapter. MANUAL PURPOSE AND CONTENTS The purpose of this Manual is to provide the operator with all necessary information to use the machine properly, in a safe and autonomous way. It contains information about technical data, safety, operation, storage, maintenance, spare parts and disposal.
INSTRUCTIONS FOR USE ENGLISH OTHER REFERENCE MANUALS – – Spare Parts List (supplied with the machine) Service Manual (that can be consulted at Kent Service Centers) SPARE PARTS AND MAINTENANCE All necessary operating, maintenance and repair procedures must be carried out by qualified personnel or by Kent Service Centers. Only original spare parts and accessories must be used. Contact Kent for service or to order spare parts and accessories, specifying the machine model and serial number.
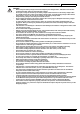
ENGLISH INSTRUCTIONS FOR USE SAFETY The following symbols indicate potentially dangerous situations. Always read this information carefully and take all necessary precautions to safeguard people and property. The operator's cooperation is essential in order to prevent injury. No accident prevention program is effective without the total cooperation of the person responsible for the machine operation.
INSTRUCTIONS FOR USE ENGLISH WARNING! Before using the battery charger, ensure that frequency and voltage values, indicated on the machine – serial number plate, match the electrical mains voltage. – Do not pull or carry the machine by the battery charger cable and never use the battery charger cable as a handle. Do not close a door on the battery charger cable, or pull the battery charger cable around sharp edges or corners. Do not run the machine on the battery charger cable.
INSTRUCTIONS FOR USE ENGLISH MACHINE DESCRIPTION MACHINE STRUCTURE AND CONTROLS 1. 2. 3. 4. 5. 6. 7. 8. 9. 10. 11. 12. 13. 14. 15. 16. 17. 18. 19. 20. 21. 22. 23. 24. 25. 26. 27. 28. 29.
INSTRUCTIONS FOR USE ENGLISH MACHINE STRUCTURE AND CONTROLS - DESCRIPTION Main switch for vacuum system, main broom and side broom activation (1) – When turned to “0” the machine is off; when turned to “I” the vacuum system and main broom are turned on; when turned to “II”, the vacuum system, main broom and side broom are turned on. Green warning light (2) – When it is on and the machine is running, it indicates that the batteries are charged.
ENGLISH INSTRUCTIONS FOR USE ACCESSORIES/OPTIONS In addition to the standard components, the machine can be equipped with the following accessories/options, according to the machine specific use. NOTE For further information concerning the optional accessories, contact an authorised Dealer. TECHNICAL DATA General Values Cleaning width (without side broom) 19.7 in (500 mm) Cleaning width (with side broom) 28.
INSTRUCTIONS FOR USE ENGLISH WIRING DIAGRAM BAT: CH1: EB1: ES1: F1: F2: F3: M1: M2: M3: SW1: SW2: Batteries Battery charger Electronic board LED Relay Main fuse Vacuum fan fuse Side broom fuse Main motor Vacuum system motor Side broom motor Main switch Hopper microswitch Colour code BK: Black BU: Blue BN: Brown GN: Green GY: Grey OG: Orange PK: Pink RD: Red VT: Violet WH: White YE: Yellow F1 RD R ES1 GY OG EB1 RD SW1a R SW2 1 II I F2 F3 OG WH BU VT GY BN SW1b II I BAT + RD J1.
ENGLISH INSTRUCTIONS FOR USE USE WARNING! On some points of the machine there are some adhesive plates indicating: – DANGER – WARNING – CAUTION – NOTE While reading this Manual, the operator must pay particular attention to the symbols shown on the plates. Do not cover these plates for any reason and immediately replace them if they are damaged. BATTERY CHECK ON A NEW MACHINE The machine is supplied with a standard 12 V, 45 Ah GEL battery (which does not require maintenance). BEFORE MACHINE START-UP 1.
INSTRUCTIONS FOR USE ENGLISH MACHINE OPERATION 1. 2. Avoid stopping for a long time with the machine in the same position and the brooms rotating: this could create unwanted marks on the floor. For machine proper operation, the dust filter must be as clean as possible. Therefore the filter shaker must be used at regular intervals (every 10 minutes, but this interval may vary according to the floor conditions), according to the following procedure. • Stop the machine and turn the main switch (1) to "0".
ENGLISH INSTRUCTIONS FOR USE MAINTENANCE The lifespan of the machine and its maximum operating safety are ensured by correct and regular maintenance. The following table provides the scheduled maintenance. The intervals shown may vary according to particular working conditions, which are to be defined by the person in charge of the maintenance. WARNING! To carry out maintenance procedures, the machine must be off and, if necessary, the batteries must be disconnected.
INSTRUCTIONS FOR USE ENGLISH SIDE BROOM HEIGHT CHECK AND ADJUSTMENT 1. 2. 3. 4. Check that the side broom is at the correct height from the ground, according to the following procedure: • Drive the machine on a level ground and lower the side broom. • Keep the machine stationary and turn on the side broom for a few seconds. • Turn off the side broom by pressing the switch (1), then lift it and move the machine.
ENGLISH INSTRUCTIONS FOR USE MAIN BROOM HEIGHT CHECK AND ADJUSTMENT 1. 2. 3. 4. 5. 6. Check that the main broom is at the correct height from the ground, according to the following procedure: • Drive the machine on a level ground. • Keep the machine stationary and turn on the main broom for a few seconds. • Turn off the main broom by pressing the switch (1), then move the machine. • Check that the main broom print (A, Fig. 3), along its length, is 1.2-2 in (3-5 cm) wide.
INSTRUCTIONS FOR USE ENGLISH MAIN BROOM DISASSEMBLY/ASSEMBLY CAUTION! It is advisable to use protective gloves when replacing the main broom because there can be sharp debris between the bristles. 1. 2. 3. 4. 5. 6. 7. 8. Drive the machine on a level ground. Turn the main switch (1) to “0”. Remove the hopper (9). Loosen the handwheels (A, Fig. 5) completely on the left side of the machine. Remove the lid (A, Fig. 6) by grasping it on the points (B). Grasp the main broom (A, Fig.
ENGLISH INSTRUCTIONS FOR USE DUST FILTER CLEANING AND INTEGRITY CHECK, HOPPER GASKET CHECK Drive the machine on a level ground. Turn the main switch (1) to “0”. Remove the hopper (9). Loosen the knobs (A, Fig. 8). Grasp the dust filter (B) as shown in the figure. Remove the dust filter by turning it in the direction shown by the arrow (A, Fig. 9) to disengage it from the pins (B), then lower the filter to disengage it from the filter shaker combs (C). 7. Remove the filter (A, Fig.
INSTRUCTIONS FOR USE ENGLISH SKIRT HEIGHT AND OPERATION CHECK 1. 2. 3. 4. Drive the machine on a level ground that is suitable for checking the skirt height. Turn the main switch (1) to “0”. Check that the height from the ground of the side skirts (A and B, Fig. 11) is within 0 and 0.08 in (0 and 2 mm). Check the skirts for integrity, cuts or tears, which can reduce the machine vacuum capabilities. If necessary replace the side skirts (see the procedure in the Service Manual).
ENGLISH INSTRUCTIONS FOR USE TROUBLESHOOTING Trouble Possible cause Remedy The machine does not start when turning the main switch to “I” or to "II". There is an open in a breaker (21). Reset the breaker by pressing the relevant button. The battery charger cable is connected to the electrical mains. Disconnect it and place it in the housing. The batteries are discharged. Charge the batteries. The side broom does not operate. There is an open in a breaker (20).
INSTRUCTIONS D'UTILISATION FRANÇAIS TABLE DES MATIERES INTRODUCTION ......................................................................................................................................................... 2 BUT ET CONTENU DU MANUEL .......................................................................................................................... 2 DESTINATAIRES ..........................................................................................................................
FRANÇAIS INSTRUCTIONS D'UTILISATION INTRODUCTION REMARQUE Les nombres entre parenthèses se réfèrent aux composants indiqués au chapitre Description de la machine. BUT ET CONTENU DU MANUEL Ce manuel se propose de fournir à l'opérateur toutes les informations nécessaires afin qu’il puisse utiliser la machine correctement et la gérer de la manière la plus autonome et sûre.
INSTRUCTIONS D'UTILISATION FRANÇAIS AUTRES MANUELS DE REFERENCE – – Catalogue de pièces de rechange (livré avec la machine) Manuel d’entretien (consultable auprès des Services après-vente Kent) PIECES DE RECHANGE ET ENTRETIEN Pour toute nécessité concernant l'emploi, l'entretien et la réparation, s’adresser au personnel qualifié ou directement aux Services après-vente Kent. N'utiliser que des pièces de rechange et accessoires d'origine.
FRANÇAIS INSTRUCTIONS D'UTILISATION SECURITE Kent utilise la symbolique suivante pour signaler les conditions de danger potentielles. Lire attentivement ces informations et prendre les précautions nécessaires pour protéger les personnes et les choses. Pour éviter tout accident la collaboration de l'opérateur est essentielle. Aucun programme de prévention des accidents du travail ne peut résulter efficace sans la totale collaboration de la personne directement responsable du fonctionnement de la machine.
INSTRUCTIONS D'UTILISATION FRANÇAIS ATTENTION ! – Avant d'utiliser le chargeur de batterie, s'assurer que la fréquence et la tension indiquées sur la plaque avec numéro de série de la machine coïncident avec la tension du réseau. – Ne pas utiliser le câble du chargeur de batterie pour tirer ou transporter la machine et ne pas utiliser le câble comme poignée. Ne pas fermer de porte sur le câble du chargeur de batterie, ne pas tirer le câble sur des surfaces ou coins tranchants.
INSTRUCTIONS D'UTILISATION FRANÇAIS DESCRIPTION DE LA MACHINE STRUCTURE ET COMMANDES DE LA MACHINE 1. 2. 3. 4. 5. 6. 7. 8. 9. 10. 11. 12. 13. 14. 15. 16. 17. 18. 19. 20. 21. 22. 23. 24. 25. 26. 27. 28. 29.
INSTRUCTIONS D'UTILISATION FRANÇAIS STRUCTURE ET COMMANDES DE LA MACHINE - DESCRIPTION Interrupteur général d'activation système d'aspiration, balai central et balai latéral (1) - En position “0” (position centrale), la machine est arrêtée ; en position “I”, le système d'aspiration et le balai central sont activés ; en position “II”, le système d'aspiration, le balai central et le balai latéral sont activés.
FRANÇAIS INSTRUCTIONS D'UTILISATION ACCESSOIRES / OPTIONS Outre les composants présents dans le modèle standard, la machine peut être équipée des accessoires optionnels suivants, selon l'emploi spécifique de la machine. REMARQUE Pour de plus amples informations relatives aux accessoires optionnels susmentionnés, s'adresser au revendeur agréé.
INSTRUCTIONS D'UTILISATION FRANÇAIS SCHEMA ELECTRIQUE BAT : CH1 : EB1 : ES1 : F1 : F2 : F3 : M1 : M2 : M3 : SW1 : SW2 : Batteries Chargeur de batterie Carte LED Relais Fusible principal Fusible ventilateur d'aspiration Fusible balai latéral Moteur principal Moteur système d'aspiration Moteur balai latéral Interrupteur général Microinterrupteur conteneur déchets F1 Codes des couleurs BK : Noir BU : Bleu BN : Marron GN : Vert GY : Gris OG : Orange PK : Rose RD : Rouge VT : Violet WH : Blanc YE : Jaune R
FRANÇAIS INSTRUCTIONS D'UTILISATION UTILISATION ATTENTION ! Des plaques adhésives appliquées sur certains points de la machine indiquent : – DANGER – ATTENTION – AVERTISSEMENT – REMARQUE Lors de la lecture de ce manuel, l'opérateur doit bien comprendre le sens des symboles illustrés sur les plaques. Ne pas couvrir les plaques et les remplacer immédiatement en cas d'endommagement.
INSTRUCTIONS D'UTILISATION FRANÇAIS MACHINE AU TRAVAIL 1. 2. Ne pas s'arrêter pendant longtemps dans la même position avec les balais qui tournent : des traces non désirées pourraient rester sur le sol. Pour un bon travail de balayage il faut que le filtre à poussière soit le plus propre possible. Par conséquent, il faut activer le secoueur à intervalles réguliers (toutes les 10 minutes pendant le travail, ou selon la quantité de poussière du sol), en procédant comme suit.
FRANÇAIS INSTRUCTIONS D'UTILISATION ENTRETIEN La durée de vie de la machine et sa sécurité de fonctionnement sont garanties par un entretien soigné et régulier. Veuillez trouver ci-dessous le plan récapitulatif d'entretien programmé. Les périodicités indiquées peuvent subir des variations en fonction de conditions de travail particulières, à définir par le responsable de l'entretien.
INSTRUCTIONS D'UTILISATION FRANÇAIS CONTROLE ET REGLAGE DE LA HAUTEUR DU BALAI LATERAL 1. 2. 3. 4. Contrôler la hauteur du sol du balai latéral, en procédant comme suit : • Porter la machine sur un sol plat et baisser le balai latéral. • Tout en gardant la machine en position d’arrêt, tourner le balai latéral pendant quelques secondes. • Arrêter le balai latéral en appuyant sur l'interrupteur (1), puis le soulever et déplacer la machine.
FRANÇAIS INSTRUCTIONS D'UTILISATION CONTROLE ET REGLAGE DE LA HAUTEUR DU BALAI CENTRAL 1. 2. 3. 4. 5. 6. Contrôler la hauteur du sol du balai central, en procédant comme suit : • Porter la machine sur un sol plat. • Tout en gardant la machine en position d’arrêt, tourner le balai central pendant quelques secondes. • Arrêter le balai central en appuyant sur l'interrupteur (1), puis déplacer la machine. • Contrôler que la largeur de la trace (A, Fig.
INSTRUCTIONS D'UTILISATION FRANÇAIS DEPOSE / REPOSE DU BALAI CENTRAL AVERTISSEMENT ! L’utilisation de gants de travail est conseillée pendant le remplacement du balai central à cause de la présence éventuelle de débris tranchants parmi les poils. 1. 2. 3. 4. 5. 6. 7. 8. Porter la machine sur un sol plat. Positionner l'interrupteur général (1) sur “0”. Déposer le conteneur déchets (9). Dévisser complètement les manivelles (A, Fig. 5) sur le côté gauche de la machine. Enlever le portillon (A, Fig.
FRANÇAIS INSTRUCTIONS D'UTILISATION NETTOYAGE ET CONTROLE DE L'INTEGRITE DU FILTRE A POUSSIERE, CONTROLE DES JOINTS D'ETANCHEITE DU CONTENEUR DECHETS A 1. 2. 3. 4. 5. Porter la machine sur un sol plat. Positionner l'interrupteur général (1) sur “0”. Déposer le conteneur déchets (9). Dévisser les pommeaux (A, Fig. 8). Saisir le filtre à poussière (B) comme indiqué dans la figure. 6. Déposer le filtre à poussière en le tournant dans la direction de la flèche (A, Fig.
INSTRUCTIONS D'UTILISATION FRANÇAIS S311357 B Figure 8 D E C A D A-B C 0-2 mm 0-0.
FRANÇAIS INSTRUCTIONS D'UTILISATION CONTROLE DE LA HAUTEUR ET DU FONCTIONNEMENT DES VOLETS 1. 2. 3. 4. Porter la machine sur un sol plat et adéquat en tant que plan de référence pour le contrôle de la hauteur des volets. Positionner l'interrupteur général (1) sur “0”. Contrôler que la hauteur des volets latéraux (A et B, Fig. 11) du sol est comprise entre 0 et 2 mm (0 et 0,08 in).
INSTRUCCIONES DE USO ESPAÑOL ÍNDICE INTRODUCCIÓN......................................................................................................................................................... 2 FINALIDAD Y OBJETO DE ESTE MANUAL.......................................................................................................... 2 DESTINATARIOS ...................................................................................................................................................
ESPAÑOL INSTRUCCIONES DE USO INTRODUCCIÓN NOTA Los números entre paréntesis se refieren a los componentes ilustrados en el capítulo Descripción de la máquina. FINALIDAD Y OBJETO DE ESTE MANUAL Este manual contiene todas las informaciones necesarias para que el operador utilice la máquina de forma adecuada, autónoma y segura. Incluye informaciones inherentes a los datos técnicos, la seguridad, el funcionamiento, el período de inactividad, el mantenimiento, las piezas de repuesto y el desguace.
INSTRUCCIONES DE USO ESPAÑOL OTROS MANUALES DE REFERENCIA – – Catálogo piezas de repuestos (en dotación a la máquina) Manual de asistencia (que se puede consultar en los Centros de asistencia Kent) PIEZAS DE REPUESTO Y MANTENIMIENTO Para cualquier necesidad que se refiere a la utilización, al mantenimiento y a las reparaciones, consultar al personal calificado o a los Centros de asistencia Kent. Se recomienda utilizar sólo piezas de repuesto y accesorios originales.
ESPAÑOL INSTRUCCIONES DE USO SEGURIDAD La siguiente simbología sirve para señalizar situaciones de peligro potencial. Leer siempre cuidadosamente estas informaciones y tomar las precauciones necesarias para proteger personas y cosas. Para evitar desgracias, la cooperación del operador es fundamental. Ningún programa de prevención de accidentes resulta eficaz sin la total cooperación de la persona directamente responsable del funcionamiento de la máquina.
INSTRUCCIONES DE USO ESPAÑOL ¡ATENCIÓN! Antes de utilizar el cargador de baterías, asegurarse de que la frecuencia y la tensión indicadas en la – placa del número de serie de la máquina coincidan con la tensión de la red. – No tirar o transportar la máquina por el cable del cargador de baterías; no utilizar el cable como empuñadura. No cerrar el cable del cargador de baterías en una puerta o tirarlo sobre bordes o ángulos afilados. No atropellar el cable del cargador de baterías con la máquina.
INSTRUCCIONES DE USO ESPAÑOL DESCRIPCIÓN DE LA MÁQUINA ESTRUCTURA Y MANDOS DE LA MÁQUINA 1. 2. 3. 4. 5. 6. 7. 8. 9. 10. 11. 12. 13. 14. 15. 16. 17. 18. 19. 20. 21. 22. 23. 24. 25. 26. 27. 28. 29.
INSTRUCCIONES DE USO ESPAÑOL ESTRUCTURA Y MANDOS DE LA MÁQUINA - DESCRIPCIÓN Interruptor general de accionamiento del sistema de aspiración, del cepillo principal y del cepillo lateral (1) – En posición central “0” la máquina está apagada; en posición “I” se activan el sistema de aspiración y el cepillo principal; en posición “II” se activan el sistema de aspiración, el cepillo principal y el cepillo lateral.
ESPAÑOL INSTRUCCIONES DE USO ACCESORIOS/OPCIONES Además de los componentes instalados en la versión estándar, la máquina puede equiparse con los siguientes accesorios/ opciones, según la utilización específica. NOTA Para informaciones suplementarias sobre estos accesorios opcionales, acudir al Revendedor autorizado.
INSTRUCCIONES DE USO ESPAÑOL ESQUEMA ELÉCTRICO BAT: CH1: EB1: ES1: F1: F2: F3: M1: M2: M3: SW1: SW2: Baterías Cargador de baterías LED tarjeta Relé Fusible principal Fusible ventilador de aspiración Fusible cepillo lateral Motor principal Motor del sistema de aspiración Motor del cepillo lateral Interruptor general Microinterruptor cajón de residuos F1 Códigos colores BK: Negro BU: Azul BN: Marrón GN: Verde GY: Gris OG: Anaranjado PK: Rosado RD: Rojo VT: Morado WH: Blanco YE: Amarillo RD R ES1 GY O
ESPAÑOL INSTRUCCIONES DE USO USO ¡ATENCIÓN! En unas partes de la máquina hay unas placas adhesivas que indican: – PELIGRO – ATENCIÓN – ADVERTENCIA – NOTA Leyendo este manual, el operador tiene que aprender el sentido de los símbolos indicados en las placas. Por ninguna razón estas placas deben cubrirse y si están dañadas tienen que sustituirse de inmediato.
INSTRUCCIONES DE USO ESPAÑOL MÁQUINA EN FUNCIÓN 1. 2. Evitar que los cepillos sigan funcionando durante demasiado tiempo mientras que la máquina está parada en un punto: la máquina podría dejar signos en el suelo. Para que la máquina funcione correctamente es necesario que el filtro de polvos sea lo más limpio posible. Por lo tanto es necesario activar el sacudidor del filtro regularmente (cada 10 minutos de trabajo, según la cantidad de polvo en el suelo), efectuando el procedimiento siguiente.
ESPAÑOL INSTRUCCIONES DE USO MANTENIMIENTO Un mantenimiento cuidadoso y continuo garantiza la vida útil y la seguridad de funcionamiento de la máquina. El esquema siguiente resume el mantenimiento programado. Los períodos indicados pueden variar según las condiciones de trabajos, que el encargado del mantenimiento debe establecer. ¡ATENCIÓN! Las operaciones de mantenimiento deben efectuarse con la máquina apagada y, si necesario, con las baterías desconectadas.
INSTRUCCIONES DE USO ESPAÑOL CONTROL Y AJUSTE DE LA ALTURA DEL CEPILLO LATERAL 1. 2. 3. 4. Controlar la altura del cepillo lateral mediante el procedimiento siguiente: • Llevar la máquina sobre un suelo llano y bajar el cepillo lateral. • Parar la máquina en un punto y dejar que el cepillo lateral gire durante unos segundos. • Parar el cepillo lateral pulsando el interruptor (1), luego levantarlo y desplazar la máquina.
ESPAÑOL INSTRUCCIONES DE USO CONTROL Y AJUSTE DE LA ALTURA DEL CEPILLO PRINCIPAL 1. 2. 3. 4. 5. 6. Controlar la altura del cepillo principal mediante el procedimiento siguiente: • Llevar la máquina sobre un suelo llano. • Parar la máquina en un punto y dejar que el cepillo principal gire durante unos segundos. • Parar el cepillo principal pulsando el interruptor (1), luego desplazar la máquina. • Controlar que la huella (A, Fig. 3) dejada por el cepillo principal por toda su largura sea de 3-5 cm (1.
INSTRUCCIONES DE USO ESPAÑOL DESMONTAJE/MONTAJE DEL CEPILLO PRINCIPAL ¡ADVERTENCIA! Durante la sustitución del cepillo principal se aconseja utilizar guantes por que residuos cortantes podrían estar encastrados en las cerdas. 1. 2. 3. 4. 5. 6. 7. 8. Llevar la máquina sobre un suelo llano. Llevar el interruptor general (1) en posición “0”. Quitar el cajón de residuos (9). Desenroscar por completo las empuñaduras (A, Fig. 5) en el lado izquierdo de la máquina. Quitar el portillo (A, Fig.
ESPAÑOL INSTRUCCIONES DE USO LIMPIEZA Y CONTROL DE LA INTEGRIDAD DEL FILTRO DE POLVOS, CONTROL DE LAS GUARNICIONES DEL CAJÓN DE RESIDUOS A 1. 2. 3. 4. 5. Llevar la máquina sobre un suelo llano. Llevar el interruptor general (1) en posición “0”. Quitar el cajón de residuos (9). Desenroscar las perillas (A, Fig. 8). Empuñar el filtro de polvos (B) como indicado en la figura. 6. Quitar el filtro de polvos girándolo en la dirección indicada por la flecha (A, Fig.
INSTRUCCIONES DE USO ESPAÑOL S311357 B Figura 8 D E C A D A-B C 0-2 mm 0-0.
ESPAÑOL INSTRUCCIONES DE USO CONTROL DE LA ALTURA Y DEL FUNCIONAMIENTO DE LOS FLAPS 1. 2. 3. 4. Llevar la máquina sobre un suelo llano y adecuado para controlar que la altura de los flaps sea correcta. Llevar el interruptor general (1) en posición “0”. Comprobar que la altura de los flaps laterales (A y B, Fig. 11) sea de 0 a 2 mm (0 a 0,08 in).
INSTRUÇÕES DE USO PORTUGUÊS ÍNDICE INTRODUÇÃO ............................................................................................................................................................ 2 OBJECTIVO E CONTEÚDO DO MANUAL............................................................................................................ 2 DESTINATÁRIOS ...................................................................................................................................................
PORTUGUÊS INSTRUÇÕES DE USO INTRODUÇÃO NOTA Os números indicados entre parêntesis referem-se aos componentes ilustrados no capítulo Descrição da máquina. OBJECTIVO E CONTEÚDO DO MANUAL Este manual tem como objectivo fornecer ao operador todas as informações necessárias de modo que este esteja preparado para utilizar a máquina da maneira mais adequada, autónoma e segura possível.
INSTRUÇÕES DE USO PORTUGUÊS OUTROS MANUAIS DE REFERÊNCIA – – Catálogo das peças de substituição (fornecido com a máquina) Manual de assistência (pode ser consultado nos centros de assistência da Kent) PEÇAS DE SUBSTITUIÇÃO E MANUTENÇÃO Para qualquer necessidade relativa à utilização, à manutenção e à reparação, consulte o pessoal qualificado ou directamente os Centros de assistência Kent. Utilize sempre peças de substituição e acessórios originais.
PORTUGUÊS INSTRUÇÕES DE USO SEGURANÇA São utilizados os seguintes símbolos para assinalar eventuais situações de perigo. Leia sempre estas informações com atenção e tome as devidas precauções para proteger as pessoas e os objectos. A colaboração do operador é essencial para evitar acidentes. Nenhum programa de prevenção de acidentes pode ser eficaz sem a total colaboração da pessoa directamente responsável pelo funcionamento da máquina.
INSTRUÇÕES DE USO PORTUGUÊS ATENÇÃO! – Antes de utilizar o carregador de baterias, certificar-se de que a frequência e a tensão indicada na placa de especificação da máquina coincidam com a tensão da rede eléctrica. – Não utilize o cabo do carregador de baterias para tirar ou transportar a máquina, nem o utilize como se fosse uma pega. Não deixe que o cabo do carregador de baterias seja preso numa porta, nem o puxe em superfície ou ângulos afiados.
PORTUGUÊS INSTRUÇÕES DE USO DESCRIÇÃO DA MÁQUINA ESTRUTURA E COMANDOS DA MÁQUINA 1. 2. 3. 4. 5. 6. 7. 8. 9. 10. 11. 12. 13. 14. 15. 16. 17. 18. 19. 20. 21. 22. 23. 24. 25. 26. 27. 28. 29.
INSTRUÇÕES DE USO PORTUGUÊS ESTRUTURA E COMANDOS DA MÁQUINA - DESCRIÇÃO Interruptor geral de accionamento do sistema de aspiração, escova central e escova lateral (1) – Na posição central “0” a máquina está desligada; na posição “I” estão activos o sistema de aspiração e a escova central; na posição “II” estão activos o sistema de aspiração, a escova central e a escova lateral.
PORTUGUÊS INSTRUÇÕES DE USO ACESSÓRIOS / OPCIONAIS Além dos componentes existentes na versão padrão, a máquina pode ser equipada com os seguintes acessórios/opcionais, com base na utilização específica da mesma. NOTA Para mais informações relativas aos acessórios opcionais acima indicados, consulte o seu Revendedor habitual.
INSTRUÇÕES DE USO PORTUGUÊS DIAGRAMA ELÉCTRICO BAT: CH1: EB1: ES1: F1: F2: F3: M1: M2: M3: SW1: SW2: Baterias Carregador de bateria Placa led Relé Fusível principal Fusível da ventoinha de aspiração Fusível escova lateral Motor principal Motor do sistema de aspiração Motor da escova lateral Interruptor geral Micro-interruptor do depósito de resíduos F1 Código das cores BK: Preto BU: Azul BN: Marrom GN: Verde GY: Cinza OG: Laranja PK: Rosa RD: Vermelho VT: Roxo WH: Branco YE: Amarelo RD R ES1 GY OG
PORTUGUÊS INSTRUÇÕES DE USO UTILIZAÇÃO ATENÇÃO! Em alguns pontos da máquina encontram-se aplicadas autocolantes que indicam: – PERIGO – ATENÇÃO – ADVERTÊNCIA – NOTA O operador, durante a leitura deste manual, deve compreender perfeitamente o significado dos símbolos presentes nas placas. Não cubra, em caso algum, os autocolantes e substitua-os imediatamente caso venham a ser danificados.
INSTRUÇÕES DE USO PORTUGUÊS MÁQUINA EM OPERAÇÃO 1. 2. Evite parar a máquina por muito tempo na mesma posição, com as escovas a rodar: pode provocar marcas indesejáveis no piso. Para um bom trabalho de varredura é necessário que o filtro de poeiras esteja o mais limpo possível. Por conseguinte, é necessário accionar o dispositivo de sacudimento do filtro a intervalos regulares (cada 10 minutos de trabalho, variáveis em função da quantidade de poeiras presentes no chão), do seguinte modo.
PORTUGUÊS INSTRUÇÕES DE USO MANUTENÇÃO Uma manutenção cuidadosa e regular garante a longevidade da máquina e sua máxima segurança de funcionamento. Encontra-se indicado a seguir uma síntese do plano de manutenção programada. As periodicidades indicadas podem sofrer variações em função de condições especiais de trabalho, a serem definidas por parte do responsável da manutenção. ATENÇÃO! As operações de manutenção devem ser efectuadas com a máquina desligada e, quando necessário, com as baterias desligadas.
INSTRUÇÕES DE USO PORTUGUÊS CONTROLO E REGULAÇÃO DA ALTURA DA ESCOVA LATERAL 1. 2. 3. 4. Controle a correcta altura ao piso da escova lateral, do seguinte modo: • Coloque a máquina num terreno plano e baixe a escova lateral. • Mantendo a máquina parada, faça girar por alguns segundos a escova lateral. • Pare a escova lateral pressionando o interruptor (1), levante-a e desloque a máquina. • Controle que a marca deixa pela escova lateral esteja, em extensão e direcção, como indicado na figura (A, Fig.
PORTUGUÊS INSTRUÇÕES DE USO CONTROLO E REGULAÇÃO DA ALTURA DA ESCOVA CENTRAL 1. 2. 3. 4. 5. 6. Controle a correcta altura ao piso da escova central, do seguinte modo: • Coloque a máquina num terreno plano. • Com a máquina parada, faça rodar durante alguns segundos a escova central. • Pare a escova central pressionando o interruptor (1) e desloque a máquina. • Verifique se a marca (A, Fig. 3) deixada pela escova central tem uma largura de 3 a 5 cm (1.2 a 2 in) em todo o seu comprimento.
INSTRUÇÕES DE USO PORTUGUÊS DESMONTAGEM/MONTAGEM DA ESCOVA CENTRAL ADVERTÊNCIA! Aconselha-se o uso de luvas durante a substituição da escova central devido à possível presença de detritos cortantes inseridos entre as cerdas. 1. 2. 3. 4. 5. 6. 7. 8. Coloque a máquina num terreno plano. Coloque o interruptor geral (1) em "0". Remova o depósito dos resíduos (9). Desaparafuse completamente os volantes (A, Fig. 5) no lado esquerdo da máquina. Remova a tampa (A, Fig. 6) segurando-a nos pontos (B).
PORTUGUÊS INSTRUÇÕES DE USO LIMPEZA E CONTROLO DO BOM ESTADO DO FILTRO DE POEIRAS, CONTROLO DAS JUNTAS DE VEDAÇÃO DO DEPÓSITO DOS RESÍDUOS A 1. 2. 3. 4. 5. 6. Coloque a máquina num terreno plano. Coloque o interruptor geral (1) em "0". Remova o depósito dos resíduos (9). Desaparafuse os manípulos (A, Fig. 8). Segure o filtro de poeiras (B) como ilustrado na figura. Remova o filtro de poeiras rodando-o no sentido da seta (A, Fig.
INSTRUÇÕES DE USO PORTUGUÊS S311357 B Figura 8 D E C A D A-B C 0-2 mm 0-0.
PORTUGUÊS INSTRUÇÕES DE USO CONTROLO DA ALTURA E DO FUNCIONAMENTO DOS FLAPS 1. 2. 3. 4. Coloque a máquina num terreno plano e adequado a servir como plano de referência para a verificação da correcta altura dos flaps. Coloque o interruptor geral (1) em "0". Controle se a altura ao solo dos flaps laterais (A e B, Fig. 11) está compreendida entre 0 e 2 mm (0 e 0,08 in).