
Instruction Manual


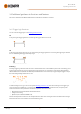
Table Of Contents
- 1. General
- 2. Installation
- 2.1 Installing power source mains plug
- 2.2 Installing cooling unit (optional)
- 2.3 Installing equipment on cart (optional)
- 2.4 Connecting welding gun
- 2.5 Installing earth return cable
- 2.6 Installing remote control (optional)
- 2.7 Installing and replacing feed rolls
- 2.8 Installing and replacing wire guide tubes
- 2.9 Installing and changing wire
- 2.10 Installing gas bottle and testing gas flow
- 2.11 How to get welding programs
- 3. Operation
- 3.1 Preparing welding system for use
- 3.2 Calibrating welding cable
- 3.3 Using control panel
- 3.3.1 Control panel: Home view
- 3.3.2 Control panel: Weld Assist
- 3.3.3 Control panel: Channels
- 3.3.4 Control panel: WPS view
- 3.3.5 Control panel: Welding parameters
- 3.3.6 Control panel: Weld history
- 3.3.7 Control panel: Info view
- 3.3.8 Control panel: Device settings
- 3.3.9 Control panel: Applying welding programs
- 3.3.10 Control panel: Weld data view
- 3.4 Additional guidance to functions and features
- 3.5 Pulse welding
- 3.6 Wireless connection (WLAN)
- 3.7 Using remote control
- 3.8 Changing welding polarity
- 3.9 Lifting equipment
- 4. Maintenance
- 5. Technical data

Master M 358
Operating manual - EN
Powerlog trigger logic is not available with manual MIG, MAX Speed, MAX Position or DPulse processes.
Powerlog trigger logic cannot be used together with a remote control. If a Powerlog memory channel is selected
when a remote control is in use, the trigger logic is automatically switched to 4T.
3.4.2 1-MIG
1-MIG is a MIG/MAG welding process where the voltage is defined automatically when you adjust the wire feed speed.
The voltage is calculated based on the welding program in use. The process is suitable for all materials, shielding gases
and welding positions. 1-MIG supports WiseSteel, WisePenetration+ and WiseFusion features, as well as various optim-
ized welding programs.
>> To take 1-MIG into use, go to the Memory channels view and select an existing memory channel with 1-MIG pro-
cess.
If there aren't any 1-MIG memory channels available, create a new one for 1-MIG process by selecting an available 1-MIG
welding program for the channel. Follow the instructions in "Control panel: Applying welding programs" on page53.
3.4.3 WiseFusion feature
The WiseFusion welding feature enables adaptive arc length control, which keeps the arc optimally short and focused.
WiseFusion increases the welding speed and penetration and decreases heat input. WiseFusion can be used throughout
the power range (short arc, globular arc and spray arc). WiseFusion is compatible with 1-MIG, MAX Position and pulsed
MIG welding processes.
>> To take WiseFusion into use, go to the control panel's Welding parameters view and apply the WiseFusion fea-
ture.
>> To adjust the welding power/wire feed speed, in the control panel's Home view, turn the left control knob.
>> To fine tune the heat output while welding, in the control panel's Home view, turn the right control knob.
For more information on Wise products, visit www.kemppi.com.
3.4.4 WisePenetration+ feature
In standard MIG/MAG welding, changes in stick-out length cause welding current to fluctuate. WisePenetration+ main-
tains constant welding current by controlling the wire feed speed according to the stick-out length. This ensures stable
and effective penetration and prevents burn through. WisePenetration+ also adjusts the voltage adaptively, which keeps
© Kemppi
57
1921980 / 2242