
Instruction Manual
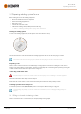
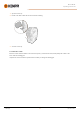
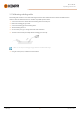
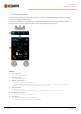
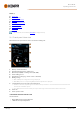
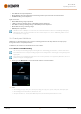

Table Of Contents
- 1. General
- 2. Installation
- 2.1 Installing power source mains plug
- 2.2 Installing cooling unit (optional)
- 2.3 Installing equipment on cart (optional)
- 2.4 Connecting welding gun
- 2.5 Installing earth return cable
- 2.6 Installing remote control (optional)
- 2.7 Installing and replacing feed rolls
- 2.8 Installing and replacing wire guide tubes
- 2.9 Installing and changing wire
- 2.10 Installing gas bottle and testing gas flow
- 2.11 How to get welding programs
- 3. Operation
- 3.1 Preparing welding system for use
- 3.2 Calibrating welding cable
- 3.3 Using control panel
- 3.3.1 Control panel: Home view
- 3.3.2 Control panel: Weld Assist
- 3.3.3 Control panel: Channels
- 3.3.4 Control panel: WPS view
- 3.3.5 Control panel: Welding parameters
- 3.3.6 Control panel: Weld history
- 3.3.7 Control panel: Info view
- 3.3.8 Control panel: Device settings
- 3.3.9 Control panel: Applying welding programs
- 3.3.10 Control panel: Weld data view
- 3.4 Additional guidance to functions and features
- 3.5 Pulse welding
- 3.6 Wireless connection (WLAN)
- 3.7 Using remote control
- 3.8 Changing welding polarity
- 3.9 Lifting equipment
- 4. Maintenance
- 5. Technical data

Master M 358
Operating manual - EN
3.1 Preparing welding system for use
Before starting the use of the welding equipment:
• Ensure the installation has been completed
• Switch the welding equipment on
• Prepare the cooler
• Connect the earth return cable
• Calibrate the welding cable (in MIG operation mode only)
>> Refer to "Calibrating welding cable" on page35 for instructions.
Turning on welding system
To turn on the welding equipment, turn the power source main switch to ON (I).
Turn the main switch to start and shut down the welding equipment. Do not use the mains plug as a switch.
If the welder is left unused for a longer period, detach the mains plug to disconnect it from the mains.
Preparing cooler
Fill the coolant container inside the cooler with Kemppi cooling liquid. For instructions on filling the cooler, refer to
"Filling cooler and circulating coolant" below. To weld, you must pump the coolant through the system by pressing the
coolant circulation button in the front panel of the cooling unit.
Connecting earth return cable
Keep the work piece connected to earth to reduce the risk of injury to users or damage to electrical equipment.
Attach the earth return cable clamp on the work piece.
Ensure that the contact surface is clean of metal oxide and paint and that the clamp is firmly secured.
Selecting operation mode and process
To select the operation mode (MIG/TIG/MMA), refer to "Control panel: Device settings" on page51.
For TIG welding, the polarity (+/-) must be switched. For information, refer to "Changing welding polarity" on
page67.
3.1.1 Filling cooler and circulating coolant
Fill the cooler with 20-40 % coolant solution, for example, Kemppi cooling liquid.
© Kemppi
33
1921980 / 2242