
Manual


turn and tighten (clockwise) the left screw 1/8
turn.
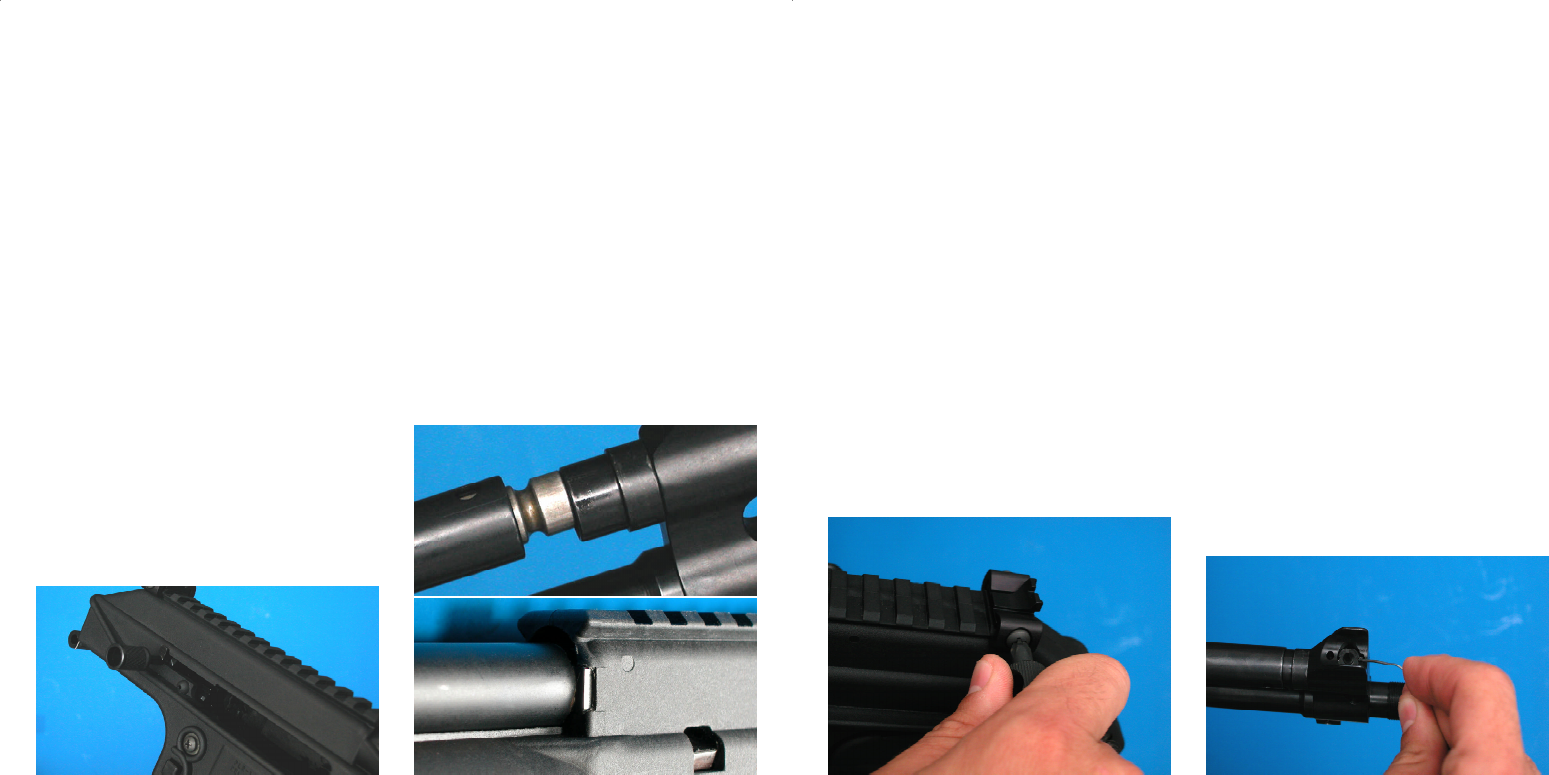
For the front sight, use a small tipped tool, like a
paper clip or an M-16 A2 style front sight tool
(not included) to depress the detent pin and
turn the sight post by hand. One click (1/4 turn)
will change the point of impact 2inches at 100
yards. Clockwise moves the point of impact up
and
counter-clockwise moves it down.
MAINTENANCE
Your pistol is a precision instrument and to
insure reliable function, it is necessary to
follow a routine maintenance procedure. After
firing your pistol, be sure to unload it following
the procedure outlined in the section entitled
“Unloading” before any cleaning or mainte-
nance procedure.
Routine cleaning, after every shooting
session:
Your pistol should be cleaned by brushing the
barrel bore and chamber with a good powder-
removing solvent and bore brush. Wipe the
areas clean with patches or a swab. Using a
small brush dipped in solvent, remove all
deposits from around the breech of the barrel,
and chamber, extractor and adjacent areas
which have been subjected to the action of
powder or primer residue. Remove any residue
on the frame with light brushing and a solvent.
After cleaning the entire gun, use a cloth to
apply a light coating of high quality gun oil to all
external surfaces and wipe clean.
Additional cleaning, after firing 500
rounds:
Remove the bolt carrier assembly and fully
disassemble it as stated in the disassembly
section of this manual. Thoroughly clean with
solvent and a brush the piston head, piston pin,
piston rod, recoil spring, recoil spring tube, bolt,
cam pin, firing pin, and bolt carrier. Do not clean
WARNING: If the recoil spring tube is not
parallel with the barrel of the pistol the
bolt carrier assembly is not installed
correctly. Remove the carrier assembly
and install it again paying close attention
to the alignment of the lock tab on the
recoil spring tube as you insert the
carrier and also be sure that the bolt
itself is always in the forward most
position as you insert the carrier
assembly into the receiver.
Push the operating handle all the way forward,
be sure that the piston head lines up and goes
into the gas head. Grip the recoil spring tube,
pull it forward and twist it 1/4 turn so that the
locking tab on the recoil spring tube goes into
the receptacle on the left side of the receiver.
Pull the operating handle back and forth to
check that it moves freely, if it does not, take
out the bolt carrier and check to make sure
everything is installed correctly and nothing is
damaged. Unfold the grip. Insert the assembly
pin into the hole and press it in until it is flush
with the outside of the grip.
SIGHT ADJUSTMENT
Sight Adjustment on the PLR-16 Pistol depends
on the placement of the rear sight. If the sight
is in the farthest forward slot on the picatinny
rail, the pistol will have a different sight radius
than if the sight is placed farthest rearward on
the picatinny rail. The data given is for the sight
in the rearmost position. Use the included
Phillips screwdriver to adjust the windage with
the two screws on the sides of the rear sight.
Tighten the screw on the same side of the rear
sight that you want to move the point of impact
to. You may have to loosen the opposite side
screw a little. For example: to move the point
of impact left 1 inch at 100 yards you would
loosen (counter-clockwise) the right screw 1/8