
Manual


Bolt carrier disassembly:
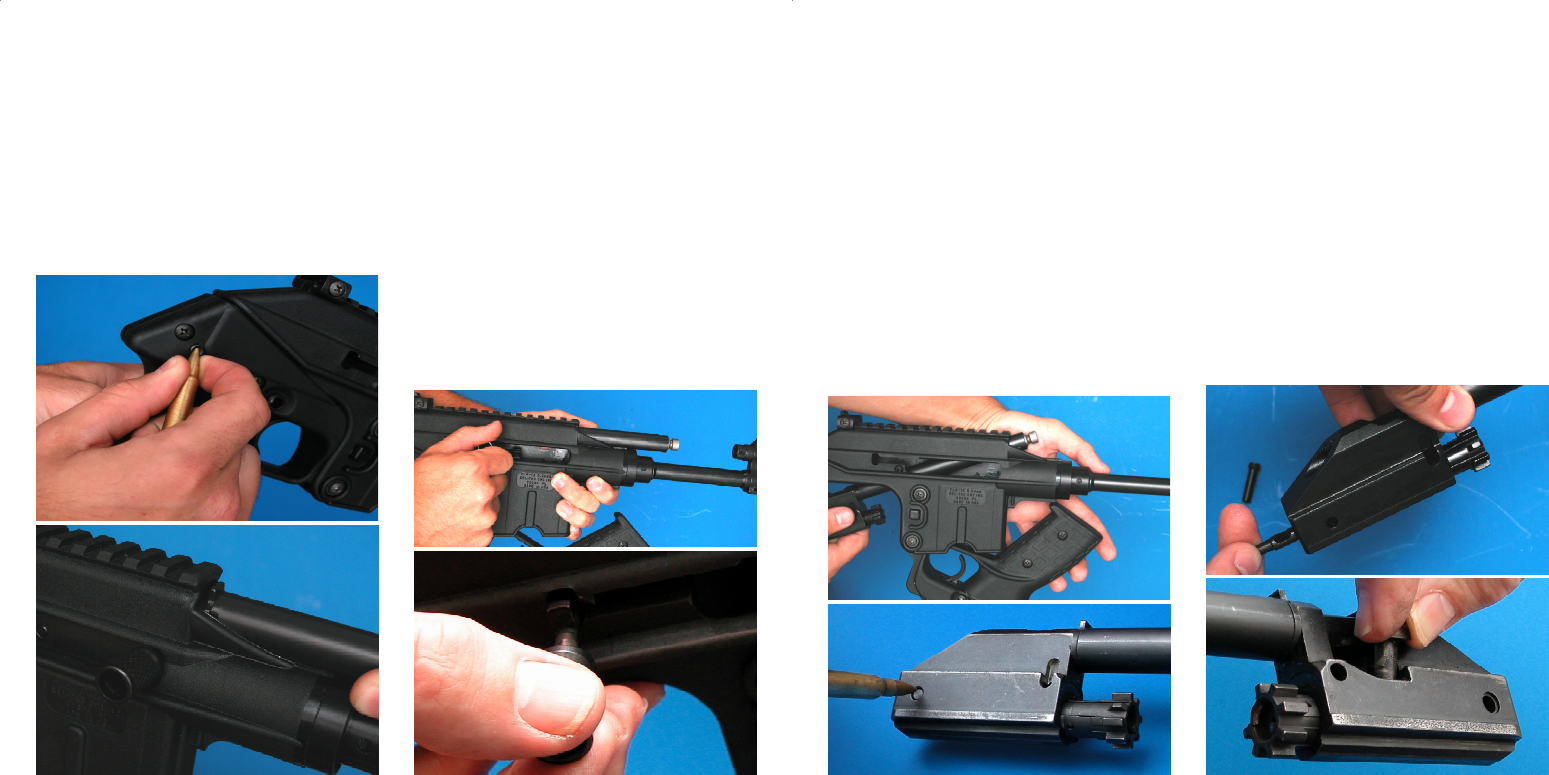
To remove the bolt, cam pin, and firing pin,
simply press out the firing pin pin from the right
side of the bolt carrier with a small tool or a
cartridge. Remove the firing pin from the back
of the bolt carrier, you may need to tap the bolt
carrier or move the bolt in and out to get the
firing pin to fall out enough to grip it. With the
firing pin removed the cam pin can now be
pulled out and with the cam pin out the bolt can
be removed from the front of the carrier.
To remove the piston head, recoil spring tube,
and recoil spring, first rotate the recoil spring
tube to align the holes in the recoil spring tube
with the pin in the piston head. While holding
the piston head with one hand, press out the
piston pin with the firing pin or a small tool.
CAUTION: The piston head is under
pressure from the compressed recoil
spring and the piston head and recoil
spring can easily fly out and injure
yourself or bystanders, always keep a
hand on the piston head and point the
piston head in a safe direction when
removing it.
With the piston pin removed the piston head is
now free to be taken off. Slide the recoil spring
tube off the piston rod and remove the recoil
spring from the recoil spring tube.
CAUTION: Some accessories that are
mounted to the picatinny rail on the top
of the receiver may interfere with the
disassembly of the PLR-16 pistol. It is
advisable to remove any scopes or other
devices mounted to the rail before
proceeding with disassembly.
With a cartridge or other pointed objec,t push
out and remove the assembly pin. Rotate the
grip down and forward. Grab the recoil spring
tube, pull it towards the muzzle and twist it 1/4
turn so that the locking tab points towards the
top of the pistol, it should slide into the receiver
about 1/4 inch as you release the recoil spring
tube. Slowly pull back on the operating handle,
the recoil spring tube should also move back
and there should not be any spring pressure
felt. Pull the handle all the way back and push it
down into the operating handle removal cutout
in the receiver. The operating handle should
now be able to be pulled straight out of the bolt
carrier. After the operating handle is removed
the bolt carrier assembly can now be guided
out of the bottom of the receiver.