
Product Manual


Multi-angle cutting gauge
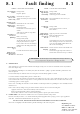
MULTI-ANGLE CUTTING GAUGE
The Multi-angle Cutting Gauge will make easy work of angled cuts when creative matcutting. The three gauges enable the
mat to be accurately positioned, marked and cut at angles of 30°, 37.5°, 45°, 52.5° and 60°, making easy work of
hexagons, octagons, chamfered corner mats, etc.
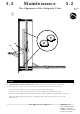
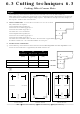
FITTING
The three angle gauges come with a length of silicon rubber cord, this is fitted into the Matguide and holds the gauges in
their set position.
Using a smooth but firm object push the cord into its recess then trim the ends.
Insert the long edge of the gauge into the recess at an angle of about 45°, then hinge it down.
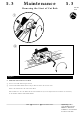
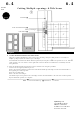
MARKING OUT
Having decided upon your design, use the Multi-angle gauge and Matguide to position the mat for marking out.
NOTE: When using the 30° and 37.5° gauges the mat board can be positioned in one of two positions.
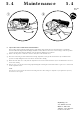
CUTTING
Set the Start of Cut (green) Limit Stop to zero.
Place the mat board under the cutter bar, again using the Multi-angle gauge or Matguide to align it ready for cutting.
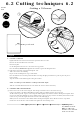
Depress the Start of Cut Finger and move the Cutter Head until the tip of the finger reaches the line at the beginning
of the marked aperture. Insert the blade fully, release the Start of Cut Finger, cut until the Finger reaches the marked
line at the end of the aperture.
NOTE: When using this method to judge the start and end of cut a small allowance needs to be made in corners that
are not at 90° to each other. This should not cause problems after a small amount of practice.
English
45°
37.5°
30°
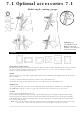
7.1
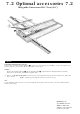
Optional accessories
7.1
MyBinding.com
5500 NE Moore Court
Hillsboro, OR 97124
Toll Free: 1-800-944-4573
Local: 503-640-5920