KASPERSKY LAB Kaspersky® Administration Kit version 5.
KASPERSKY® ADMINISTRATION KIT VERSION 5.0 Reference Book © Kaspersky Lab Visit our website: http://www.kaspersky.
Contents CHAPTER 1. KASPERSKY® ADMINISTRATION KIT.................................................. 6 1.1. The purpose of the document............................................................................... 8 1.2. Conventions used in this book .............................................................................. 8 CHAPTER 2. GETTING STARTED.............................................................................. 10 2.1. Starting the program and connecting to the administration server...
Kaspersky Administration Kit 5.7. Application Deployment Wizard.......................................................................... 79 5.8. Local installation of Network Agent..................................................................... 82 5.9. Local installation of Network Agent Console Plug-in.......................................... 86 5.10. Installing applications in silent mode................................................................. 87 CHAPTER 6. POLICY MANAGEMENT ..........
Contents 5 11.2. Viewing and modifying report templates ........................................................ 169 11.3. Creating a report template .............................................................................. 171 11.4. Generating and viewing reports...................................................................... 173 11.5. Generating summary reports on slave Administration Servers..................... 174 CHAPTER 12. MANAGING LICENSE KEYS ..........................................
CHAPTER 1. KASPERSKY® ADMINISTRATION KIT Kaspersky® Administration Kit is an application that is designed to provide a centralized solution for most important administration tasks associated with managing the corporate network anti-virus security system based on Kaspersky Lab’s applications included into Kaspersky Anti-Virus Business Optimal and Kaspersky Corporate Suite . Kaspersky Administration Kit supports all network configurations that use TCP/IP protocol.
Kaspersky® Administration Kit • 7 create individual patterns for the application's operation by creating and running tasks for a set of computers from different administration groups. • Automatically update the anti-virus database and application modules on computers. This features allows centralized updating of the anti-virus database for all installed Kaspersky Lab's applications without accessing the Kaspersky Lab's internet updates server for each individual update.
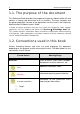
Kaspersky Administration Kit 1.1. The purpose of the document This Reference Book describes the purpose of Kaspersky Administration Kit and contains a step-by-step discussion of all its functions. The basic concepts and the general operation scheme of the application are discussed in the Kaspersky Administration Kit Administrator's Guide. In order to review questions that our users often ask Kaspersky Lab's support specialists visit our website and follow the ServicesÆ Knowledge base link.
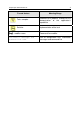
Kaspersky® Administration Kit Format feature Meaning/Usage Task, example Statement of a problem, example of the demonstration of the application's capabilities Solution Implementation of the task [key] – modifier name Command line modifier Information messages and command line text Text of configuration files, information messages and command line
CHAPTER 2. GETTING STARTED 2.1. Starting the program and connecting to the administration server In order to start the application, select the Kaspersky Administration Kit item in the Kaspersky Administration Kit group of the standard Run\Programs menu. This programs group is created only on the administrator's workstations at the time when the Administration Console is installed. To connect to an Administration Server, select the Kaspersky Administration Server () node in the console tree.
Getting started • Use SSL connection. Select this checkbox to transmit data between the Administration Server and Administration Console via SSL. Unselect this box if you do not want to communicate via SSL. However, this might impair the integrity and safety of the data transmitted. • Use proxy server. Select this checkbox if you want to connect to the Administration Server via a proxy server. Enter the address for connecting to the proxy server in the Proxy server address field.
Kaspersky Administration Kit to browse for the certificate file. The file has the .cer extension and is located in the Cert folder in the Kaspersky Administration Kit directory on the Administration Server. The Console will attempt to authenticate the server using the certificate you specified. You can copy the certificate file to a shared folder or a floppy disk. This copy can be used to configure access settings. Figure 2. Request for connecting to the Administration Server.
Getting started 13 If the connection is successful, the logical network structure and settings appear in the console tree. To disconnect from the Administration Server select the Kaspersky Administration Server () node in the console tree and select the Disconnect from the Administration Server command or use the analogous shortcut menu item in the Action menu.
Kaspersky Administration Kit 1. Select the node that corresponds to the Administration Server you need in the main Kaspersky Administration Kit window, open the shortcut menu and select the Properties command or use the corresponding item in the Action menu. 2. Select the Security tab in the Properties: window that will open (see Figure 4). Figure 4.
Getting started o viewing the logical network structure (or administration group); o viewing the values of application's policies, tasks, and settings. • Executing: starting and stopping existing group and global tasks.
Kaspersky Administration Kit 1. Select the administration group you need in the console tree, open the shortcut menu and select the Properties command or use the analogous item from the Action menu. 2. Select the Security tab in the Properties: window that will open (see Figure xx). This tab is similar to the Security tab of the Administration Server settings configuration window. Figure 5.
Getting started 2.3. Viewing information about the computer network IP subnetworks In order to view information about the computer network, received by the Administration Server during a regular poll: Select the Network node in the console tree.
Kaspersky Administration Kit Select one of the following options: o Specify the IP subnetwork using address and the subnetwork mask; in this case you must specify the Subnetwork mask and Subnetwork address in the corresponding entry fields. o Specify IP subnetwork using the start and the end address; after this, enter the start and the end IP addresses. The values of the settings are specified in the decimal notation.
Getting started Figure 7. Viewing IP subnetwork settings The General tab • change the subnetwork's name; • determine the whether the Administration Server will automatically move new computers added to the subnetwork to include them to the structure of the logical network. In order to do this, check the Move computers into group and select the required administration group using the Select button.
Kaspersky Administration Kit In order to add an IP range that defines the subnetwork press the Add button. In the IP range window that will open (see Figure xx) specify the method of the range description and enter the values for the method selected. Select one of the following options: • Specify the IP subnetwork using address and subnetwork mask; in this case you must specify the Subnetwork mask and Subnetwork address in the corresponding entry fields.
Getting started Figure 9. Adding an IP range 2.4. Quick Start Wizard To create a system of centralized management of antivirus protection: 1. In the console tree of the Kaspersky Administration Kit main window, select the Kaspersky Administration Server () node and open the shortcut menu for this node. Click Quick Start Wizard on the shortcut menu or on the Action menu. 2.
Kaspersky Administration Kit Figure 10. Polling the computer network 3. At this stage you will have to specify the method for creating a logical network (see Figure 11). You can select one of the following options: Figure 11. Quick Start Wizard.
Getting started • I want to create logical network tree based on the Windows domain structure – Create a logical network automatically based on the structure of Windows domains and user groups displayed in the Unassigned group folder. If a computer is not available in the Unassigned mode when you are creating a logical network (switched off or disconnected from the network), the wizard will not add this computer to the logical network.
Kaspersky Administration Kit 5. In the next stage, you should configure the system of anti-virus protection (Figure 13). Figure 12. Configuring the notifications forwarding settings Figure 13. Quick Start Wizard.
Getting started Quick Start Wizard creates a system of anti-virus protection for logical network clients using Kaspersky Anti-Virus 5.0 for Windows Workstations. In this case, the Administration Server creates a policy and defines a minimum set of tasks for the highest hierarchical level of Kaspersky Anti-Virus 5.0 for Windows Workstations. It also configures a global task of retrieving updates for the Administration Server.
Kaspersky Administration Kit 6. In the final window of the wizard you will be offered to launch the Deploy wizard. You can use this wizard to install the Network Agent. If you do not wish to install the application immediately after the Quick Start Wizard is completed, uncheck the Launch the Deploy Wizard box.
CHAPTER 3. VIEWING, CREATING, AND CONFIGURING A LOGICAL NETWORK 3.1. Viewing the logical network structure To view information about the structure of a group that is a part of the logical network group: Select the desired group folder in the Groups folder. A list of objects included in this group will be displayed in the details panel (you can also expand the corresponding branch of the console tree). • To view information about group policies, select the Policies folder.
Kaspersky Administration Kit The General tab (Figure 14) displays the following information: Figure 14. Viewing group properties.
Viewing, creating, and configuring a logical network 29 Figure 15. Viewing group properties. The Computers tab • The New computer detected section shows what installation packages are used to remotely install Kaspersky Lab applications on the new client computers added to the group. For the Unassigned group properties (see Figure 32), the New computer detected section contains the Add computer to group checkbox.
Kaspersky Administration Kit Figure 16. The Computer status tab You can change the threshold values for some of the conditions. In order to do this, select the required condition in the Condition column and double-click it to open the editing window (see Figure 117). For example, you can establish the maximum number of days during which the client computer will not connect to the Administration Server. After this period of time is elapsed, the computer will be assigned the Critical status.
Viewing, creating, and configuring a logical network 31 The criteria for determining the status of the client computer are configured in the setting of the previous hierarchy level group and will be inherited by all groups of the logical network. In order to configure individual criteria for a group, uncheck the Inherited box and configure the settings. The Security tab (see Figure 5) is designed to configure access rights tot he administration group (see section 2.2 on page 14).
Kaspersky Administration Kit Figure 18. Viewing client properties.
Viewing, creating, and configuring a logical network 33 Figure 19. Viewing system characteristics of a client computer The Protection tab (Figure 20) shows information about the current status of anti-virus protection on a client computer. You can view the following data: • Real-time protection status – Current anti-virus protection status. • Last full scan date – date and time of the last virus scan.
Kaspersky Administration Kit Figure 20. Viewing system characteristics of a client. The Protection tab The Applications tab (Figure 101) lists all Kaspersky Lab applications installed on the client computer. You can view general information about an application, manage its performance, and configure settings (for details, see section 7.9 on page 135).
Viewing, creating, and configuring a logical network 35 Figure 21. Viewing system characteristics of a client. The Tasks tab 3.2. Finding a computer in the logical network To search for a computer or a group of computers that match the specified criteria, select the node or the administration group, open its shortcut menu and select Find computer.
Kaspersky Administration Kit Figure 22. Searching for a computer. The Network tab. On the Application tab (Figure 23), specify the following search criteria: • Application name. Enter the name of the application installed on the client computer. • Application version. Specify the version of the application installed on the client computer. • Last update time. Specify the time interval in which the anti-virus database and application modules on the client computer were updated for the last time.
Viewing, creating, and configuring a logical network 37 Figure 23. Searching for a computer. The Application tab On the Computer Status tab (Figure 24), specify the following search criteria: • Computer Status. Search for computers that have the following statuses: OK, Critical, or Warning. • Computer status description. Select conditions on which the client computer was assigned this status • RTP status. Select the current real-time protection status of the computer(s) you want to find.
Kaspersky Administration Kit Figure 24. Searching for a computer. The Computer status tab On the Virus Protection tab (Figure 25), you can specify the following search criteria: • Anti-virus database date. • Anti-virus database records range. • Last full scan time. Specify the time interval during which the computer was fully scanned for the last time. • Viruses found.
Viewing, creating, and configuring a logical network 39 Figure 25. Searching for a computer. The Virus Protection tab. In order to include client computers that are included in the structure of the logical networks of the slave administration servers into the search, check the Include data with slave servers (up to level). After this specify the maximum nesting level to be included into the search. After specifying search criteria, click the Find Now button.
Kaspersky Administration Kit 3.3. Computer queries In order to create a computer query: 1. Select the Computer Queries node in the console tree, open the shortcut menu and select the New/New Query command or use the analogous item from the Action menu. 2. Enter the name for the query in the window that will open (Fig. 27) press the OK button.
Viewing, creating, and configuring a logical network • 41 Search in network – search among the computers not included into the logical network. In order to include data from the slave administration servers into the query, check the Include data with slave servers (up to level) box. After this, specify the maximum nesting level to be included into the search. Figure 27. .
Kaspersky Administration Kit tion time range box and specify the start and the end date and time of the interval in the from and until fields. • the time when new computers appear in the network; in order to do this, check the New computers found during network scan and specify period in days in the Detection period(days) field. Figure 28. Configuring computers query. The Network tab Specify which applications must be installed on computers using the Applications tab (see Figure xx).
Viewing, creating, and configuring a logical network 43 Figure 29. Configuring a computer query The Applications tab Specify the criteria for the evaluation of the anti-virus protection on the computers what will be included into the query on the Anti-virus protection tab (see Figure 31).
Kaspersky Administration Kit Figure 30. Configuring a computer query. The Anti-virus protection tab On the Computer status tab (see Figure 32), specify the parameters that describe the status of the client computers and the status of the real-time protection task performed on computers.
Viewing, creating, and configuring a logical network 45 Figure 31. Configuring a computer query The Computer status tab 3. After you are done with the settings press the Apply or the OK button. 3.4. Creating, modifying, and deleting logical network groups To add a new group to the logical network structure: 1. If you want to create a nested group, select a parent group in the console tree or the Groups folder in the details panel. If you want to create an upper-level group, select the Groups folder. 2.
Kaspersky Administration Kit 4. In the next wizard dialog box, in the Computers section, define actions to be applied to client computers of this group that have been inactive during a specified time interval: • If you want the administration server to perform any actions, check the Notify administrator after computer has been inactive for checkbox and specify the number of days in the days field to notify the administrator if the computer is inactive for this length of time.
Viewing, creating, and configuring a logical network 47 To rename a group: Select a group in the console tree or the details panel and click Properties on the shortcut menu or the Action menu. On the General tab of the Properties dialog box, change the group name (Figure 14). You cannot rename the Groups folder because it is a built-in element of the Administration Console.
Kaspersky Administration Kit group using Windows Networking to move the computer from the Unassigned group to the destination group. • 1. Manually – A computer will be added to a group based on the data entered manually by the administrator. To add a computer, select I want to define IP addresses for the computers in the group. Here the data are verified for uniqueness to prevent name conflicts.
Viewing, creating, and configuring a logical network 49 Figure 32. Unassigned group properties. The Computers tab You can move clients from one group to another and delete them from the logical network by using the standard Cut/Paste or Delete commands on the shortcut menu or the Action menu. The computers deleted from the logical network are moved to the Unassigned group. You can also move computers by dragging them to the target location with your mouse. 3.6.
Kaspersky Administration Kit 2. Run the group or global task wizard (details see Chapter 7, page 105). 3. At the stage of selecting the application and defining the task type (see Figure 33), specify the following: • In the Choose the application for which to define a task drop-down list – Kaspersky Network Agent; • In the Choose type of task for execution drop-down list – Change Kaspersky Administration Server Task. Figure 33. Creating a task of changing the Kaspersky Administration Task.
Viewing, creating, and configuring a logical network • 51 Port number that will be used to connect to the new Administration Server through the SSL protocol – in the Server SSL port field. Using the Choose certificate… button specify the certificate file used to authenticate the new Administration Server in the Kaspersky Administration Server certificate field. The file has the .
Kaspersky Administration Kit If you create a group task, all clients of the selected group will be assigned to a new Administration Server. 6. Specify the account under which the task will start (see section 5.4 on page 67). 7. To finish creating the task, schedule it to start at a certain time. Figure 35. Viewing the properties of the Change Administration Server task. 3.7.
Viewing, creating, and configuring a logical network 53 After the installation of the Network Agent, this utility is located in the root installation folder for the component and when run from the command line performs the following action depending on the modifiers used: • connects the Network Agent to the Administration Server using the parameters supplied; • logs the results of the operation into the events log file or displays them on the screen.
Kaspersky Administration Kit • -silent – launch the utility in the silent mode; the use of this modifier can be useful, for instance, when launching the utility from the launch scenario when registering the user. • -dupfix – this key is used when the Network Agent was installed by a method other than the traditional method (using the distribution kit), for example, by restoring from the disk image. 3.8.
Viewing, creating, and configuring a logical network • 55 -logfile – log the values of the connection parameters used by the Network Agent to connect to the Server and the results of the utility operation; by default the information will be stored in file stdout.tx; if the modifier is not used, then the parameters, results and error messages will be printed to the screen.
CHAPTER 4. HIERARCHY OF ADMINISTRATION SERVERS 4.1. Connecting a slave Administration Server to a master Server In order to add a slave Administration Server to the logical network: 1. Select the required administration group, open the shortcut menu and select the New / Administration Server item. You can access the same option on the Action menu. A wizard will start. Follow the wizard’s instructions. 2. You will need to specify the name of the slave server. Enter it manually.
HIERARCHY of Administration Servers 57 In order to configure settings used for connecting a slave server to the main Administration Server, 1. In the Administration Console, select the required Administration Server, open the shortcut menu and select the Properties item. You can also select this item on the Action menu.
Kaspersky Administration Kit 4.2. Viewing the logical network of a slave Administration Server To view the logical network structure: Select the required slave Administration Server. In the shortcut menu, select the Connect to Administration Server item. You can select the same command on the Action menu. The structure of the logical network of the selected slave Server will be displayed in the Administration Console. Then, you can view the structure as described in section 3.1 on page 27 .
CHAPTER 5. INSTALLATION AND DEINSTALLATION APPLICATIONS ON CLIENTS 5.1. Viewing the installation package parameters In order to view the properties of the installation package and to modify its name and settings: open the Remote Install node in the console tree, select the required installation package in the results panel and use the Properties command from the shortcut menu or from the Actions menu.
Kaspersky Administration Kit Figure 36. Installation package properties dialog box. The General tab • Application • Version • Size • Created The Settings tab (Figure 37) shows settings of the installation package, corresponding to those of the application the package was created for. These are the default settings, which can be modified if necessary.
HIERARCHY of Administration Servers 61 Figure 37. Installation package properties dialog box. The Installer Settings tab The License info tab (see Figure 38) displays general information on the license issued for the application for which the package has been created.
Kaspersky Administration Kit Figure 38. Installation package properties viewing window The License info tab Using the OS restart (see Figure 41) you can determine the actions to be performed if the computer must be restarted after the installation of the application. • Do not restart the operating system. • Restart the operating system automatically.
HIERARCHY of Administration Servers 63 was installed. In order to do this, check the Enforce the restart after (min.) and specify the time interval desired. Figure 39. Installation package properties viewing window The OS restart tab. 5.2. Creating installation packages To create an installation package: 1. Connect to the administration server (see section 2.1 on page 10). 2.
Kaspersky Administration Kit applications that support remote installation). As a result, the application name appears in the Application name field and version number, in the Application version field. Figure 40. Creating a Kaspersky Lab's application installation package. The installation package settings are set by default, depending on the application to install. You can change the installation package settings in the properties dialog box after the package has been created (see above).
HIERARCHY of Administration Servers 65 Figure 41. Creating of an installation package for installation of an application specified by the user. 4. In the next wizard’s box (Figure 42), you can include a license key file into the installation package by clicking Browse… and selecting the required license key file (the file has .key extension). If you do not want to add a license key to the installation package, click Next. Figure 42. Creating an installation package. Selecting a license key.
Kaspersky Administration Kit 5. A set of files required for installing this application on clients is then loaded to the shared folder on the administration server. The server checks the administrator workstation for the availability of the Console Plug-in for this application. If the plug-in has not been installed or its version is earlier than that of the application, it will be installed or replaced.
HIERARCHY of Administration Servers • 67 proxy server settings – To specify the settings, click the Settings button and enter the proxy server address, user login and password. To enable connection via the proxy server, select the Use proxy server checkbox. After the Network Agent is installed, you can change the connection settings using policies and application settings.
Kaspersky Administration Kit 4. To set the application and task type (Figure 43) select the Kaspersky Administration Kit and Application deployment task respectively. Figure 43. Remote installation task setup. Defining the task type 5. Then define the installation package for this task (Figure 44). Select the required package among other installation packages created for that Administration Server or create a new one using the New… button. Figure 44. Creating an application deployment task.
HIERARCHY of Administration Servers 69 6. In the next wizard box, specify one of the following installation methods (Figure 45): • Use push install – Forced installation; • Use login script-based install – Installation using a login script. Figure 45. Creating an application deployment task. Specifying the installation method 7.
Kaspersky Administration Kit Figure 46. Selecting accounts If you selected the push installation method, define a method of selecting the client computers on which to create this task (see Figure 47) • I want to select computers using Windows Networking. In this case, the client computers on which to install applications will be selected automatically, based on the data collected by the Administration Server during browsing the Windows network. • I want to define IP addresses for the computers.
HIERARCHY of Administration Servers 71 Figure 47. Defining a method of selecting client computers If the client computers will be selected based on the Windows network structure, the list will be created in the wizard’s dialog box (see Figure 48) in a similar manner as during adding computers on the logical network (see section 3.5 on page 47).
Kaspersky Administration Kit Figure 48. Creating a list of computers on which to install applications based on the Windows-network structure. If the client computers will be added manually, the list will be populated by entering the IP addresses (or a range of IPs) of client computers (see Figure 49).
HIERARCHY of Administration Servers 73 Figure 49. Creating a list of computers using IP addresses. 8. In the next wizard’s box, specify the account under which the remote installation task will be started on clients (see Figure 50). The user account must have administrator rights for all clients on which you are planning to run the application deployment task.
Kaspersky Administration Kit To install Kaspersky applications on clients that do not belong to this domain, log on as a user with administrator rights for these clients to start the remote installation task. In the fields below, specify information about the user whose account satisfies the required conditions: Figure 50. Selecting an account. 9. Define the task schedule (see Figure 51).
HIERARCHY of Administration Servers • 75 Configure schedule settings in the fields corresponding to the selected startup mode (for details, see section 7.1 on page 105). Figure 51. Scheduling the application deployment task.
Kaspersky Administration Kit 5.5. Configuring the remote installation task The remote installation task is configured in the same manner as other tasks (see section 7.4 on page 117). Therefore, we shall only describe settings displayed on the Settings tab that are specific to each type of task. Provided below is a detailed discussion of settings specific to a particular task type that are displayed on the Settings tab.
HIERARCHY of Administration Servers 77 Figure 52. Remote Installation Tasks Settings. Push install method Figure 53. Remote Installation task. The Advanced dialog box. If you are configuring the script-based installation task, on the Settings tab you can edit the list of user accounts to which the current changes will be applied (see Figure 54). Use the Add… and Remove buttons to edit the list.
Kaspersky Administration Kit Figure 54. Configuring the remote installation task using scripts. 5.6. Remote software uninstallation In order to remotely uninstall Kaspersky Lab's software: Create a task similar to that of remote installation (deployment) (section 5.4 on page 67), select Remote application uninstallation as the task type. In order to ensure successful performance of the task, uncheck the Do not install application if it is already installed in the More tab (see Figure 53).
HIERARCHY of Administration Servers 79 5.7. Application Deployment Wizard To install the application using the Application Deployment Wizard: 1. Connect to the required Administration Server (see section 2.1 on page 10). 2. In the console tree of the Kaspersky Administration Kit main window, select the Kaspersky Administration Server () node and open the shortcut menu. Click Application Deploy Wizard on the shortcut menu or on the Action menu to start the wizard.
Kaspersky Administration Kit 4. Specify computers on which you want to install Kaspersky Lab applications (Figure 56). in the wizard window. Select one of the following options: • Install the application onto selected computers, if you select this option, a group task of application deployment will be created after the completion of the wizard. • Install application onto computers in the administration group - as the result of the wizard operations a global task will be created. Figure 56.
HIERARCHY of Administration Servers 81 Figure 57. Application Deploy Wizard. Selecting a group 6. Then you will have to specify the account under which the deployment task for the client computers will run (for more details, see section 5.4 on page 67). Figure 58.
Kaspersky Administration Kit 7. After this, you will see a dialog box showing the progress of the deployment task on the client computers of the selected group (Figure 59). To view details of the task running on individual clients, click the Results button. Figure 59. Running a deployment task 5.8. Local installation of Network Agent To locally install Network Agent: 1. Launch the setup.exe file in the NetAgent folder on the Kaspersky Administration Kit installation CD.
HIERARCHY of Administration Servers 83 Files\Kaspersky Lab\Network Agent. If this folder does not exist, it will be created automatically. Click Browse to select another location. 4. In the Administration Server wizard’s box (see Figure 60), you should specify the following settings for the Network Agent to connect to the Administration Server: • The Server address field contains the address of the computer running (or to be running the Administration Server.
Kaspersky Administration Kit 5. Determine the folder in the Unassigned group where the client will be added by the Administration Server. Set the following options (see Figure 61): • Default group name – The client will be added to a folder that corresponds to its current location on the Windows network – domain or user group (this option is enabled by default). • Define group name – The client will be added to the specified folder. Enter the name of the folder in the field below.
HIERARCHY of Administration Servers 85 The file has the .cer extension and is located in the Cert folder in the Kaspersky Administration Kit directory on the Administration Server. You can copy the certificate file to a shared folder or a floppy disk. This copy can be used during the installation of Network Agent. Figure 62. Installing the Network Agent. Selecting a method for receiving the Administration Server certificate. 7.
Kaspersky Administration Kit Figure 63 Installing Network Agent. Setting up the Network Agent launch After the installation is complete, Network Agent will be installed on your computer with the following settings: • Name – Kaspersky Network Agent • Automatic launch at operating system startup • The Local System account You can view the Kaspersky Network Agent service properties, start and stop this service, and monitor its performance by using Services, a standard Windows administration tool.
HIERARCHY of Administration Servers 87 Administration Kit. The wizard will guide you through the installation. Follow the wizard’s instructions. The klcfginst.msi installation file for the Network Agent Console Plug-in is located in the NetAgent folder of the Kaspersky Administration Kit installation package. 5.10. Installing applications in silent mode To install an application in silent mode: 1. Create the required installation package (see section 5.
CHAPTER 6. POLICY MANAGEMENT 6.1. Creating a policy for an application To create a new group policy: 1. In the console tree, select a group for which you want to create a policy. In this group folder, select the Policies folder and click the New/Policy item on the shortcut menu or the Action menu to start a new policy wizard. Follow the wizard’s instructions. 2. Now you have to specify the policy name and the application for which this policy is being created. Enter the policy name.
Policy management Only one group policy can be assigned to a group per application. No applications will have policies created for them. Figure 64. Creating a policy. Selecting an application 3. In order to apply the policy you created as the active policy for the application, activate this policy by checking the Activate policy active box (see Figure 65). There can be several policies created in a group for one application, but only one policy can be the active policy.
Kaspersky Administration Kit Figure 65. Creating a policy. Activating the policy 4. Then you have to consider the general settings for the policy and configure settings for the selected application (Figure 66). You can lock policy settings for nested groups, application settings, or task settings. The policy settings that can be locked are marked with the icon . . To lock a setting, click this icon. The icon will change to Local application settings have a higher priority than policy settings.
Policy management Figure 66. Creating a policy for Kaspersky Anti-Virus 5.0 for Windows Workstations 6.2. Viewing and modifying a policy To view group policy settings and/or modify them: In the console tree, choose the required group and select the Policies folder in this group. In the details pane, you will see a list of all policies created for this group. Choose the policy required and click the Properties command on the shortcut menu or the Action menu.
Kaspersky Administration Kit • Creation date and time • Date and time of last modification • The Activate policy based on the event box and the list used to select an event that triggers the policy activation • The Activate policy box that determines whether the policy is the active policy for the application On this tab you can: • change the policy's name; • determine the automatic activation of the policy upon a certain event and select such event; • activate or de-activate a policy Fig
Policy management • Defined • Enforced • Pending • Failed Figure 68. Editing a policy. The Enforcement tab Detailed information on the results of policy enforcement on each client is available in the dialog box (Figure 69), accessed by clicking the Details button.
Kaspersky Administration Kit • o Finished – The policy for an application on this computer has been successfully applied; o Scheduled – The policy for an application on this computer has not been applied yet; o Failed – The policy for an application on this computer has failed (the computer was turned off, disconnected, the application did not run, or was not installed). Date – Date and time when the event occurred. Figure 69.
Policy management Figure 70. Editing a policy editing. The Event processing tab After the policy has been created, the values on the Event processing tab are the default application settings. The settings are specific to each Kaspersky Lab application and more information about them is available in user guides for each application. If necessary, you can change the policy settings as needed.
Kaspersky Administration Kit 1. From the drop-down list, select the severity level: Critical, Error, Warning, or Info. 2. Events corresponding to the selected severity level will be displayed in the Events types field below. The list of events is specific to each application. For more information about events, see the application documentation. Select the types of events to be recorded by pressing the Shift and Ctrl keys on your keyboard. 3.
Policy management Figure 71. The Windows Events registration dialog box 4. In the Notify administrator group, define how notifications will be sent by checking the following checkboxes: • Send email – To send notifications via a mail server • Use NET SEND – To send notifications via the NET SEND service • Run executable – To run a program or a script following a certain event. You can check more than one checkbox. 5. • Configure settings for the selected notification mode.
Kaspersky Administration Kit Names of the variables of the executable module environment coincide with the names of substitute parameters used to format the notification message text (see below). • Enter a text of the notification to be sent to the defined recipients. Click the Message text… button and type the template in the dialog box that appears (Figure 73). The notification text may include information about the event recorded.
Policy management the specified template will be sent to the addressed specified in the settings. 6. After all required settings have been configured, click Apply and proceed to the next severity level. Figure 72. Selecting a notification mode. Specifying notification delivery settings Figure 73. Specifying notification delivery settings.
Kaspersky Administration Kit Figure 74. Specifying notification delivery settings. Specifying the sender and message subject 6.3. Activating a policy In order to apply a group policy as the active policy for the application, 1. Select the group policy you need in the results panel, open the context menu and select the Properties command or use the analogous item in the Action menu. 2.
Policy management 3. In the application group policy configuration window Properties: . 4. Check the Activate policy based on the event box and select the event you need from the drop-down list. In order to cancel automatic activation of the policy by event, the box must be unchecked. 6. Press the Apply or the ОК button. If you deactivate policy by event, you can return to the previous policy only manually. 6.4.
Kaspersky Administration Kit • In the Server connection group, select the Use server SSL connection checkbox to enable connection via an SSL secured port (using the SSL protocol). • In the Agent port section, you can enable client/server communication via a UDP-port and define the port number. To enable the UDP-port connection, check the Open port checkbox and enter the port number in the Port field. The default value is 15000. If this port is already in use, you can change the number.
Policy management Figure 76. Editing a Network Agent policy 6.5. Exporting and importing policies You can export and import policies from one administration group to another. To export a policy: In the console tree, select the required group and click the Policies folder. The results pane will display a list of all policies existing for this group. Select a policy, open the shortcut menu and click Export. The same command can be accessed on the Action menu.
Kaspersky Administration Kit To import a policy: In the console tree, select the required group. Open the shortcut menu of the Policies folder and click All tasks/Import. The same command can be accessed on the Action menu In the window that opens, specify the name of the file from which the policy will be imported and click Open. If a policy for this application already exists in the group, new policy will not be imported.
CHAPTER 7. TASK MANAGEMENT 7.1. Creating a group task To specify a new group task: 1. In the console tree, choose the group for which you want to create the task and select the Tasks folder in this Group. On the shortcut menu or the Action menu, click New/Task to start a new task wizard. Follow its instructions. 2. Specify the task name. If a task with this name already exists in the group, the _1 ending will be automatically added to the new task name. 3.
Kaspersky Administration Kit Figure 77. Creating a task. Selecting an application and defining the type of the task 4. Then, configure task settings according to the application selected (Figure 78). Some settings are set by default. For details about task configuration, see the documentation for a specific application. Figure 78. Configuring a task for Kaspersky Anti-Virus 5.
Task management 5. In the next wizard’s box, specify the account under which the task will start on client computers (see Figure 79). Select one of the options below: • Default account – in this case the task will be run under the account of the application that performs this task. • Specified account – in this case you will have to enter the details of the account (username, password) that has sufficient right to access the object.
Kaspersky Administration Kit • o Monthly; o Once; o At application start - Start the task at application startup. o Manually – Start the task manually from the Kaspersky Administration Kit main window by clicking the Start command on the shortcut menu or on the Action menu. o Immediately – Start the task immediately after you finish with the wizard. Specify schedule options in the fields specific to the selected schedule.
Task management run field, the task will start every two hours starting at 15:00 on August 3, 2004. The default frequency value is set at 6 and the date and time for the task to start is automatically copied from the current system date and time of your computer. o The procedure for the task to start if the client computer is unavailable (turned off, disconnected from the network, etc.) or if the application is not opened at the time specified by the schedule.
Kaspersky Administration Kit Figure 81. Scheduling a task to start daily o The frequency of task startups in the Every days field and the start time in the Schedule to run field. For example, if the Every days field has a value of 2 and the Schedule to run field has 15:00:00, the task will start once every two days at 3 p.m. The default value for the Every days field is 2 and the current system time is the default task start time.
Task management Figure 82. Scheduling a task to start every week o The frequency of task startups in the Every field and the start time in the Schedule to run field. By default, the task will start on Sunday, 18:00:00. You can change the default time, if necessary. For example, if the value of the Every field is Sunday and the value of the Schedule to run field is 3:00:00 AM, the task will start every Sunday at 3 AM.
Kaspersky Administration Kit The default value in the Every day of month field is 1 and the current system time is set in the Schedule to run field. o For instructions on what to do if a client is temporarily unavailable, see above. o About the randomized schedule option, see above. Figure 83.
Task management Figure 84. Scheduling a task to start once If you set the task to start Manually (Figure 85), at application start or immediately after the task is created, set the randomization interval during which the task will start on client computers (see above).
Kaspersky Administration Kit Figure 85. Setting a task to start manually After you finish with the wizard, the task you created will be added to the Tasks folders of the corresponding group and all nested groups and displayed in the details panel. If necessary, you can configure task settings (see section 7.4 on page 117). 7.2.
Task management Figure 86. Creating a global task. Defining clients on which this task will be executed Select logical network clients for which you want to create the task. You can select either computers from different folders or all computers in the current folder (see section 5.3 on page 66). Global tasks will be executed only on the specified clients. If any new client computers are added to the group you selected, this task will not be performed for them.
Kaspersky Administration Kit to change application settings and click the Properties item on the shortcut menu or on the Action menu. After this, the Properties dialog box will appear in the application main window (Figure 18). 2. Switch to the Tasks tab (Figure 87). The tab shows all tasks created for this client. To create a new local task, click Add. To configure task settings, click Properties. Figure 87. Creating a local task.
Task management 7.4. Viewing and changing task settings To view and/or change task settings: • If you want to create/modify a group task, choose a target group in the console tree and select the Group Tasks folder in this group. In the details panel, you will see all tasks assigned to this group. Select the required task, open the shortcut menu and choose the Properties item from the shortcut menu (or from the Action menu).
Kaspersky Administration Kit view the details of task performance, click History (see section 7.8 on page 128). On this tab, you can use the following buttons to manage the task manually: Start, Stop, Pause, and Resume. You can temporarily remove the task from the list of scheduled tasks. To do this, uncheck the Enabled (scheduled task runs at specified time) checkbox.
Task management Figure 89. Editing task settings. The Settings tab On the Account tab (Figure 90), you can specify an account under which the task will be running: • Default account. The task will run under the account of the application that will perform this task. • Specified account. If you select this option, specify the account (username and password) that has appropriate access rights.
Kaspersky Administration Kit Figure 90. Editing task settings. The Account tab On the Schedule tab (Figure 91) you can change task scheduling options, configure automatic startup of the operating system on the computers turned off at the time when the task is launched or restrict the duration of the task execution. The content of the Schedule tab and its operation are analogous to the operations you have to perform when configuring settings during the task creation.
Task management Figure 91. Editing task settings. The Schedule tab On the Notification tab (Figure 92), you can configure settings for sending notifications about task performance results.
Kaspersky Administration Kit Figure 92. Editing task settings. The Notification tab • In the Register information about task history fields, define saving options for task history: • Check the Store task history locally to locally store information on each client. • Check the Store task history on the server for to centrally store task history sent from all clients on the administration server. In the days field, specify the interval during which the task history will be stored on the server.
Task management 123 • Check Notify of all results to receive notifications on all task performance events. • Check Notify of every failure to be notified about errors only. Select and configure notification settings in a similar manner to defining notification settings for a policy on the Event processing tab (see section 6.2 on page 91). As the default settings, the program uses administration server settings (see section 8.2 on page 140).
Kaspersky Administration Kit tion (min) box. After this, specify the time required. As the result, operating system of the computer will startup before the task is launched. In order to restrict task execution time, in the Schedule tab of the task configuring window (see Figure 116), check the Stop if task takes longer then (min.) and specify the time period in minutes after which the task will be stopped. 7.5.
Task management Figure 94. Start /stop application task. Task settings dialog box When editing the settings of the start /stop application task (see Figure 95), you can edit the settings described above.
Kaspersky Administration Kit Figure 95. Editing the Start /stop application task 7.6. Exporting and importing tasks To export a task from the administration group to a file: In the console tree, select the required task and click the Tasks folder. The results pane will display a list of all tasks created for this group. Select a task, open the shortcut menu and click Export. The same command can be accessed on the Action menu.
Task management 127 To import a task from a file: In the console tree, select the required group. Open the shortcut menu of the Tasks folder and click Import. The same command can be accessed on the Action menu In the window that opens, specify the name of the file from which the task will be imported and click Open. 7.7. Starting and stopping tasks To manually start/stop a task: In the details panel, choose the target task (either global or group) and open the shortcut menu.
Kaspersky Administration Kit Tasks are launched on a client only if the corresponding application is running. When the application is disabled, all running tasks are cancelled. 7.8. Monitoring and viewing task performance results To start monitoring the task performance: open the settings window for the task you need (see 7.4 on page 117) and switch to the General tab (see Figure 88).
Task management 129 Figure 96. Viewing task history stored on the administration server To view task performance results for each client, open the Properties dialog box using the History button on the Tasks tab (see below). You will see information stored on the administration server. If task history is stored locally on a workstation, use the administration console installed on this computer. In order to view the task history data stored on the client computer: 1.
Kaspersky Administration Kit The task progress (except for real-time protection tasks) is displayed as a percentage in the Status column on the Tasks tab (Figure 97). Figure 97. The Local computer Properties dialog box.
Task management 131 Figure 98. Viewing task execution results for a specific computer In order to simplify viewing of and searching for necessary information, there is a provision for configuring user-defined filters. The use of filters allows performing search and filtering out information that is not required at the moment that make viewing the required information more difficult as after the filter is applied; only information that satisfies the filter's parameters becomes available.
Kaspersky Administration Kit Figure 99.. Configuring events filter The Events tab 2. Using the Events tab (see Figure 99) select characteristics of events and task execution results that must be displayed after the filter is applied. • Specify the characteristics of events in the Events types group of fields: o Select the task importance level from the drop-down list: There are types of events defined for each application that can occur during the operation of this application.
Task management 3. 2. If you would like to display the task execution results, check the Task execution results box and select the task status you want to view. 3. Check the Only last results of task execution box if you would like to display information about the results of the last task run only. 4.
Kaspersky Administration Kit Figure 100. Configuring events filter. The Time tab 4. After you are done with configuring the filter, press the OK button. After this only information that satisfy the parameters specified will be displayed in the Task execution results window. In order to remove the filter,, press the Remove filter button or use the analogous command from the shortcut menu.
Task management 135 7.9. Deploying group tasks on slave Administration Servers The results of task deployment on slave Administration Servers are displayed in the History window (see Figure 96) in the group task properties window on the slave Administration Server.
CHAPTER 8. MANAGING APPLICATION SETTINGS 8.1. Viewing application settings To view/configure application settings: 1. Select a group in the Groups folder that includes the required client computer. In the details panel, select the computer on which the target application is installed. Click the Properties command on the shortcut menu or on the Action menu. 2. The Properties dialog box containing several tabs will appear in the main program. Switch to the Applications tab (Figure 101).
Managing application settings 137 Figure 101. Client properties dialog box. The Applications tab The dialog box consists of several tabs. The dialog box shows information updated during the last client/server synchronization. The tabs are specific to each application. For more information about the tabs, see the corresponding user documentation. The General, Licenses, and Event processing tabs are common for all applications.
Kaspersky Administration Kit Figure 102. Application properties dialog box. The General tab On the Licenses tab, you can view detailed information about the current and reserve license keys installed on a client computer.
Managing application settings 139 • Type – Type of the installed key (for example, commercial or test) • License period – License validity period • Limit computer count – Maximum number of computers on which this license key can be installed. Figure 103. Application properties dialog box. The Licenses tab The Event processing tab (Figure 104) displays rules for handling events occurred on a client computer. You can view them and make necessary changes.
Kaspersky Administration Kit Figure 104. Application properties dialog box. The Event processing tab 8.2. Administration Server settings To view the Administration Server settings: Select the Kaspersky Administration Server () node in the console tree that corresponds to the required Administration Server and click Properties on the shortcut menu or the Action menu.
Managing application settings 141 Figure 105. Viewing application plug-in properties. The Application plug-in info of the administration server This tab also has the Statistics tab for viewing the general statistics on the selected Administration Server and the Plug-in info button that opens Application plug-in info, the Administration Server Plug-in information box (Figure 105).
Kaspersky Administration Kit Figure 106. Viewing administration server properties. The General tab The tab also has the Server hierarchy settings button that opens a dialog box for editing properties of the selected slave Server (see Figure 107).
Managing application settings 143 Figure 107. Properties of a slave Administration Server The Settings tab (Figure 108) shows administration server properties. The Server location group has the following fields: • Server port displays the port number used to connect to the administration server. The default port number is 14000. If this port is already in use, you can change it. • Server SSL port displays the SSL port number used to securely connect to the administration server.
Kaspersky Administration Kit • Domain query interval (min) – Interval for sending queries to the Windows network domains for existing computers (in minutes). In the Maximum number of events to store in database field, specify the maximum number of events stored in the database on the Administration Server. If necessary, you can change these settings. Figure 108. Viewing administration server properties.
Managing application settings • Critical events: o The permitted number of computers for the key has been exceeded – There are too many licenses for this key. o Virus outbreak! – The virus activity exceeds the preset limit. The response of the administration server to the Virus outbreak! event is extremely important, especially when a virus outbreak occurs and the risk of virus attacks increases.
Kaspersky Administration Kit • o Host may be out of control - Connection with the Network Agent installed on the client might be lost. o Host status is 'Warning' - A computer with settings corresponding to the “Warning” status has been detected on the network. Info: o More than 90% of the permitted number of computers for the key are active – Number of licenses for this key is more than 90%. o New host found – A new client has been found during network browsing.
Managing application settings 147 Figure 109. Viewing administration server properties. The Event processing tab On the Notification tab (Figure 110), you can set parameters for notifying the administrator and / or other users on events sent to the administration server from anti-virus applications. These settings are used by policies for applications as default settings. To reduce the impact on the Server’s resource usage, limit the number of notifications sent by the Administration Server.
Kaspersky Administration Kit Figure 110. Viewing administration server properties. The Notification tab Figure 111. Limiting the number of notifications On the Virus outbreaks tab (Figure 112), you can set the Virus outbreak event generation criteria, the maximum number of detected viruses during a specified time interval.
Managing application settings 149 for a short period exceeds the threshold, the event is classified as a Virus outbreak. This parameter allows the administrator to prepare and respond to a virus outbreak. Figure 112. Viewing administration server properties. The Virus outbreaks tab Check the Enable generation of virus outbreak events checkbox to enable detection of virus activities within your logical network.
Kaspersky Administration Kit 8.3. Network Agent settings When you are working with Network Agent settings, in addition to the General, Licenses, and Event processing tabs, the "Kaspersky Network Agent" application properties dialog box (Figure 113) has the Settings tab. The options displayed on this tab are identical to those on the Settings tab of the Network Agent policy settings dialog box (see section 6.3 on page 100). Figure 113.
CHAPTER 9. UPDATING THE ANTI-VIRUS DATABASE AND PROGRAM MODULES 9.1. Creating the update task Downloading updates from a single source is a global task (see section 7.2 on page 114). To create the downloading updates task, select Kaspersky Administration Kit as the application for which you want to create the task and the Download updates task as the task type (see Figure 114). Figure 114. Creating an update task. Selecting the application and the type of task.
Kaspersky Administration Kit administration servers will be automatically launched after the master Server has received updates. Figure 115. Creating an update task. Configuring updates receiving settings You can create the list of updates sources using the Add and the Remove buttons.
Updating the Anti-Virus database and program modules 153 Figure 116. Configuring the updates source • Master Administration Server - for receiving updates from the public folder of the Administration Server. • Updates folder - for receiving updates from a network folder. If you select this option, specify the address of the folder that contains the updates.
Kaspersky Administration Kit Figure 117. Configuring the parameters used to connect to the updates server In order to ensure that the tasks of receiving updates by the slave administration servers are launched automatically after the master server receives the updates, irrespective of the schedule configured in the settings of these tasks, check the Enforce updating of the slave servers box. 9.2.
Updating the Anti-Virus database and program modules • 155 view the location of the folder containing the updates received from the source in the Local updates source folder field. Figure 118. Configuring the update task. The Settings Tab • Redefine the source of retrieving updates and set parameters for connecting to the update servers in the Updates Source group of fields (see section 9.1 on page 151). 9.3.
Kaspersky Administration Kit To view update properties: Select the required update in the details panel and click Properties on the shortcut menu or on the Action menu. This will open the Properties dialog box (see Figure 119). The General tab displays the following information: • Update name; for database updating, the field has the value Anti-virus database.
Updating the Anti-Virus database and program modules 157 9.4. Automatic update deployment To make the server push updates across clients immediately after downloading: Select the Updates node in the console tree and click Properties on the shortcut menu or on the Action menu. In the Update Properties dialog box, that will appear on your screen (Figure 120), check the Deploy antivirus database automatically on all clients checkbox.
Kaspersky Administration Kit Figure 120. The Updates Properties dialog box In order to ensure that updates received by the master Administration Server are distributed to the slave servers automatically immediately after they are received, in the settings of the task of receiving updates by the Administration Server (see Figure 115 and Figure 118) check the Enforce updating of the slave servers box.
CHAPTER 10. WORKING WITH QUARANTINE In order to view the properties of a quarantined object: select the Quarantine node in the console tree, select the object you need in the results panel and use the Properties command from the shortcut menu or the analogous item in the Action menu.
Kaspersky Administration Kit Figure 121. Viewing properties of a quarantined object In order to remove an object from the quarantine: select the Quarantine node in the console tree, select the object you need in the results panel and use the Delete command from the shortcut menu or the analogous item in the Action menu. As the result, the anti-virus application that quarantined this object on the client computer will remove the object from the quarantine.
CHAPTER 11. EVENTS, REPORTS AND NOTIFICATIONS 11.1. Logging and viewing events and receiving notifications To view the Kaspersky Administration Kit event log stored on the Administration Server: Connect to the administration server (see section 2.1 on page 10), open the Events node in the console tree and select folder that corresponds to the level of importance you wish to view: Information messages, Critical messages, Functional failure, Warnings.
Kaspersky Administration Kit • Severity – Level of event importance • Host – Name of the client on which the event occurred • Group – Name of the group that includes this client • Application – Application that generated the event • Version – Application version • Event – Event name • Time – Time when the event was logged • Description – Event description. You can sort data in any column in either ascending or descending order or change the order of columns, add or remove columns.
Events, reports and notifications In order to customize a query: 1. Select the query you need in the console tree or in the results panel and use the Properties command from the shortcut menu or the analogous item in the Action menu. 2. This will open the query configuration window (see Figure 124), that contains tabs: General, Events, Computers and Time. On the General tab you can change the query name.
Kaspersky Administration Kit 9. If you would like to restrict the amount of information displayed after the filter is applied, check the Restrict the number of displayed events box and specify the maximum number of lines in the table. Figure 124. Configuring an events query. The Events tab Using the Computers tab (see Figure 125) define on which computers events and task execution results included into the query must be registered.
Events, reports and notifications 165 Figure 125. Configuring events query. The Computers tab Specify time for registration of events and task execution results on the Time tab (see Figure 131). You can select the following options: 3. • During a period and specify registered dates for the beginning and the end of the period. In order to do this, select Events for the date in the field groups From and Until and specify the exact date and time.
Kaspersky Administration Kit Figure 126. Configuring the events query. The Time tab In order to save information about the events to a file: 10. Select in the console tree the query that contains the events you need and use the All tasks/Export command in the shortcut menu or the analogous item in the Action menu. This will launch the wizard. 11. During the first step of the wizard, specify the path and name to the file to which the information will be saved.
Events, reports and notifications 167 To delete events satisfying certain criteria: Create and apply a query with the desired criteria. After this delete the events on the results panel using the Clear option on the shortcut menu. The application will only delete the events that satisfy query settings from the Events node. To view the Kaspersky Administration Kit event log information stored on the client computer: 1. Run the Administration Console on the client computer. 2.
Kaspersky Administration Kit Figure 127. The Local computer Properties dialog box. The Applications tab This will open a dialog box (see Figure 128) with a table of events generated by this application on the given client computer.
Events, reports and notifications 169 Figure 128. Viewing events stored on the administration server 11.2. Viewing and modifying report templates To view and/or modify a report template: Connect to the target administration server (see section 2.1 on page 10) and select the Reports node in the console tree. A list of existing report templates will be displayed in the details panel. Choose the required template and click Properties on the shortcut menu or on the Action menu.
Kaspersky Administration Kit • Summary fields – Allows you to determine the fields with summary data to be included in the reports and define the order of sorting entries in these reports. • Totals – Allows you to define a list of calculated (summarized) fields included in the report. • Target group – Serves to specify groups or computers from different groups for which the report is generated. Figure 129. The Report template properties dialog box.
Events, reports and notifications 171 11.3. Creating a report template To create a report template: 1. Choose the Reports node in the console tree and click the New command on the shortcut menu or on the Action menu to start a wizard. Follow the wizard’s instructions. 2. Specify the template name. If a template with this name already exists, the _1 ending will be automatically added to the new template name. 3. Choose the report type. The following steps will depend on your choice. 4.
Kaspersky Administration Kit 5. Specify objects for which you want to create the report (Figure 131). • I want to create a report for a group – Create a report for computers included in one group • I want to create report for a list of computers – Create a report for computers from different group If a report can only be created for the entire network, for example Licensing report, this step and the next one are omitted. Figure 131. Creating a report template. Selecting objects to be reported.
Events, reports and notifications 173 Figure 132. Creating a template for protection reports. Selecting clients After you finish working with the wizard, the new template will be added to the Reports node in the console tree and displayed in the details panel. The template can be used to create and view reports. 11.4. Generating and viewing reports To generate a report using a template: Connect to the target administration server and select the Reports node in the console tree.
Kaspersky Administration Kit • Summarized data (calculated, summarized report fields) • Graphical diagram displaying the general report data • Table with cumulative data • Table with detailed data Figure 133. Creating a template for protection reports. Selecting clients 11.5. Generating summary reports on slave Administration Servers To create such a report: Select the desired report template in the Reports node on the master Administration Server.
Events, reports and notifications • Include data on slave Administration Servers checkbox • Nesting level for Administration Servers according to their hierarchy (Nesting level field). Click Generate. As the result, the report will be displayed in your browser window. If some Administration Servers are information will be reflected in the report.
CHAPTER 12. MANAGING LICENSE KEYS 12.1. Viewing information about license keys In order to view information about installed license keys: connect to the Administration Server you need (see section 2.1, page 10) and select the License keys node in the console tree. After this the results panel will display the list of license keys installed on the client computers. The following information will be provided for each key: • Serial number – license key serial number.
Managing license keys • validity period; • restriction on the number of computers. Figure 134. License key . The General tab The Objects tab (see Figure 135) contains the list of client computers for which this key is installed. The list provides the following information: • client computer name; • administration group; • this key is used (or not used) as the current key • key expiration date; • date of the key activation on the client computers.
Kaspersky Administration Kit Figure 135. License key properties. The Objects tab Information about which license keys are installed for the application on the specific client computer can be viewed in the application properties configuration window. 12.2. Installing a new license key In order to install a new license key, create and launch a license key installation task. A license key installation task can be created as a group, global or a local task (see Chapter 7 on page 105).
Managing license keys the installation, check the Use as the current license key box. If the key will be installed as the backup key, the box should not be checked. The backup license key becomes current after the expiration of the current license key. More detailed information about the license key is provided in the License key details field. Figure 136. Creating a license extension task.
Kaspersky Administration Kit Figure 137. Modifying a license extension task. 12.3. Creating and viewing the license key report In order to create a report about the status of the license keys installed on the client computers of the logical network: use the in-built template License keys report or create a new template of the same type (see section 11.3 on page 171).
CHAPTER 13. BACKUP COPYING AND RESTORATION OF THE ADMINISTRATION SERVER DATA In order to create a backup copy of the Administration Server data: • create and launch a global task of data backup copying (see section 13.1 on page 181) using the Administration Console or • run the klbackup utility on the computer where the Administration Server is installed with the required set of modifiers from the command line (see section 13.2 on page 184).
Kaspersky Administration Kit Select Kaspersky Administration Kit as the application for which the task is created (see Figure 138), as the task type - select Backup data copying. Figure 138. Creating a backup data copying task.
Backup copying and restoration of the Administration Server data 183 You can restrict the number of backup copies - the maximum number of subfolder that can be simultaneously located in the backup storage. In order to do this check the Restrict the number of backup copies stored box and specify the required number of copies. If the imposed restriction has been met, the previous, older copy stored in the backup storage will be removed. Figure 139. Creating a backup copying task.
Kaspersky Administration Kit Figure 140. Configuring the backup copying task settings 13.2. Backup data copying utility In order to create a backup copy of the Administration Server data manually: start the klbackup utility on the computer where the Administration Server is installed, using the required number of modifiers from the command line.
Backup copying and restoration of the Administration Server data 185 The account of the database server and the klbackup utility must have right for modifying the BACKUP PATH folder. • -use_ts – when saving the data, copy information into the folder under the name that reflects the current date and time of the operation in format klbackup YYYY-MM-DD # HH-MM-SS nested into BACKUP_PATH folder. If no modifier is specified, information will be saved into the root of the BACKUP_PATH folder.
APPENDIX A. FREQUENTLY ASKED QUESTIONS This chapter is devoted to the most frequently asked questions from users pertaining to installation, setup and operation of the Kaspersky Anti-Virus; here we shall try to answer them here in detail. Question: Is this possible to use Kaspersky Anti-Virus with anti-virus software supplied by other manufacturers? In order to avoid conflicts we recommend that you uninstall ant-virus software of other manufacturers prior to installation of Kaspersky Anti-Virus.
Appendix A faster than the previous one. That is achieved through the use of new, exclusive technologies, such as iChecker™, developed at Kaspersky Lab. Using this technology, a file is checked for viruses only once during the initial scanning. During subsequent scans the file is not checked provided that it remains unchanged. Thus anti-virus performance increases drastically after the first file scan.
Kaspersky Administration Kit 5. Send the following data to the Technical support service (pack them in one archive before sending): • All Configuration files of your mail agent (MTA)’ • Mail system log file; • Anti-virus log file; • License key. 6. Make sure to specify in your mail if you have any of the following on your system: • SCSI controller; • A very old or very new brand of processor, or more than one processor; • Less than 64 MB or more than 2 GB of RAM. 7.
Appendix A 189 col. In this case, it is recommended to use any other proxy server. The updating service also cannot work through Microsoft ISA Server using FTP protocol. In this case, we recommend obtaining updates from the Kaspersky Lab servers using HTTP protocol.
APPENDIX B. GLOSSARY This documentation uses some specific terms related to anti-virus protection. Glossary is a list of definitions of these terms. The glossary entries are arranged in alphabetical order to facilitate using the glossary. A Available updates – Service Packs that contain urgent updates accumulated over time and latest changes in the application architecture. Administration group – Computers grouped in accordance with their functional and installed Kaspersky Lab applications.
Appendix B 191 B Block object – Prevent external applications from accessing an object. The blocked object cannot be read, executed, modified, or deleted. Backing up – Creating a backup of a file in the BACKUP folder before treating it (disinfection or deleting). This file can later be restored from its backup, for example, for subsequent scanning with the updated antivirus database. BACKUP folder – A directory that contains backups of deleted and disinfected objects.
Kaspersky Administration Kit database after you receive/send it. Such databases are scanned in the on-demand scanning mode. G Global task – A task defined for and running on a number of clients from different administration groups. Group Task – A task defined for and running on all clients in a group. Group policy – A set of application settings in an administration group managed through Kaspersky Administration Kit. Group policies can be different for each group.
Appendix B 193 Logical network operator – A user that monitors the system of anti-virus protection managed by Kaspersky Administration Kit. Local management – Management of an application through a local interface. Local task – A task created for and running on a single client. License period – A period during which you have the right to take advantage of the full functionality of Kaspersky Anti-Virus. As a rule, the license period defined by the license key is one year from the date of purchase.
Kaspersky Administration Kit Q Quarantining – A method of handling a suspicious object. Access to this object is blocked and the file is moved to the quarantine for further processing. Quarantine – A special storage that isolates infected and suspicious objects. R Real-time protection – A scanning mode in which an anti-virus application is memory resident. In the real-time protection mode, the application scans all objects when you open them for reading, writing, or executing.
Appendix B • Critical • Error • Warning • Info Events of the same kind can be of different severity levels, depending on a specific situation. Startup objects – A set of programs that are necessary for launching and smooth operation of the operating system and other software installed on your computer. Your operating system launches these objects during each startup. Some viruses attempt to infect the startup objects and can cause a startup failure.
APPENDIX C. KASPERSKY LAB Founded in 1997, Kaspersky Lab has become a recognized leader in information security technologies. It produces a wide range of data security software and delivers high-performance, comprehensive solutions to protect computers and networks against all types of malicious programs, unsolicited and unwanted email messages, and hacker attacks. Kaspersky Lab is an international company.
Appendix C 197 C.1. Other Kaspersky Lab Products Kaspersky Anti-Virus® Personal ® Kaspersky Anti-Virus Personal has been designed to provide anti-virus protection to personal computers running Windows 98/ME or Windows 2000/NT/XP against all known viruses, including potentially dangerous software. Kaspersky Anti-Virus Personal provides real-time monitoring of all sources of virus intrusion - e-mail, internet, CD, etc.
Kaspersky Administration Kit unknown viruses. Kaspersky Anti-Virus Personal includes many interface enhancements, making it easier than ever to use the program.
Appendix C Kaspersky® Personal Security Suite Kaspersky® Personal Security Suite is a program suite designed for organizing comprehensive protection of personal computers running Windows. The suite prevents malicious and potentially dangerous programs from penetrating through any possible data sources and protects you from unauthorized attempts to access your computer’s data, as well as blocking spam.
Kaspersky Administration Kit • E-mail clients, namely Microsoft Exchange Notes/Domino, Postfix, Exim, Sendmail, and Qmail; • Internet-gateways: CheckPoint Firewall –1; Microsoft ISA Server 2000 Standard Edition. 2000/2003, Lotus The Kaspersky Anti-Virus® Business Optimal distribution kit includes Kaspersky® Administration Kit, a unique tool for automated deployment and administration.
Appendix C 201 Kaspersky® Anti-Spam Kaspersky® Anti-Spam is a cutting-edge software suite that is designed to help organizations with small- and medium-sized networks wage war against the onslaught of undesired e-mail (spam). The product combines the revolutionary technology of linguistic analysis with modern methods of e-mail filtration, including RBL lists and formal letter features. Its unique combination of services allows users to identify and wipe out up to 95% of unwanted traffic.
Kaspersky Administration Kit Kaspersky Mail Gateway is a comprehensive solution that provides complete protection of the mail system users. This application installed between the corporate network and Internet scans all components of e-mail messages for the presence of viruses and other malware (Spyware, Adware, etc.) and performs centralized anti-spam filtration of the e-mail messages flow. This solution also includes some additional mail traffic filtration features. C.2.
APPENDIX D. LICENSE AGREEMENT NOTICE TO ALL USERS: CAREFULLY READ THE FOLLOWING LEGAL AGREEMENT (“AGREEMENT”) FOR THE LICENSE OF SPECIFIED SOFTWARE (“SOFTWARE”) PRODUCED BY KASPERSKY LAB. (“KASPERSKY LAB”). IF YOU HAVE PURCHASED THIS SOFTWARE VIA INTERNET BY CLICKING THE ACCEPT BUTTON, YOU (EITHER AN INDIVIDUAL OR A SINGLE LEGAL ENTITY) CONSENT TO BE BOUND BY AND BECOME A PARTY TO THIS AGREEMENT.
Kaspersky Administration Kit applies to all such specified Software applications, subject to any restrictions or usage terms specified on the applicable price list or application packaging that apply to any such Software applications individually. 1.1 Use. The Software is licensed as a single application; it may not be used on more than one Client Device or by more than one user at a time, except as set forth in this Section. 1.1.
Appendix D 205 accessing or using the Software. Use of software or hardware that reduces the number of Client Devices or seats directly accessing or utilizing the Software (e.g., “multiplexing” or “pooling” software or hardware) does not reduce the number of licenses required (i.e., the required number of licenses would equal the number of distinct inputs to the multiplexing or pooling software or hardware “front end”).
Kaspersky Administration Kit (ii) Support Services will terminate unless renewed annually by payment of the then-current annual support charge and by successful completion of the Support Services Subscription Form again. (iii) By completion of the Support Services Subscription Form you consent to the terms of the Kaspersky Lab Privacy Policy which is attached to this Agreement, and you explicitly consent to the transfer of data to other countries outside your own as set out in the Privacy Policy.
Appendix D 207 (iii) Kaspersky Lab does not warrant that this Software identifies all known viruses, nor that the Software will not occasionally erroneously report a virus in a title not infected by that virus; (iv) Your sole remedy and the entire liability of Kaspersky Lab for breach of the warranty at paragraph (i) will be at Kaspersky Lab option, to repair, replace or refund of the Software if reported to Kaspersky Lab or its designee during the warranty period.
Kaspersky Administration Kit (g) Loss of goodwill; (h) Loss of reputation; (i) Loss of, damage to or corruption of data, or; (j) Any indirect or consequential loss or damage howsoever caused (including, for the avoidance of doubt, where such loss or damage is of the type specified in paragraph (ii), (a) to (ii), (i).