
User Guide


Configuring Filtering Parameters 73
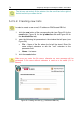
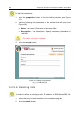
To save (accept) the changes made to the filtering rule:
Click the accept button in the Rule properties window (see Figure 11).
The rule edit window opens every time you finish working with a condition or an
action (when entering or editing is complete).
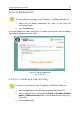
In order to reject all changes made to the filtering rule after it has been
opened for editing,
1. click the cancel button in the edit or condition/action addition
window.
2. click the cancel button in the rule edit window (see Figure 11).
Problem
Suppose you have made changes to a condition of the filtering
rule. What should be done to enable these changes to be used in the
message filtering process?
Solution
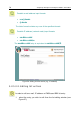
To save and enable the changes:
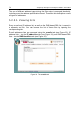
1. click the accept button in the Condition properties window (see
Figure 19) to accept the changes.
2. click the accept button in the Rule properties window (see
Figure 11) to accept the changes made to the filtering rule.
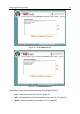
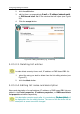
3. click the save button in the filter profile window (see Figure 7).
As a result, all changes in the filter configuration will be saved, Configuration
compiler will be launched, and the changes will be enabled.
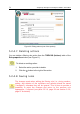
5.2.5. Working with lists. The
e-mails, ip addresses, dns blacklists
tabs
E-mail and IP addresses lists as well as DNS-based RBL lists are used in the
filtering rules (see para 5.2.1 - 5.2.4, pages 48 - 59) to set conditions related to a
group of addresses (rather than to a separate address) that should be processed
the same way. Sometimes this group may be very large, e.g., a list of e-mail
spam senders or mail servers from which spam arrives. This list may include
hundreds or even thousands of records.