
Operations and Maintenance Manual
_
JANUS
®
Multi-Protocol Reader Ver. 2: Appendix
Confidential UM 360450-210 Revision C Page 249 of 288
© Kapsch TrafficCom Canada Inc. 2014
These drawings and specifications contain confidential and proprietary information and are the property of Kapsch TrafficCom Canada Inc. and are issued in strict
confidence and will be kept confidential and used solely for the purpose intended and for no other purpose and shall not be transmitted, reproduced, copied, and/or
used as the basis for manufacture or sale of apparatus unless otherwise agreed to in writing by Kapsch TrafficCom Canada Inc.
FILE: UM 360450-210 REV C JANUS MPR2 OPERATOR-MAINTENANCE MANUAL.DOCX 08/17/2015 11:42
Kapsch TrafficCom
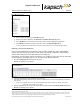
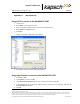
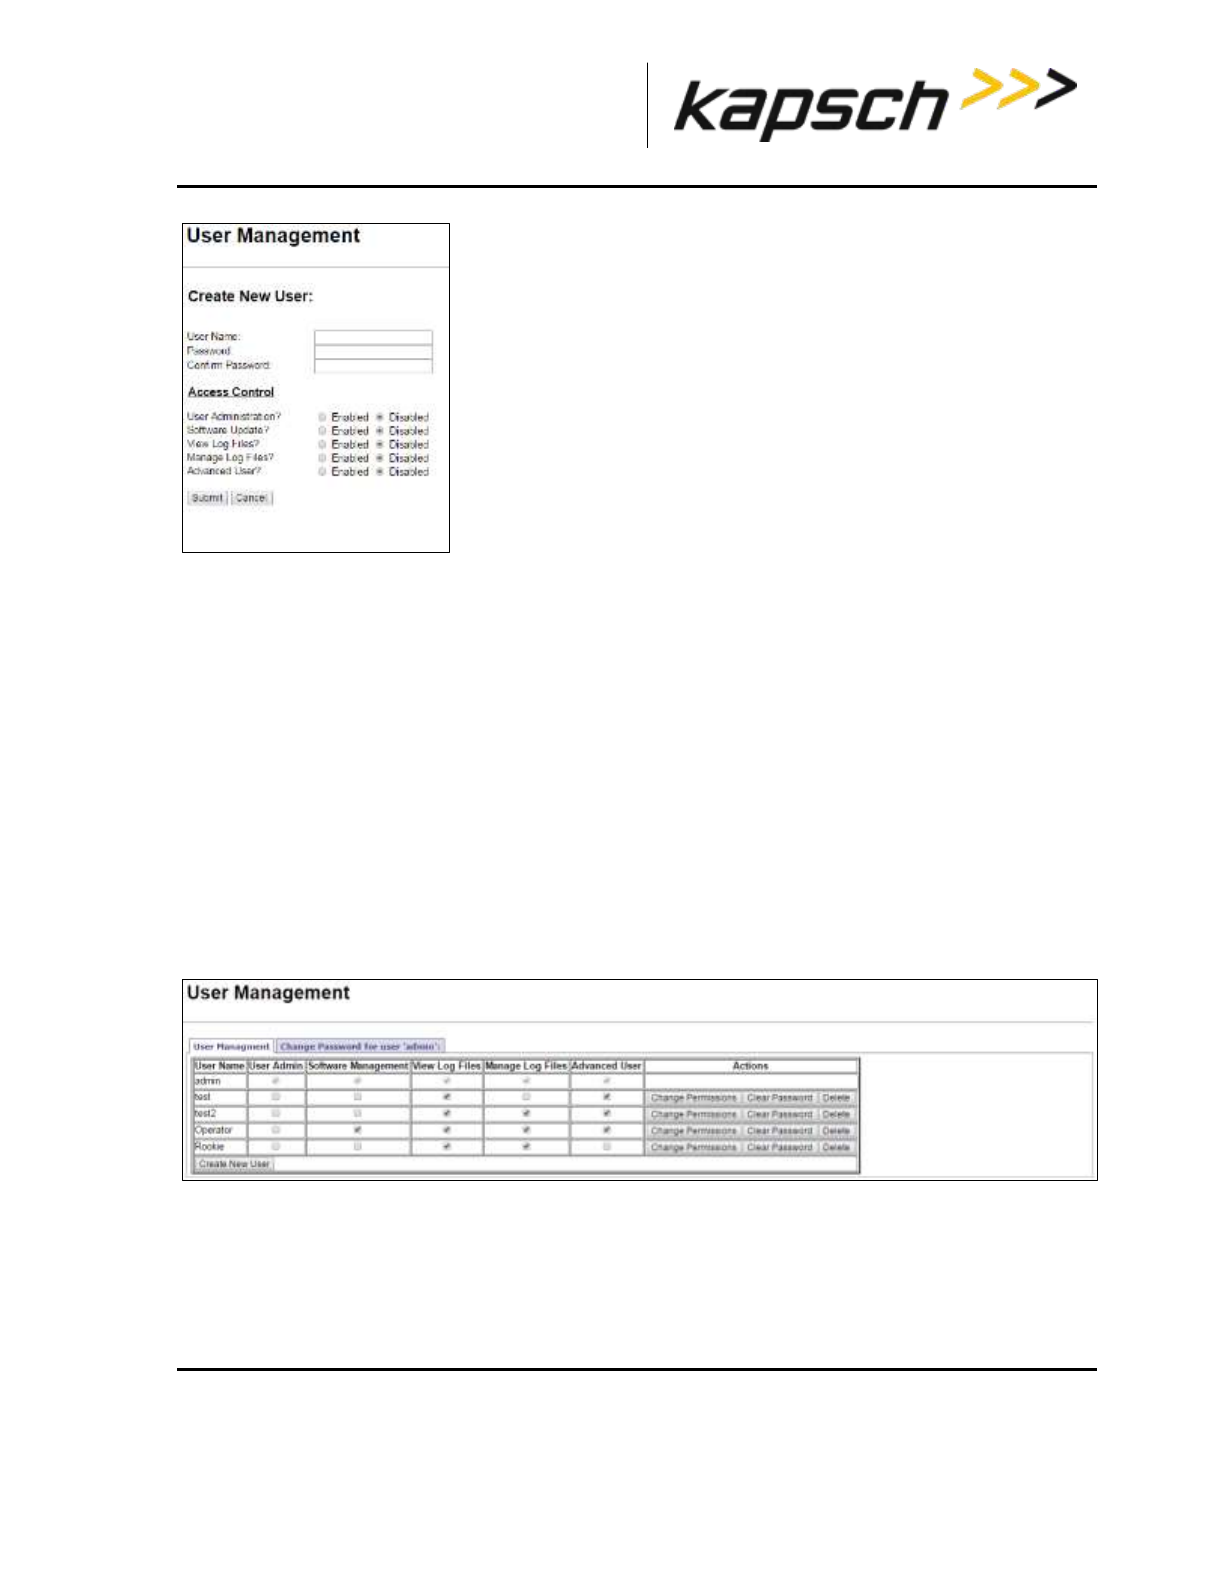
4. Enter a unique user name in the User Name text box.
5. Enter the new user’s password in the Password and Confirm Password text boxes.
6. Select Enabled for any of the five access areas to give the user the appropriate permissions.
7. Click Submit to create the new user account and return to the User Management tab.
Note: If you decide not to create the user at this time, click Cancel to return to the User Management tab
Changing a user’s access permissions
A user’s access permissions are set when the user account is created. As a user’s responsibilities
change, they may need access to more or fewer areas of the Reader configuration. This procedure
outlines how to change the access permissions of an existing user.
Prerequisites: A service laptop connected to Ethernet 1 or a USB port of the CTM. Refer to Connecting
a service laptop to the Reader, page 47. You must have User Admin permissions.
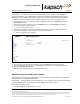
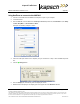
1. Click on the Manage Users link on the left side panel
Result: The following screen appears.
2. Identify the user whose access permissions need changing.
3. Select the corresponding check box to give access to a particular area; clear the corresponding check box to
deny access.
Note: If you navigate away from the User Management page before clicking the Change Permissions
button, the access changes are not saved.
4. After the appropriate access changes are made, click the user’s corresponding Change Permissions button.
Result: The following screen appears.