
Owners manual


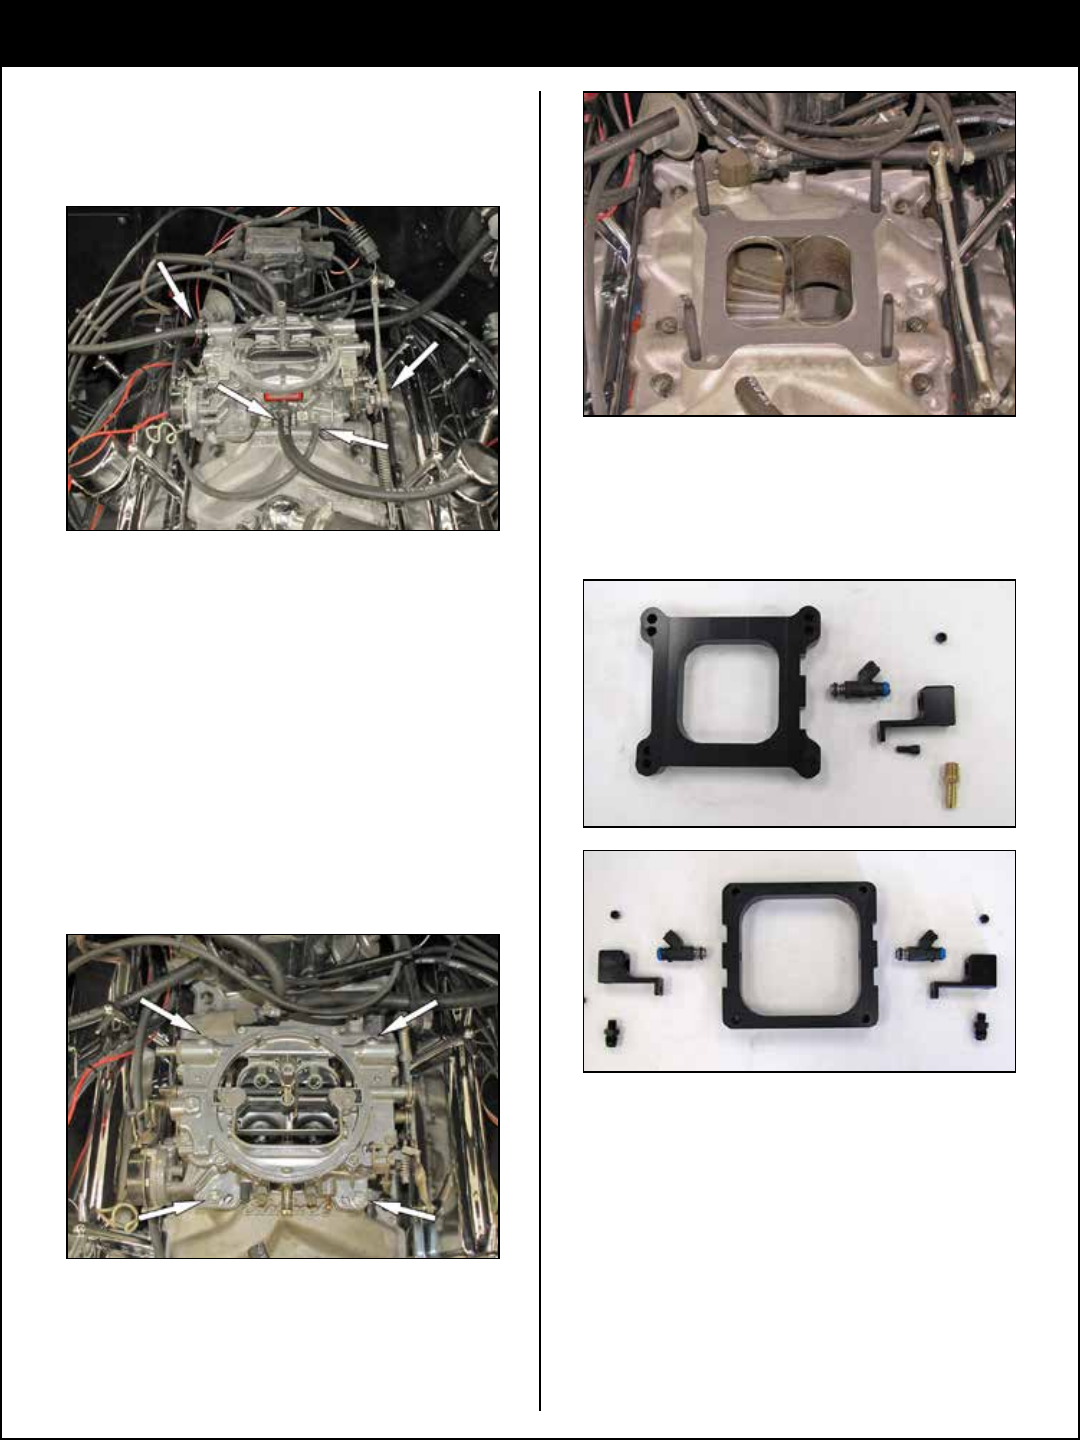
PLATE INSTALLATION
The following steps describe the proceedure for
the installation of the ECI plate and supporting
hardware. Specic layouts may vary on your
application.
1. Turn o the ignition and disconnect the negative
battery cable and remove the air lter assembly.
Label all the vacuum lines prior to disconnecting
for ease of reassembly, i.e. vacuum advance,
brake booster. Disconnect the throttle linkage, fuel
line, vacuum lines, electrical wiring etc. from the
carburetor. Be sure to capture any fuel that may
leak out of the fuel line. Pay close attention to any
lines that may be damaged, replace them at this
time.
WARNING: Use caution and proper safety
procedures when working on open fuel
systems. Be sure to work in a well-ventilated
area, gasoline vapor is extremely ammable
and may result in re or explosion if exposed to
spark or open ame.
2. Remove the bolts that secure the carburetor to
the intake manifold. Remove the carburetor and
gasket from the manifold.
3. Be sure that the mounting ange on top of the
manifold is clean and dry. Install the provided
extended carburetor studs and new base gasket
onto the manifold. Be careful that no debris falls
into the manifold as SEVERE engine damage may
result.
4. Assemble the ECI injector plate. The injector(s)
and fuel rail(S) can be installed two dierent ways
onto the injector plate. It is advisable to mock up
your installation on the engine to determine the
best position for your injector(s) and fuel line(s)
to be routed. Once you have determined the best
position for your situation, install the injector(s),
Fuel rail(s), fuel line tting(s) and plug(s) into the
injector plate.
NOTE: Be sure to apply a small amount of lube
to the injector O-rings and Teon
®
thread sealer
to all npt treads.
4