
Compact Component System Instruction Manual

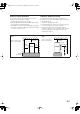

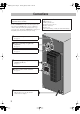
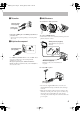
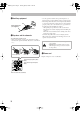
Table Of Contents
- Connections
- Display Indication
- Daily Operations—Playback
- Daily Operations—Sound & Other Adjustments
- Adjusting the Speaker Output Balance
- Reinforcing the Bass Sound
- Applying an Optimal Bass Sound Effect —VARIO BASS
- Selecting the Sound Modes
- Creating Your Own Sound Modes —User Mode
- Creating 3-Dimensional Sound Field—3D Phonic
- Presetting Automatic DVD Video Sound Increase Level
- Changingthe Picture Tone
- Changing the Display Brightness
- Setting the Clock
- Unique Video Disc/File Operations
- Advanced Playback Operations
- On-Screen Operations
- Recording Operations
- Enjoying Karaoke
- Timer Operations
- Setup Menu Operations
- Operating the TV
- Additional Information
- Parts Index
3
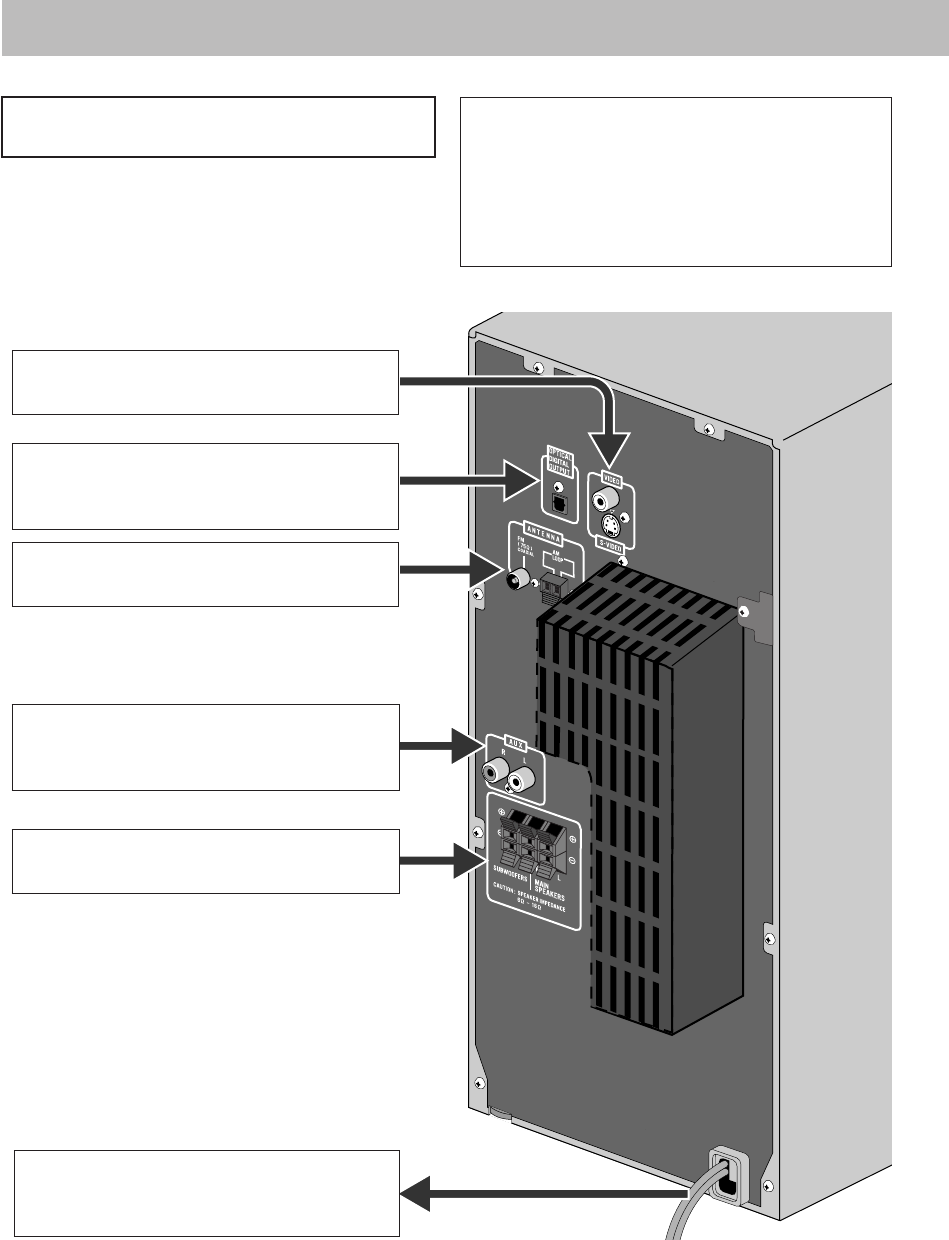
Connections
• Connect VIDEO OUT directly to the video input of your
TV. Connecting VIDEO OUT to a TV via a VCR may
interfere with your viewing when playing back a copy-
protected source. Connecting VIDEO OUT to an integrated
TV/VCR system may interfere with your viewing.
Do not connect the AC power cord until all other
connections have been made.
Supplied accessories
• FM antenna (x1)
• AM loop antenna (x1)
• Composite video cord (x1)
• Remote control (x1)
• Batteries (x2)
If any item is missing, consult your dealer immediately.
! From AM/FM antenna
See page 4.
Ÿ From the digital input of digital audio
component
See page 4.
~ From the video input of TV/monitor
See page 4.
@
From the speakers and the subwoofer
See page 5.
¤ To a wall outlet
Plug the AC power cord only after all
connections are complete.
⁄ From the analog audio output of auxiliary
equipment (VCR, etc.)
See page 5.
DX-J21[J].book Page 3 Tuesday, April 8, 2008 11:32 AM