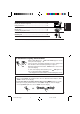
CD RECEIVER KD-LX50 ENGLISH RECEPTOR CON CD KD-LX50 ESPAÑOL RECEPTEUR CD KD-LX50 FRANÇAIS VCR /I SCM SEL 7 MONO 8 LOCAL 9 MODE S S M DISP ATT SOURCE BBE BAND INT 10 RPT 11 RND 12 OFF KD-LX50 For installation and connections, refer to the separate manual. Para la instalación y las conexiones, refiérase al manual separado. Pour l’installation et les raccordements, se référer au manuel séparé.
ENGLISH INFORMATION (For U.S.A.) This equipment has been tested and found to comply with the limits for a Class B digital device, pursuant to Part 15 of the FCC Rules. These limits are designed to provide reasonable protection against harmful interference in a residential installation. This equipment generates, uses, and can radiate radio frequency energy and, if not installed and used in accordance with the instructions, may cause harmful interference to radio communications.
ENGLISH WARNINGS • DO NOT install any unit in locations where; – it may obstruct the steering wheel and gearshift lever operations, as this may result in a traffic accident. – it may obstruct the operation of safety devices such as air bags, as this may result in a fatal accident. – it may obstruct visibility. • DO NOT operate any unit while manipulating the steering wheel, as this may result in a traffic accident.
ENGLISH Thank you for purchasing a JVC product. Please read all instructions carefully before operation, to ensure your complete understanding and to obtain the best possible performance from the unit. CONTENTS How to reset your unit .................................................................... 2 BASIC OPERATIONS .................................................... 6 RADIO OPERATIONS ................................................... 7 Listening to the radio ......................................
ENGLISH EXTERNAL COMPONENT OPERATIONS ..................... 53 Playing an external component ................................................... 53 Using a subwoofer ......................................................................... 53 CD CHANGER OPERATIONS ......................................54 Playing CDs ................................................................................... 54 Selecting CD playback modes ...................................................... 56 MAINTENANCE ........
BASIC OPERATIONS ENGLISH Notes: • When you use this unit for the first time, set the built-in clock correctly, see page 40. • To operate the v oice recognition system, see pages 22 to 39. 3 1 1 2 Turn on the power. The display illuminates and the control panel comes out. 2 Select the source. Each time you press the button, the source changes as follows: = Tuner (FM or AM) = CD* = CD changer** = External component = (back to the beginning) To operate the tuner, see pages 7 – 11.
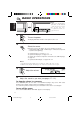
RADIO OPERATIONS ENGLISH Listening to the radio You can use either automatic searching or manual searching to tune into a particular station. Searching a station automatically: Auto search LOCAL 1 2 1 MODE 1- 1 1- 2 2 Select the band. 1 Press SOURCE (ATT) to select the tuner as the source. 2 Press BAND to select the band (FM1, FM2, FM3 or AM). Each time you press the button, the band changes as follows: FM1 FM2 FM3 AM Selected band appears. Note: This receiver has three FM bands (FM1, FM2, FM3).
ENGLISH Searching a station manually: Manual search MONO 1 MODE 1- 1 1- 2 2,3 2 1 Select the band. 1 Press SOURCE (ATT) to select the tuner as the source. 2 Press BAND to select the band (FM1, FM2, FM3 or AM). Note: This receiver has three FM bands (FM1, FM2, FM3). You can use any one of them to listen to an FM broadcast. 2 3 8 Press and hold ¢ or 4 starts flashing on the display.
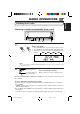
ENGLISH Storing stations in memory You can use one of the following two methods to store broadcasting stations in memory. • Automatic preset of FM stations: SSM (Strong-station Sequential Memory) • Manual preset of both FM and AM stations FM station automatic preset: SSM You can preset 6 local FM stations in each FM band (FM1, FM2 and FM3). 2 1- 1 1- 2 11 2 Select the FM band number (FM1, FM2 or FM3) you want to store FM stations into. 1 Press SOURCE (ATT) to select the tuner as the source.
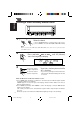
ENGLISH Manual preset You can preset up to 6 stations in each band (FM1, FM2, FM3 and AM) manually. EXAMPLE: Storing an FM station of 88.3 MHz into the preset number 1 of the FM1 band 3 1 2 1 1- 1 1- 2 2 Select the band. 1 Press SOURCE (ATT) to select the tuner as the source. 2 Press BAND to select the FM1 band. 2 Tune into a station of 88.3 MHz. See page 7 to tune into a station. 3 Press and hold the number button (in this example, 1) for more than 2 seconds.
You can easily tune into a preset station. Remember that you must store stations first. If you have not stored them yet, see pages 9 and 10. 2 1 2 1 ENGLISH Tuning into a preset station 1- 1 1- 2 2 Select the band. 1 Press SOURCE (ATT) to select the tuner as the source. 2 Press BAND to select the band (FM1, FM2, FM3 or AM). 2 Select the number (1 – 6) for the preset station you want. When using this unit in an area other than North or South America: You need to change the AM/FM channel intervals.
ENGLISH CD OPERATIONS Playing a CD ¢ 4 1 1 Open the loading slot. The display panel moves down, and the loading slot appears. 2 Insert a disc into the loading slot. The unit draws a CD, the display panel moves up, and CD play starts automatically. Total track number Total playing time of of the inserted disc the inserted disc Current track Elapsed playing time Notes: • When a CD is in the loading slot, selecting “CD” as the source by pressing SOURCE (ATT) starts CD play.
¢ 4 ENGLISH Locating a track or a particular portion on a CD Number buttons 4 (10) to 6 (12) Number buttons 1(7) to 3 (9) To fast-forward or reverse the track Press and hold ¢, while playing a CD, to fast-forward the track. Press and hold 4 , while playing a CD, to reverse the track. To go to the next tracks or the previous tracks Press ¢ briefly, while playing a CD, to go ahead to the beginning of the next track.
ENGLISH Selecting CD playback modes MODE INT RPT RND To play back tracks at random (Random Play) You can play back all tracks on the CD at random. 1 Press MODE while playing a CD. “MODE” appears on the lower part of the display, and the number buttons can work as different function buttons. 2 Press RND (Random), while “MODE” is still on the display, so that the RND indicator lights up on the display. Each time you press the button, CD random play mode turns on and off alternately.
You can play back the first 15 seconds of each track sequentially. 1 Press MODE while playing a CD. “MODE” appears on the lower part of the display, and the number buttons can work as different function buttons. 2 Press INT (Intro), while “MODE” is still on the display. Each time you press the button, CD intro scan mode turns on and off alternately. When the intro scan mode is turned on, “INTRO” appears on the display for 5 seconds and the track number flashes.
ENGLISH Playing a CD Text In a CD Text, some information about the disc (its disc title, performer and track title) is recorded. You can show these disc information on the display. DISP Select text display mode while playing a CD Text. Each time you press the button, the display changes as follows: Disc Title / Performer Track Title Current track no. and Elapsed playing time Notes: • The display shows up to 12 characters at one time and scrolls if there are more than 12 characters.
SOUND ADJUSTMENTS ENGLISH Adjusting the sound You can adjust the sound characteristics to your preference. 2 1 1 Select the item you want to adjust. Each time you press the button, the adjustable items change as follows: BAS TRE (bass) (treble) VOLUME Indication FADER WOOFER BALANCE To do: Range BAS Adjust the bass. –06 (min.) — +06 (max.) TRE Adjust the treble. –06 (min.) — +06 (max.) FADER* Adjust the front and rear speaker balance.
ENGLISH Turning on/off the BBEII function The BBEII* function restores the brilliance and clarity of the original live sound in recording, broadcasts, etc. When a speaker reproduces sound, it introduces frequency-dependent phase shifting, causing high-frequency sounds to take longer to reach the ear than low frequency sounds.
You can select and store a preset sound adjustment suitable for each playback source. (Advanced SCM) ENGLISH Using the Sound Control Memory Selecting and storing the sound modes Once you select a sound mode, it is stored in memory, and will be recalled every time you select the same source. A sound mode can be stored for each of the following sources — FM1, FM2, FM3, AM, CD and external components.
ENGLISH Recalling the sound modes SOURCE (ATT) Select the source while the “Link” indicator is lit on the display. The “Link” indicator starts flashing, and the sound mode stored in memory for the selected source is recalled (and appears on the display for a while). Notes: • You can adjust each sound mode to your preference, and store it in memory. If you want to adjust and store your original sound mode, see “Storing your own sound adjustments” on page 21.
You can adjust the sound modes (BEAT, SOFT, POP: see page 19) to your preference and store your own adjustments in memory. 3- 2 1 3- 1 2,4 1 ENGLISH Storing your own sound adjustments 3 Light “MODE” on the lower part of the display. The number buttons can work as different function buttons. REMEMBER you must finish the following steps while “MODE” is still on the display. Otherwise, the setting will be canceled. 2 Select the sound mode you want. For details, see page 19.
STOP ENGLISH PLAY VOICE COMMAND OPERATIONS What is Voice Recognition System? The Voice Recognition System enables the voice command operations — “Speak a word. It will be done.” This System allows you to operate the receiver by your spoken words with ease and safety. It has ended the risk of searching for push-buttons while you are on the road. JVC Voice Recognition System provides you two modes; Standard Word mode and User Word mode.
STOP Before using the voice commands Read carefully the following precautions. Before you start... • Make sure that the voice control unit, voice remote, and microphone are correctly connected. (Refer to the Installation/Connection Manual separately supplied.) • Set “VOICE/BEEP” to “VOICE,” and “VOICE LANG” to the language you understand (see page 39). This may make the voice command operations easy for you to follow.
STOP ENGLISH PLAY Operating the receiver in the Standard Word mode In the System, 13 preset Operation Commands have been preset when shipped from the factory. When you speak these 13 preset words (in English), the receiver operates as you command the receiver to do so. To use the preset voice commands without recording your own voice, make sure that “VOICE WORD” is set to “STANDARD” (initial setting). If not, set it correctly by following the steps described on pages 38 and 39.
STOP PLAY ENGLISH Basic Procedure 1,2 4 ATT/STR* Voice remote 1 * ATT stands for “attenuator,” and STR stands for “store.” Turn on the power. The display illuminates and the control panel comes out. 2 Activate the Voice Recognition System. “SPEAK” starts flashing on the display after the voice navigation “Please speak now” (or a beep). 3 Speak one of the Operation Commands (listed on page 24) to the microphone while “SPEAK” is flashing on the display.
STOP ENGLISH PLAY 4 Adjust the volume. To drop the volume in a moment Press ATT (STR) while listening to any source. “ATT” starts flashing on the display, and the volume level will drop in a moment. To resume the previous volume level, press the button again. Operating the receiver in the User Word mode In the User Word mode, you can use 13 preset Operation Commands and 12 Access Commands.
STOP PLAY ENGLISH Registering procedure EXAMPLE: Storing your own voice “Turn off” into Operation Command number 01 5,11 6 1,4 1 3 7 2 Voice remote Press and hold SEL (Select) for more than 2 seconds so that one of the PSM items appears on the display. (See page 44.) 2 Select “VOICE WORD.” 3 Set it to “USER.” • For more details, see page 39. 4 5 Finish the setting. Press and hold VOICE until Access Command (VOICE 14) appears on the display. TO BE CONTINUED ON THE NEXT PAGE 27 EN22-39.
STOP ENGLISH PLAY 6 Select the preset voice command number (VOICE 01). 7 Press STR (ATT) to make the System ready to record your voice. “SPEAK” starts flashing on the display after the voice navigation “Please speak now.” 8 Speak the word(s) you want to record while “SPEAK” is flashing on the display. (In this example, speak “Turn off.”) • If the System recognizes your word(s), “REPEAT” starts flashing on the display after the voice navigation “Please repeat.
STOP 9 Speak the same word(s) again while “REPEAT” is flashing on the display. (In this example, speak “Turn off.”) ENGLISH PLAY “CHECK” appears on the display while recording your voice. “OK” appears when recording is complete. “ ” on the display means that your own voice is recorded for this voice command. If the recording fails A beep sound comes out and the display goes back to the one shown in step 6.
STOP ENGLISH PLAY Presetting the Access Commands You can store the frequently-used operations into the Access Commands and register your voice to make the System execute the Access Commands. • You can store the following operations into the Access Commands; – Selecting the source (CD and External component). – Selecting the frequencies (FM and AM). – Selecting the CDs in the CD changer. Before you start... • Set “VOICE WORD” to “USER.” Without setting it to “USER,” you cannot preset the Access Commands.
STOP 2 Select the operation you want to store into the Access Command. (In this case, select “FM 89.5 MHz.”) ENGLISH PLAY If you want to memorize the sound mode at the same time Select the sound mode you want. (See page 19.) Note: Preset number cannot be stored but only its station frequency is stored in the user voice command. 3 Press and hold VOICE until Access Command (VOICE 14) appears on the display. 4 Press STR (ATT) to make the System ready to record your voice.
STOP ENGLISH PLAY 6 Speak the same word(s) again while “REPEAT” is flashing on the display. (In this example, speak “Jazz 89.”) “CHECK” appears on the display while recording your voice, “OK” appears when recording is complete. 7 Press and hold VOICE again to finish the recording. Note: If you want to show “JAZZ 89” on the display when you recall this station using the voice command, assign the name “JAZZ 89” to this station. See “Assigning names to the sources” on page 48.
STOP Registering procedure (Continued for the second Access Command by following the previous one) EXAMPLE: Storing an operation of “selecting disc number 01 in the CD changer,” and registering word “Classics” as your Access Command to that operation into Access Command number 15. ENGLISH PLAY 2,6 3 1 Voice remote Select the operation you want to store into the Access Command. (In this case, select “disc number 01 in the CD changer.
STOP ENGLISH PLAY 4 Speak the word(s) you want to record while “SPEAK” is flashing on the display. (In this example, speak “Classics.”) • If the System recognizes your word(s), “REPEAT” starts flashing on the display after the voice navigation “Please repeat.” • If the System does not recognize your word(s), it will ask you to speak again. In this case, speak the word(s) again. 5 Speak the same word(s) again while “REPEAT” is flashing on the display. (In this example, speak “Classics.
STOP To operate the system in the User Word mode Make sure to set “VOICE WORD” to “USER” by following steps 1 to 4 on page 27. Then follow the procedure below. 1 Press VOICE to turn on the receiver. 2 Press VOICE again to activate the Voice Recognition System. 3 Speak one of the Operation Commands or of the Access Commands you have stored to the microphone while “SPEAK” is flashing on the display. • For example, to use Access Command number 14, speak “Jazz 89” (which you have registered previously.
STOP ENGLISH PLAY To change the Access Command contents You can change the following command contents: – Registered word(s) (ex: disc name, frequency name) – Registered word(s) and operation (ex: disc number 01 of the CD changer = disc number 03 of the CD changer, CD changer = FM 89.5 MHz) If you want to change an Access Command contents, follow the procedure below. Be sure to select the source you want to store newly before you start.
STOP To erase the voice commands If you want to erase the Access Commands (VOICE 14 to VOICE 25) already stored, or if you want to erase the registered voice for the Operation Commands (VOICE 01 to VOICE 13), follow the procedure below. • An Operation Command cannot be erased but only the registered voice for it is erased. ENGLISH PLAY 1 Press and hold VOICE until one of the Access Commands appears on the display. 2 Press + or – until the voice command you want to delete appears on the display.
STOP ENGLISH PLAY Other convenient functions for the Voice Recognition System You can use the functions described on the next page for the Voice Recognition System. Basic Procedure 1,4 1 2 3 2 Press and hold SEL (Select) for more than 2 seconds so that one of the PSM items appears on the display. (See page 44.) Select the function you want to set or adjust — VOICE LANG, VOICE/BEEP, VOICE WORD, or VOICE VOL. 3 Set or adjust the selected function. 4 Finish the setting. 38 EN22-39.
STOP To select the voice navigation language — VOICE LANG When the voice control unit is connected to the receiver, you can select the language for the voice navigation in the voice command registration process. When this unit is shipped from the factory, “English” is selected. • English: English navigation will be heard while registering your voice commands into the system. • French: French navigation will be heard while registering your voice commands into the system.
ENGLISH OTHER MAIN FUNCTIONS Setting the clock 1,4 1 2 2,3 2,3 Press and hold SEL (Select) for more than 2 seconds so that one of the PSM items appears on the display. (See page 44.) 1 2 Set the hour. 1 Select “CLOCK HOUR” if not shown on the display. 2 Adjust the hour. 3 1 2 Set the minute. 1 Select “CLOCK MINUTE.” 2 Adjust the minute. 4 Finish the setting. To check the current clock time while the unit is turned off, press + or –.
You can select the proper cruise mode for your car. This unit changes the volume level automatically (at 3 possible levels) based on the driving speed of your car by detecting the alternator’s generating frequency (Audio Cruise). If you want to use this mode, follow the procedure below. When shipped from the factory, this mode is set to “CRUISE OFF.” • CRUISE 1: Select this if your car is relatively quiet. • CRUISE 2: Select this if your car is relatively loud.
ENGLISH When this function is turned on (the CRUISE indicator lights up on the display), the proper volume level is automatically selected among the 3 possible levels according to the driving speed, and the selected level is shown on the display. When the driving speed increases. When the driving speed decreases.
You can change the items listed on the next page by using the PSM (Preferred Setting Mode) control. ENGLISH Changing the general settings (PSM) Basic Procedure 1,4 1 2 3 2 Press and hold SEL (Select) for more than 2 seconds so that one of the PSM items appears on the display. Select the PSM item you want to adjust. (See page 44.) 3 Adjust the PSM item selected above. 4 Finish the setting. 43 EN40-50.KD-LX50[J]/f 43 00.3.
ENGLISH 3 2 1 Set. Factory-preset settings See page 1:00 40 Select. – CLOCK HOUR Hour adjustment Back Advance CLOCK MINUTE Minute adjustment Back Advance SCM LINK Sound control memory linkage SCM LINK OFF SCM LINK ON SCM LINK ON 45 CLOCK DISP Clock display CLK DISP OFF CLK DISP ON CLK DISP ON 45 LEVEL METER Level display DIMMER MODE Dimmer mode + 6 types (See page 45.
You can cancel the Advanced SCM (Sound Control Memory), and unlink the sound modes and the playback sources When shipped from the factory, a different sound mode can be stored in memory for each source so that you can change the sound modes simply by changing the sources.
ENGLISH To turn on/off the power amplifier switch — P. AMP SWITCH You can switch off the built-in amplifier and send the audio signals only to the external amplifier(s) to get clear sounds and to prevent internal heat buildup inside this unit. When shipped from the factory, the power amplifier switch is turned on so that the built-in amplifier works. • P. AMP ON: Select this mode when not using external amplifier(s). • P. AMP OFF: Select this mode when using external amplifier(s).
When this unit is shipped from the factory, the channel intervals are set to 10 kHz for AM and 200 kHz for FM (AREA US settings). You will have to change the channel intervals when using this unit in an area other than North America and South America. • AREA EU: Select this when using this unit in an area other than North and South America. (9 kHz for AM and 50 kHz (for manual tuning) / 100 kHz (for searching) for FM) • AREA US: Select this when using this unit in North or South America.
ENGLISH Assigning names to the sources You can assign names to station frequencies, CDs and the external component connected to the LINE IN plugs. After assigning a name, it will appear on the display when you select the source. Sources Station frequencies CDs * and CD changer * External component Maximum number of the characters up to 12 characters (up to 30 station frequencies including both FM and AM) up to 32 characters (up to 40 discs) up to 12 characters * You cannot assign a name to a CD Text.
Select the character set you want while “ ” is flashing. Each time you press the button, the character set changes as follows: Capital letter ( ) Small letter ( Numbers and symbols ( 4 ENGLISH 3 ) ) Select a character. About the available characters, see page 50. 5 6 Move the cursor to the next (or previous) character position. Repeat steps 3 to 5 until you finish inputting the name. 7 Press the button while the last selected character is flashing. The input name is stored in memory.
ENGLISH Available characters Capital letters A B C D E F G H I J K L M N O P Q R S T U V W X Y Z space Small letters a b c d e f g h i j k l m n o p q r s t u v w x y z space Numbers and symbols 0 1 2 3 4 5 6 7 8 9 ! ” # $ % & ’ ( ) + , – . / : ; < = * > ? @ _ ` space Notes: • When you try to assign a name to the 41st disc, “NAME FULL” appears on the display. (In this case, delete unwanted names before assignment.
Remote sensor Before using the remote controller: • Aim the remote controller directly at the remote sensor on the main unit. Make sure there is no obstacle in between. • Do not expose the remote sensor to strong light (direct sunlight or artificial lighting). ENGLISH REMOTE OPERATIONS Installing the battery When the controllable range or effectiveness of the remote controller decreases, replace the battery. 1. Remove the battery holder.
ENGLISH Using the remote controller 1 1 • Turns on the unit if pressed briefly. • Turns off the unit if pressed and held until “SEE YOU” appears on the display. • Drops the volume level for a moment if pressed briefly. Press again to resume the volume. 2 • Functions as the BAND button while listening to the radio. Each time you press the button, the band changes. • Functions as the DISC + button while listening to the CD changer.
Playing an external component When connecting an external component such as a VCR (KZ-V10) to the LINE IN plugs on the rear, you can select the component as the sound source. You can also connect the TV to this unit. 2 1 1 ENGLISH EXTERNAL COMPONENT OPERATIONS 2 Select the external component. Each time you press the button, the source changes as described on page 6. 2 Operate the external component.
ENGLISH CD CHANGER OPERATIONS We recommend that you use one of the CH-X series (ex: CH-X1200) with your unit. If you have another CD automatic changer, consult your JVC car audio dealer for connections. • For example, if your CD automatic changer is one of the KD-MK series, you need a cord (KS-U15K) for connecting it to this unit. Before operating your CD automatic changer: • Refer also to the Instructions supplied with your CD changer.
Press and hold ¢, while playing a CD, to fast-forward the track. Press and hold 4 , while playing a CD, to reverse the track. ENGLISH To fast-forward or reverse the track To go to the next tracks or the previous tracks Press ¢ briefly, while playing a CD, to go ahead to the beginning of the next track. Each time you press the button consecutively, the beginning of the next tracks is located and played back. Press 4 briefly, while playing a CD, to go back to the beginning of the current track.
ENGLISH Selecting CD playback modes MODE INT RPT RND To play back tracks at random (Random Play) 1 Press MODE while playing a CD. “MODE” appears on the lower part of the display, and the number buttons can work as different function buttons. 2 Press RND (Random), while “MODE” is still on the display, so that the RND indicator lights up on the display.
1 Press MODE while playing a CD. “MODE” appears on the lower part of the display, and the number buttons can work as different function buttons. 2 Press INT (Intro), while “MODE” is still on the display. Each time you press the button, CD intro scan mode changes as follows: ENGLISH To play back only intros (Intro Scan) INTRO 1 INTRO 2 Canceled Mode Indication Plays the beginnings (15 seconds) INTRO 1 Track number flashes Of all tracks on all inserted discs.
ENGLISH MAINTENANCE Handling CDs COMPACT This unit has been designed only to reproduce the CDs bearing the Other discs cannot be played back. and marks. DIGITAL AUDIO How to handle CDs When removing a CD from its case, press down the center holder of the case and lift the CD out, holding it by the edges. • Always hold the CD by the edges. Do not touch its recording surface.
What appears to be trouble is not always serious. Check the following points before calling a service centre. Symptoms Causes Remedies • CD cannot be played back. CD is inserted upside down. Insert the CD correctly. • CD sound is sometimes interrupted. You are driving on rough roads. Stop CD play while driving on rough roads. CD is scratched. Change the CD. Connections are incorrect. Check the cords and connections. The volume level is set to the minimum level. Adjust it to the optimum level.
ENGLISH Symptoms Causes • Your voice commands (either Operation or Access Commands) do not operate the receiver. Remedies Microphone is not connected. Connect it correctly. Voice control unit is not connected. Connect it correctly. Your voice does not reach the microphone. Attach the microphone to the place indicated in the Installation/Connection manual (separate volume). • You cannot use all Operation Commands. “USER” is selected for “VOICE WORD.
AUDIO AMPLIFIER SECTION Maximum Power Output: Front: 45 W per channel Rear: 45 W per channel Continuous Power Output (RMS): Front: 17 W per channel into 4 Ω, 40 Hz to 20,000 Hz at no more than 0.8 % total harmonic distortion. Rear: 17 W per channel into 4 Ω, 40 Hz to 20,000 Hz at no more than 0.8 % total harmonic distortion.
ESPAÑOL IMPORTANTE (EE.UU.) Este equipo se ha sometido a todo tipo de pruebas y cumple con las normas establecidas para dispositivos de Clase B, de conformidad con la Parte 15 de las reglas de la FCC (Comisión Federal de Comunicaciones). Estas reglas están diseñadas para asegurar una protección razonable contra este tipo de interferencias en las instalaciones residenciales. Este equipo genera y utiliza energía de radiofrecuencia.
ADVERTENCIAS ESPAÑOL • NO instale la unidad en los siguientes sitios: – Donde pueda obstruir la maniobra del volante de dirección y del cambio de engranajes, con el consiguiente riesgo de accidentes de tráfico. – Donde pueda obstruir el funcionamiento de dispositivos de seguridad tales como bolsas de aire, pues podría resultar en un accidente fatal. – Donde pueda obstruir la visibilidad. • NO OPERE la unidad mientras está maniobrando el volante de dirección, pues podría producirse un accidente de tráfico.
Muchas gracias por la compra de un producto JVC. Como primer paso, por favor lea detenidamente este manual para comprender a fondo todas las instrucciones y obtener un máximo disfrute de esta unidad. INDICE ESPAÑOL Cómo reposicionar su unidad ........................................................ 2 OPERACIONES BASICAS .............................................. 6 OPERACIONES DE LA RADIO .......................................7 Para escuchar la radio ..................................................
OPERACIONES DE LOS COMPONENTES EXTERIORES .. 53 Reproducción de un componente exterior ................................. 53 Uso de un subwoofer .................................................................... 53 ESPAÑOL OPERACION DEL CAMBIADOR DE CD ........................ 54 Reproducción de los discos compactos ....................................... 54 Selección de los modos de reproducción de CD ......................... 56 MANTENIMIENTO .....................................................
ESPAÑOL OPERACIONES BASICAS 3 1 1 2 Notas: • Cuando utilice esta unidad por primera vez, ponga el reloj incorporado en hora; consulte la página 40. • Para utilizar el sistema de reconocimiento de voz, consulte las páginas 22 a 39. Encienda la unidad. La indicación se ilumina y el panel de control sale. 2 Reproduzca la fuente.
OPERACIONES DE LA RADIO Para escuchar la radio Podrá sintonizar una determinada emisora mediante búsqueda automática o búsqueda manual. LOCAL MODE 11 2 1- 1 1- 2 ESPAÑOL Para buscar una emisora automáticamente: Búsqueda automática 2 Seleccione la banda. 1 Pulse SOURCE (ATT) para seleccionar el sintonizador como fuente. 2 Pulse BAND para seleccionar la banda (FM1, FM2, FM3 o AM). Cada vez que pulsa el botón, la banda cambia tal como se indica: FM1 FM2 FM3 AM Aparece la banda seleccionada.
ESPAÑOL Para buscar una emisora manualmente: Búsqueda manual MONO 1 1 MODE 1- 1 1- 2 2,3 2 Seleccione la banda. 1 Pulse SOURCE (ATT) para seleccionar el sintonizador como fuente. 2 Pulse BAND para seleccionar la banda (FM1, FM2, FM3 o AM). Nota: Este receptor tiene tres bandas FM (FM1, FM2, FM3). Podrá usar cualquiera de ellas para escuchar un radiodifusión en FM. 2 3 Pulse y mantenga pulsado ¢ o 4 hasta que “M” (Manual) comience a destellar en la indicación.
Cómo almacenar emisoras en la memoria ESPAÑOL Las emisoras podrán almacenarse en la memoria mediante uno de los dos métodos siguientes. • Preajuste automático de emisoras FM: SSM (Memoria secuencia de las emisoras más fuertes) • Preajuste manual de ambas emisoras FM y AM Preajuste automático de emisoras FM: SSM Pueden preajustarse 6 emisoras FM locales en cada banda FM (FM1, FM2 y FM3). 2 1- 1 1- 2 11 2 Seleccione el número de banda FM (FM1, FM2 o FM3) en que desea almacenar las emisoras FM.
Preajuste manual ESPAÑOL Podrá preajustar manualmente hasta 6 emisoras en cada banda (FM1, FM2, FM3 y AM). EJEMPLO: Almacenamiento de una emisora FM de 88,3 MHz en el número de preajuste 1 de la banda FM1 3 11 2 1- 1 1- 2 2 Seleccione la banda. 1 Pulse SOURCE (ATT) para seleccionar el sintonizador como fuente. 2 Pulse BAND para seleccionar la banda FM1. 2 Sintonice la emisora de 88,3 MHz. Para sintonizar una emisora, consulte la página 7.
Cómo sintonizar una emisora preajustada ESPAÑOL Las emisoras preajustadas pueden sintonizarse fácilmente. Tenga presente que primero deberá almacenar las emisoras. Si todavía no lo ha hecho, consulte las páginas 9 y 10. 2 1 1 2 1- 1 1- 2 2 Seleccione la banda. 1 Pulse SOURCE (ATT) para seleccionar el sintonizador como fuente. 2 Pulse BAND para seleccionar la banda (FM1, FM2, FM3 o AM). 2 Seleccione el número (1 – 6) en que desea preajustar la emisora.
OPERACION DEL REPRODUCTOR DE CD Para reproducir un CD ESPAÑOL ¢ 4 1 1 Abra el panel de control. El panel indicador se mueve hacia abajo, y aparece la ranura de carga. 2 Inserte un disco en la ranura de carga. La unidad introduce el CD, el panel indicador se mueve hacia arriba, y el CD comienza a reproducirse automáticamente.
¢ 4 Botones numéricos 1 (7) a 3 (9) Botones numéricos 4 (10) a 6 (12) ESPAÑOL Cómo encontrar una pista o un punto determinado de un CD Para avanzar o retroceder rápidamente la pista Pulse y mantenga pulsado ¢ mientras se está reproduciendo un CD para avanzar rápidamente la pista. Pulse y mantenga pulsado 4 mientras se está reproduciendo un CD para hacer retroceder rápidamente la pista.
ESPAÑOL Cómo seleccionar los modos de reproducción del CD MODE INT RPT RND Para reproducir las pistas de forma aleatoria (Reproducción aleatoria) Podrá reproducir todas las pistas del CD de forma aleatoria. 1 Pulse MODE mientras se está reproduciendo un CD. Aparece “MODE” en la parte inferior de la indicación, y los botones numéricos quedan activados como botones de diferentes funciones.
Para reproducir sólo las introducciones musicales (Búsqueda de introducción) 1 Pulse MODE mientras se está reproduciendo un CD. Aparece “MODE” en la parte inferior de la indicación, y los botones numéricos quedan activados como botones de diferentes funciones. 2 Pulse INT (Intro) mientras “MODE” continúa visualizándose en la indicación. Cada vez que pulsa el botón, el modo de búsqueda de introducción de CD se activa y desactiva alternativamente.
Reproducción del CD Text ESPAÑOL En el CD Text, se ha grabado cierta información relacionada con el disco (el título del disco, su ejecutante y título de pista). Podrá visualizar esta información del disco en la indicación. DISP Seleccione el modo de indicación de texto mientras reproduce un CD Text. Cada vez que usted pulsa el botón, la indicación cambia de la manera siguiente: Título disco / Ejecutante Título de Pista Disc del Title / Performer Track Title Current track no.
AJUSTES DEL SONIDO Ajuste del sonido 2 1 ESPAÑOL Usted puede ajustar las características de sonido a su preferencia. 1 Seleccione el ítem que desea ajustar. Cada vez que pulsa el botón, los ítems ajustables cambian de la siguiente manera: Indicación BAS TRE (bass) (graves) (treble) (agudos) VOLUME WOOFER Para: FADER BALANCE Gama BAS Ajustar los graves. –06 (mín.) — +06 (máx.) TRE Ajustar los agudos. –06 (mín.) — +06 (máx.
ESPAÑOL Activado/desactivado de la función BBEII La función BBEII* restablece la brillantez y la claridad del sonido original durante la grabación, radiodifusión, etc. Al reproducirse el sonido, el altavoz introduce el desplazamiento de fase dependiente de la frecuencia, haciendo que los sonidos de alta frecuencia tarden más que los sonidos de baja frecuencia en llegar al oído.
Utilización de la memoria de control de sonido Selección y almacenamiento de los modos de sonido Una vez que seleccione un modo de sonido, será almacenado en la memoria y llamado cada vez que seleccione la misma fuente. El modo de sonido se puede almacenar para cada una de las siguientes fuentes — FM1, FM2, FM3, AM, CD y componentes exteriores.
ESPAÑOL Llamada de los modos de sonido SOURCE (ATT) Seleccione la fuente mientras el indicador “Link” se encuentre encendido en la pantalla. El indicador “Link” comienza a destellar y se llama el modo de sonido almacenado en la memoria para la fuente que se ha seleccionado (y aparece en la indicación durante unos instantes). Notas: • Podrá ajustar el sonido preajustado para adaptarlo a su gusto y almacenarlo en la memoria.
Cómo almacenar sus propios ajustes de sonido ESPAÑOL Usted podrá ajustar los modos de sonido (BEAT, SOFT, POP: consulte la página 19) a su gusto y almacenar sus propios ajustes en la memoria. 3- 2 1 3- 1 2,4 1 3 Haga que “MODE” se encienda en la indicación. Los botones numéricos quedan activados como botones de diferentes funciones. RECUERDE que deberá terminar de realizar los pasos siguientes mientras “MODE” continúa visualizándose en la indicación. De lo contrario, se cancelará el ajuste.
OPERACIONES DE LOS COMANDOS DE VOZ STOP PLAY ESPAÑOL ¿Qué es un sistema de reconocimiento de voz? El sistema de reconocimiento de voz permite realizar operaciones de comando de voz: “Diga la palabra. Será ejecutada”. Este sistema le permite accionar el receptor mediante palabras, con seguridad y facilidad. Esto evita el peligro de tener que andar buscando botones mientras conduce. El sistema de reconocimiento de voz de JVC proporciona dos modos, modo de palabras estándar y modo de palabras del usuario.
STOP PLAY Antes de usar los comandos de voz Antes de empezar... • Asegúrese de que el controlador de voz, el telemando por voz, y el micrófono estén correctamente conectados. (Consulte el manual de instalación/conexiones suministrado separadamente). • Ajuste “VOICE/BEEP” a “VOICE”, y “VOICE LANG” a su idioma (consulte la página 39). Esto podrá facilitar la realización de las siguientes operaciones. ESPAÑOL Lea atentamente las precauciones siguientes.
STOP PLAY Operación del receptor en el modo de palabras estándar ESPAÑOL El sistema se expide de fábrica con 13 comandos de voz preestablecidos. (Para la pronunciación de estos términos en inglés, consulte también la página 28). Cuando usted pronuncia estas 13 palabras preestablecidas (en inglés), el receptor funcionará según la orden que le haya dado. Para utilizar los comandos de voz preestablecidos sin grabar su propia voz, asegúrese de que “VOICE WORD” esté ajustado a “STANDARD” (ajuste inicial).
STOP PLAY Procedimiento básico 4 ATT/STR* Telemando por voz 1 * Att significa “attenuator” (atenuador) y STR significa “store” (almacenar). ESPAÑOL 1,2 Conecte la alimentación. La indicación se ilumina y el panel de control sale. 2 Active el sistema de reconocimiento de voz. “SPEAK” comienza a parpadear en la indicación después de la navegación vocal “Please speak now” (o un pitido).
STOP PLAY ESPAÑOL 4 Ajuste el volumen. Para disminuir el volumen al instante Pulse ATT (STR) mientras está escuchando alguna fuente. “ATT” comienza a destellar en la indicación, y el nivel de volumen disminuye al instante. Para restablecer el nivel de volumen anterior, pulse el botón otra vez. Operación del receptor en el modo de palabras del usuario En el modo de palabras del usuario se pueden utilizar 13 comandos de operación preestablecidos y 12 comandos de acceso.
STOP PLAY Procedimiento de registro EJEMPLO: Almacenando “Apagar” con su propia voz en el comando de operación número 01. ESPAÑOL 5,11 6 1,4 1 3 7 2 Telemando por voz Pulse y mantenga pulsado SEL (Seleccionar) durante más de 2 segundos hasta que aparezca uno de los ítems de PSM en la indicación. (Consulte la página 44). 2 Seleccione “VOICE WORD”. 3 Ajústelo a “USER”. • Para más información, consulte la página 39. 4 5 Finalice el ajuste.
STOP PLAY ESPAÑOL 6 Seleccione el número del comando de voz preestablecido (VOICE 01). 7 Pulse STR (ATT) de manera que el sistema quede preparado para registrar su voz. “SPEAK” comienza a parpadear en la indicación después de la navegación vocal “Please speak now”. 8 Diga la(s) palabra(s) que desea grabar mientras “SPEAK” se encuentra parpadeando en la indicación. (En este ejemplo, diga “Apagar”).
STOP PLAY Diga la(s) misma(s) palabra(s) otra vez mientras “REPEAT” está parpadeando en la indicación. (En este ejemplo, diga “Apagar”). Aparece “CHECK” en la indicación mientras graba su voz. ESPAÑOL 9 Aparece “OK” al finalizar la grabación. El símbolo “ ” en la indicación significa que su propia voz ha sido grabada para este comando de voz. Si la grabación falla Suena un pitido y vuelve a aparecer la indicación mostrada en el paso 6.
STOP PLAY ESPAÑOL Preajuste de los comandos de acceso Usted puede almacenar las operaciones utilizadas con mayor frecuencia en los comandos de acceso y registrar su voz para que el sistema los ejecute. • En los comandos de acceso se pueden almacenar las siguientes operaciones: – Selección de la fuente (CD y componente externo). – Selección de las frecuencias (FM y AM). – Selección de los CDs del cambiador de CD. Antes de empezar... • Ajuste “VOICE WORD” a “USER”.
STOP PLAY Seleccione la operación que desea almacenar en el comando de acceso. (En este caso, seleccione “FM 89,5 MHz”). Si desea memorizar el modo de sonido al mismo tiempo Seleccione el modo de sonido deseado. (Consulte la página 19). Nota: El número de preajuste no puede ser almacenado; sólo se almacena la frecuencia de su emisora en el comando de voz del usuario. 3 ESPAÑOL 2 Pulse y mantenga pulsado VOICE hasta que aparezca el comando de acceso (VOICE 14) en la indicación.
STOP PLAY Diga la(s) misma(s) palabra(s) otra vez mientras “REPEAT” está parpadeando en la indicación. (En este ejemplo, diga “Jazz 89”). ESPAÑOL 6 Aparece “CHECK” en la indicación mientras graba su voz. Aparece “OK” al finalizar la grabación. 7 Pulse y mantenga pulsado VOICE otra vez para finalizar la grabación. Nota: Si desea que en la indicación se visualice “JAZZ 89” al llamar esta emisora con el comando de voz, asigne el nombre “JAZZ 89” a esta emisora.
STOP PLAY EJEMPLO: Almacenar la operación de “seleccionar el número de disco 01 en el cambiador de CD” y registrar la palabra “Clásica” como comando de acceso a tal operación en el comando de acceso número 15. 2,6 3 1 ESPAÑOL Procedimiento de registro (Continuación para el segundo comando de acceso después del anterior) Telemando por voz Seleccione la operación que desea almacenar en el comando de acceso. (En este caso, seleccione “número de disco 01 en el cambiador de CD”).
STOP PLAY ESPAÑOL 4 Diga la(s) palabra(s) que desea grabar mientras “SPEAK” se encuentra parpadeando en la indicación. (En este ejemplo, diga “Clásica”). • Si el sistema reconoce su(s) palabra(s), “REPEAT” empieza a parpadear en la indicación después de la navegación vocal “Please repeat”. • Si el sistema no consigue reconocer su(s) palabra(s), le pedirá que hable otra vez. En tal caso, diga la(s) palabra(s) otra vez.
STOP PLAY Para operar el sistema en el modo de palabras del usuario 1 Pulse VOICE para encender el receptor. 2 Pulse VOICE otra vez para activar el sistema de reconocimiento de voz. 3 Mientras parpadea “SPEAK” en la indicación, diga ante el micrófono uno de los comandos de operación o de los comandos de acceso que tiene almacenados. • Por ejemplo, para usar el comando de acceso número 14, diga “Jazz 89” (registrado previamente por usted). 4 Pulse + o – para ajustar el volumen.
STOP PLAY ESPAÑOL Para cambiar los contenidos de los comandos de acceso Si lo desea, podrá cambiar los contenidos de los comandos siguientes: – Palabra(s) registrada(s) (por ej.: nombre del disco, nombre de frecuencia) – Palabra(s) registrada(s) y operación (por ej.: número de disco 01 del cambiador de CD = número de disco 03 del cambiador de CD, cambiador de CD = FM 89,5 MHz). Si desea cambiar los contenidos de un comando de acceso, siga el procedimiento de abajo.
STOP PLAY Para borrar los comandos de voz 1 Pulse y mantenga pulsado VOICE hasta que uno de los comandos de acceso aparezca en la indicación. 2 Pulse + o – hasta que el comando de voz que desea borrar aparezca en la indicación. (En este ejemplo, seleccione el comando de acceso número 15). ESPAÑOL Si desea borrar los comandos de acceso (VOICE 14 a VOICE 25) ya almacenados, o si desea borrar la voz registrada para los comandos de operación (VOICE 01 a VOICE 13), siga el procedimiento descrito abajo.
STOP PLAY Otras funciones convenientes para el sistema de reconocimiento de voz ESPAÑOL Se pueden usar las funciones descritas en la página siguiente para el sistema de reconocimiento de voz. Procedimiento básico 1,4 1 2 3 2 Pulse y mantenga pulsado SEL (Seleccionar) durante más de 2 segundos hasta que uno de los ítems de PSM aparezca en la indicación. (Consulte la página 44). Seleccione la función que desea definir o ajustar: VOICE LANG, VOICE/BEEP, VOICE WORD, o VOICE VOL.
STOP Para seleccionar el idioma de la navegación vocal — VOICE LANG Cuando el controlador de voz está conectada al receptor, usted podrá seleccionar el idioma para la navegación vocal en el proceso de registro de comandos de voz. La unidad se expide de fábrica con la opción “English” seleccionada. • English: Se escuchará la navegación en inglés mientras se registran sus comandos de voz en la memoria. • French: Se escuchará la navegación en francés mientras se registran sus comandos de voz en la memoria.
OTRAS FUNCIONES PRINCIPALES ESPAÑOL Ajuste del reloj 1,4 1 2 2,3 2,3 Pulse y mantenga pulsado SEL (Selección) durante más de 2 segundos para que aparezca uno de los ítemes de PSM en la indicación. (Consulte la página 44). 1 2 Ajuste la hora. 1 Seleccione “CLOCK HOUR” si no está visualizado en la indicación. 2 Ajuste la hora. 3 1 2 Ajuste los minutos. 1 Seleccione “CLOCK MINUTE”. 2 Ajuste los minutos. 4 Finalice el ajuste.
Podrá seleccionar el modo de crucero de audio apropiado para su automóvil. Esta unidad cambia automáticamente el nivel de volumen (a 3 niveles posibles) de acuerdo con la velocidad de su automóvil, detectando la frecuencia generada por el alternador (Crucero de audio). Si desea utilizar este modo, realice el procedimiento de abajo. La unidad se expide de fábrica con este modo ajustado a “CRUISE OFF”. • CRUISE 1: Selecciónelo si hay poco ruido en su automóvil.
Cuando está activada esta función (el indicador CRUISE se enciende en la indicación), se seleccionará automáticamente el nivel de volumen apropiado entre los 3 niveles posibles de acuerdo con la velocidad de conducción, y se mostrará el nivel seleccionado en la indicación. ESPAÑOL Cuando aumenta la velocidad de conducción. Cuando disminuye la velocidad de conducción.
Cambio de los ajustes generales (PSM) Podrá cambiar los ítemes listados en la página siguiente utilizando el control PSM (Modo de ajuste preferido). 1,4 1 2 3 4 ESPAÑOL Procedimiento básico 3 2 Pulse y mantenga pulsado SEL (Selección) durante más de 2 segundos para que aparezca uno de los ítemes de PSM en la indicación. Seleccione el ítem de PSM que desea ajustar. (Consulte la página 44). Ajuste el ítem de PSM seleccionado arriba. Finalice el ajuste. 43 SP40-50.KD-LX50[J]/f 43 00.3.
3 2 1 ESPAÑOL Selección. Ajuste. – Ajustes de fabrica Ver página 1:00 40 + CLOCK HOUR Ajuste de la hora Retroceso Avance CLOCK MINUTE Ajuste de los minutos Retroceso Avance SCM LINK Enlace de memoria para control sonido SCM LINK OFF SCM LINK ON SCM LINK ON 45 CLOCK DISP Indicación del reloj CLK DISP OFF CLK DISP ON CLK DISP ON 45 LEVEL METER Indicación de nivel DIMMER MODE Modo reductor de luz 6 tipos (Véase página 45).
Selección de la indicación de reloj — CLOCK DISP Si lo desea, podrá visualizar la hora del reloj en la parte inferior de la indicación al encender la unidad. La unidad ha sido ajustada en fábrica para que el reloj se visualice en la indicación. • CLK DISP ON: Se activa la visualización del reloj. • CLK DISP OFF: Se desactiva la visualización del reloj. Cuando se selecciona “CLK DISP OFF”, el modo de sonido actualmente seleccionado (consulte la página 20) se visualiza en la parte superior de la indicación.
ESPAÑOL Para conectar/desconectar el interruptor del amplificador de potencia — P. AMP SWITCH Es posible desconectar el amplificador incorporado y enviar las señales de audio al amplificador(es) externo(s) solamente para obtener sonidos claros y evitar que se caliente el interior de esta unidad. La unidad se expide de fábrica con el interruptor del amplificador de potencia conectado de manera que el amplificador incorporado funcione. • P.
ESPAÑOL Cambio de los intervalos entre canales AM/FM — AREA CHANGE Esta unidad se expide de fábrica con los intervalos entre canales ajustados a 10 kHz para AM y a 200 kHz para FM (ajustes para AREA US). Deberá cambiar los intervalos entre canales cuando utilice esta unidad en un área que no sea Norteamérica o Sudamérica. • AREA EU: Selecciónelo cuando utilice esta unidad en un área que no sea Norteamérica o Sudamérica.
Asignación de nombres a las fuentes ESPAÑOL Usted puede asignar nombres a las frecuencias de emisoras, CDs y a los componentes externos conectados a las clavijas LINE IN. Una vez que se asigne un nombre, aparecerá en la indicación cuando lo seleccione.
3 Seleccione el juego de caracters deseado mientras está destellando “ ”. Letras mayúsculas ( ) Letras minúsculas ( Números símbolos ( 4 ) ) ESPAÑOL Cada vez que usted pulsa el botón, el juego de caracters cambia de la manera siguiente: Seleccione un carácter. Con respecto a los caracteres disponibles, consulte la página 50. 5 6 Mueva el cursor a la posición del carácter siguiente (o anterior). Repita los pasos 3 a 5 hasta terminar de introducir el nombre.
Caracteres disponibles ESPAÑOL Letras mayúsculas A B C D E F G H I J K L M N O P Q R S T U V W X Y Z espacio Letras minúsculas a b c d e f g h i j k l m n o p q r s t u v w x y z espacio Números símbolos 0 1 2 3 4 5 6 7 8 9 ! ” # $ % & ’ ( ) + , – . / : ; < = * > ? @ _ ` espacio Notas: • Cuando usted asigna un nombre al disco 41, aparece “NAME FULL” en la indicación.
OPERACIONES A DISTANCIA Sensor remoto ESPAÑOL Antes de emplear el mando a distancia: • Apunte el mando a distancia directamente hacia el sensor remoto de la unidad principal. Asegúrese de que no haya obstáculos en el camino. • No exponga el sensor remoto a la luz intensa (luz solar directa o iluminación artificial). Instalación de la pila Cuando los límites de alcance o la efectividad del mando a distancia se reduce, reemplace la pila.
Empleo del mando a distancia ESPAÑOL 1 2 3 4 1 • La unidad se enciende si pulsa brevemente. • La unidad se apaga si pulsa y mantiene pulsado hasta que aparezca “SEE YOU” en la indicación. • El nivel de volumen disminuye instantáneamente si pulsa de manera breve. Vuelva a pulsar volver al volumen 7 anterior. 2 • Funciona como el botón BAND mientras escucha la radio. Cada vez que pulsa este botón, la banda cambia. • Funciona como el botón DISC + mientras escucha el cambiador de CD.
OPERACIONES DE LOS COMPONENTES EXTERIORES Reproducción de un componente exterior ESPAÑOL Cuando conecte un componente externo como un VCR (KZ-V10) a los conectores LINE IN de la parte trasera, podrá seleccionar el componente como fuente de sonido. También podrá conectar un televisor a esta unidad. 2 1 2 1 2 Seleccione el componente externo. Cada vez que pulsa el botón, la fuente cambia de la manera descrita en la página 6. Opere el componente externo.
OPERACION DEL CAMBIADOR DE CD ESPAÑOL Recomendamos emplear uno de la serie CH-X (ej.: CH-X1200) con su unidad. Si tiene otro cambiador automático de CD, consulte con su concesionario de JVC de equipos de audio para automóviles. • Por ejemplo, si su cambiador automático de CD es uno de la serie KD-MK, necesitará un cable (KSU15K) para conectarlo a esta unidad. Antes de operar su cambiador automático de CD: • Refiérase también a las instrucciones suministradas con su cambiador de CD.
Para avanzar o retroceder rápidamente la pista Pulse y mantenga pulsado ¢ mientras se está reproduciendo un CD para avanzar rápidamente la pista. Para seleccionar las pistas siguientes o anteriores Pulse ¢ por un tiempo breve mientras se está reproduciendo un CD, para saltar al comienzo de la pista siguiente. Cada vez que pulsa el botón consecutivamente, se localiza el comienzo de las pistas siguientes y se efectúa su reproducción.
ESPAÑOL Selección de los modos de reproducción de CD MODE INT RPT RND Para reproducir las pistas de forma aleatoria (Reproducción aleatoria) 1 Pulse MODE mientras se está reproduciendo un CD. Aparece “MODE” en la parte inferior de la indicación, y los botones numéricos quedan activados como botones de diferentes funciones. 2 Pulse RND (Aleatorio) mientras “MODE” continúa visualizado en la indicación para que el indicador RND se encienda en la indicación.
1 Pulse MODE mientras se está reproduciendo un CD. Aparece “MODE” en la parte inferior de la indicación, y los botones numéricos quedan activados como botones de diferentes funciones. 2 Pulse INT (Intro) mientras “MODE” continúa visualizado en la indicación.
MANTENIMIENTO Manipulación de los CD Esta unidad ha sido diseñada para reproducir únicamente discos compactos (CD) que lleven la marca y . No es posible reproducir ningún otro disco. COMPACT DIGITAL AUDIO ESPAÑOL Cómo tratar los CD Rondje in het midden Cuando saque el CD de su caja, presione el sujetador central de la caja y extraiga el CD agarrándolo por los bordes. • Siempre sujete el CD por los bordes. No toque su superficie de grabación.
LOCALIZACION DE AVERIAS Lo que aparenta ser una avería podría resolverse fácilmente. Verifique los siguientes puntos antes de acudir al centro de servicio. Causas Remedios • No se puede reproducir el CD. El CD está insertado boca abajo. Inserte el CD correctamente. • El sonido del CD se interrumpe algunas veces. Está conduciendo por caminos accidentados. Deje de reproducir el CD mientras conduce por caminos accidentados. El CD está rayado. Cambie el CD. Las conexiones son incorrectas.
ESPAÑOL Síntomas Causas • El receptor no responde a sus comandos de voz (sean comandos de operación o de acceso). El micrófono no está conectado. Conéctelo correctamente. El controlador de voz no está conectado. Conéctelo correctamente. Su voz no llega al micrófono. Instale el micrófono en el sitio indicado en el manual de instalación/conexiones (volumen separado). • No se pueden usar todos los comandos de operación. “USER” está seleccionado para “VOICE WORD”.
ESPECIFICACIONES Máxima potencia de salida: Delantera: 45 W por canal Trasera: 45 W por canal Potencia de salida continua (RMS): Delantera: 17 W por canal en 4 Ω, 40 Hz a 20.000 Hz con una distorsión armónica total no mayor de 0,8 %. Trasera: 17 W por canal en 4 Ω, 40 Hz a 20.000 Hz con una distorsión armónica total no mayor de 0,8 %. Impedancia de carga: 4 Ω (tolerancia de 4 Ω a 8 Ω) Gama de control de tonos: Graves: ±10 dB a 100 Hz Agudos: ±10 dB a 10 kHz Respuesta de frecuencias: 40 Hz a 20.
FRANÇAIS IMPORTANT POUR PRODUITS LASER Precautions 1. PRODUIT LASER CLASSE 1 2. DANGER: Radiation laser invisible quand l’appareil est ouvert ou que le verrouillage est en panne ou désactivé. Éviter une exposition directe au rayon. 3. ATTENTION: Ne pas ouvrir le volet supérieur. Il n’y a pas de pièce réparable par l’utilisateur à l’intérieur. Confier le service après-vente à un personnel qualifié. 4.
AVERTISSEMENTS: FRANÇAIS • N’installez aucun élément dans les endroits suivants: – où il peut gêner l’accès au volant ou au levier de vitesse car cela peut entraîner un accident de la circulation. – où il peut gêner la manipulation de dispositifs de sécurité tels que les conduits d’aération car cela peut entraîner un accident de la circulation. – où il peut gêner la visibilité. • NE COMMANDEZ pas l’appareil lors de la manipulation du volant car cela peut entraîner un accident de la circulation.
Merci pour avoir acheté un produit JVC. Veuillez lire attentivement toutes les instructions avant d’utiliser l’appareil afin de bien comprendre son fonctionnement et d’obtenir les meilleures performances possibles. TABLE DES MATIERES Comment réinitialiser votre appareil ........................................... 2 OPERATIONS DE BASE ................................................6 FRANÇAIS FONCTIONNEMENT DE LA RADIO ............................... 7 Ecoute de la radio .................................
FONCTIONNEMENT DE L’APPAREIL EXTÉRIEUR .......... 53 Reproduction d’un appareil extérieur ........................................ 53 Utilisation d’un caisson de grave ................................................. 53 FONCTIONNEMENT DU CHANGEUR DE CD ................ 54 Lecture de CD ............................................................................... 54 Sélection des modes de lecture de CD ......................................... 56 ENTRETIEN .................................................
OPERATIONS DE BASE 3 1 FRANÇAIS 1 2 Remarques: • Si vous utilisez cet appareil pour la première fois, réglez l’horloge intégrée en vous reportant à la page 40. • Pour utiliser le système de reconnaissance vocale, référezvous aux pages 22 à 39. Mettez l’appareil sous tension. L’affichage s’allume et le panneau de commande sort. 2 Choisissez la source.
FONCTIONNEMENT DE LA RADIO Ecoute de la radio Vous pouvez utiliser la recherche automatique ou l’accord manuel pour accorder une station particulière. LOCAL 11 MODE 1- 1 1- 2 FRANÇAIS Recherche d’une station automatiquement: Recherche automatique 2 Choisissez la bande. 2 1 Appuyez sur SOURCE (ATT) pour choisir le tuner comme source. 2 Appuyez sur BAND pour choisir la bande (FM1, FM2, FM3 ou AM). Chaque fois que vous appuyez sur la touche, la source change de la façon montrée comme suit.
Recherche manuelle d’une station: Recherche manuelle MONO FRANÇAIS 1 1 2 MODE 1- 1 1- 2 2,3 Choisissez la bande. 1 Appuyez sur SOURCE (ATT) pour choisir le tuner comme source. 2 Appuyez sur BAND pour choisir la bande (FM1, FM2, FM3 ou AM). Remarque: Cet appareil a trois bandes FM (FM1, FM2, FM3). Vous pouvez utiliser n’importe laquelle pour écouter une station FM. 2 Maintenez pressées ¢ ou 4 “M” (manuel) clignote sur l’affichage.
Mémorisation des stations Vous pouvez utiliser l’une des deux méthodes suivantes pour mémoriser les stations reçues. • Présélection automatique des stations FM: SSM (Strong-station Sequential Memory) • Présélection manuelle des stations FM et AM Présélection automatique des stations FM: SSM FRANÇAIS Vous pouvez présélectionner 6 stations locales dans chaque bande FM (FM1, FM2 et FM3). 2 1- 1 1- 2 1 1 Choisissez le numéro de la bande FM (FM1, FM2 ou FM3) où vous souhaitez mémoriser la station.
Présélection manuelle Vous pouvez présélectionner manuellement un maximum de 6 stations pour chaque bande (FM1, FM2, FM3 et AM). FRANÇAIS EXEMPLE: Mémorisation de la station FM située à 88,3 MHz sur le numéro de présélection 1 de la bande FM1 3 1 1 2 1- 1 1- 2 2 Choisissez la bande. 1 Appuyez sur SOURCE (ATT) pour choisir le tuner comme source. 2 Appuyez sur BAND pour choisir la bande FM1. 2 Accordez une station à 88,3 MHz. Voir la page 7 pour accorder une station.
Accord d’une station présélectionnée 2 11 2 FRANÇAIS Vous pouvez accorder facilement une station présélectionnée. Rappelez-vous que vous devez d’abord mémoriser les stations. Si vous ne les avez pas encore mémorisées, reportez-vous aux pages 9 et 10. 1- 1 1- 2 2 Choisissez la bande. 1 Appuyez sur SOURCE (ATT) pour choisir le tuner comme source. 2 Appuyez sur BAND pour choisir la bande (FM1, FM2, FM3 ou AM). 2 Choisissez le numéro (1 – 6) de la station présélectionnée souhaitée.
FONCTIONNEMENT DU LECTEUR CD Lecture d’un CD ¢ 4 FRANÇAIS 1 1 Ouvrez le panneau de commande. Le panneau d’affichage descend et la fente d’insertion apparaît. 2 Insérez un disque dans la fente de chargement. L’appareil tire le CD, le panneau d’affichage remonte et la lecture du CD commence automatiquement.
Localisation d’une plage ou d’un point particulier sur un CD ¢ 4 Touches numériques 4 (10) à 6 (12) Pour avancer rapidement ou inverser une plage Maintenez ¢ pressé, pendant la reproduction d’un CD, pour avancer rapidement la plage. Maintenez 4 la plage. FRANÇAIS Touches numériques 1 (7) à 3 (9) pressé, pendant la reproduction d’un CD, pour inverser Pour aller aux plages suivantes ou précédentes Appuyez brièvement sur ¢ pendant la lecture d’un CD pour avancer au début de la plage suivante.
Sélection des modes de lecture de CD FRANÇAIS MODE INT RPT RND Pour reproduire les plages dans un ordre aléatoire (Lecture aléatoire) Vous pouvez reproduire toutes les plages du CD dans un ordre aléatoire. 1 Appuyez sur MODE pendant la lecture d’un CD. “MODE” apparaît sur la partie inférieure de l’affichage et les touches numériques peuvent être utilisées comme touches de fonctions variées.
Pour reproduire uniquement les introductions (Balayage des introductions) 1 Appuyez sur MODE pendant la lecture d’un CD. “MODE” apparaît sur la partie inférieure de l’affichage et les touches numériques peuvent être utilisées comme touches de fonctions variées. 2 Appuyez sur INT (introduction) pendant que “MODE” apparaît sur l’affichage. Chaque fois que vous appuyez sur la touche, le mode de balayage des introductions se met alternativement en et hors service.
Lecture des CD Text FRANÇAIS Dans un CD Text, certaines informations à propos du disque (son titre, l’interprète et le titre de la plage) sont enregistrées. Vous pouvez afficher certaines de ces informations sur l’affichage. DISP Choisissez le mode d’affichage de texte lors de la reproduction d’un CD Text. Chaque fois que vous appuyez sur la touche, l’affichage change comme suit: Titre deTitle la plage Discdu Title / Performer Track Titre disque / Interprète Current track no.
AJUSTEMENT DU SON Ajustement du son Vous pouvez ajuster les caractéristiques du son à votre préférence. 1 1 Choisissez l’élément que vous souhaitez ajuster. Chaque fois que vous appuyez sur la touche, l’élément ajustable change comme suit: Indication BAS TRE (graves) (bass) (aigus) (treble) VOLUME WOOFER FADER BALANCE Pour: Plage BAS Ajuster les graves. –06 (min.) — +06 (max.) TRE Ajuster les aigus. –06 (min.) — +06 (max.) FADER* Ajuster l’équilibre entre les enceintes avant et arrière.
FRANÇAIS Mise en/hors service de la fonction BBEII La fonction BBEII* rétablit la brillance et la clarté du son original d’un enregistrement, d’une émission, etc. Quand une enceinte reproduit le son, elle introduit un décalage de phase en fonction de la fréquence, faisant que les sons haute fréquence prennent plus longtemps à atteindre l’oreille que les sons basse fréquence.
Utilisation de la mémoire de commande du son Vous pouvez choisir et mémoriser un ajustement du son spécifique pour chaque source de lecture. (SCM avancé) Sélection et mémorisation des modes sonores FRANÇAIS Une fois que vous avez choisi un mode, il est mémorisé et est rappele chaque fois que vous choisissez la même source. Un mode sonore peut être mémorisé pour chacune des sources suivantes — FM1, FM2, FM3, AM, CD et les appareils extérieurs.
Rappel des modes sonores FRANÇAIS SOURCE (ATT) Choisissez la source pendant que l’indicateur “Link” est allumé sur l’affichage. L’indicateur “Link” clignote et le mode sonore mémorisé pour la source choisie est rappelé (et apparaît quelques instants sur l’affichage). Remarques: • Vous pouvez ajuster le mode sonore préréglé comme vous le souhaitez et le mémoriser.
Mémorisation de votre propre ajustement sonore 3- 2 1 3- 1 2,4 1 3 Allumez “MODE” sur la partie inférieure de l’affichage. Les touches numériques peuvent être utilisées comme touches de fonctions variées. FRANÇAIS Vous pouvez ajuster les modes sonore (BEAT, SOFT, POP: voir page 19) comme vous le souhaitez et mémoriser votre propre ajustement. RAPPELEZ-VOUS que vous devez terminer ces étapes pendant que “MODE” est allumé sur l’affichage. Sinon, le réglage sera annulé.
STOP PLAY FONCTIONNEMENT DE LA COMMANDE VOCALE Qu’est que le système de reconnaissance vocale? Le système de reconnaissance vocale permet de commander l’autoradio avec la voix — “Dites une commande et elle est réalisée!”. Ce système vous permet de commander l’autoradio facilement et en toute sécurité à l’aide de commandes vocales. Il élimine le risque des recherches des touches en conduisant.
STOP PLAY Avant d’utiliser les commandes vocales Lisez attentivement les précautions suivantes. Précautions pour l’enregistrement de votre voix: FRANÇAIS Avant de commencer... • Assurez-vous que le module de commande vocale, la télécommande vocale et le microphone sont connectés correctement. (Référez-vous au manuel d’installation/ connexion fourni séparément.) • Réglez “VOICE/BEEP” sur “VOICE” et “VOICE LANG” sur la langue que vous souhaitez utiliser (référez-vous à la page 39).
STOP PLAY Utilisation de l’autoradio en mode Mots standards À l’expédition de l’usine, 13 Commandes de fonctionnement ont été préréglées. (Référezvous aussi à la page 28 pour la prononciation de ces mots anglais.) Si vous dites ces 13 mots préréglés (en anglais), l’autoradio répondra à vos commandes. FRANÇAIS Pour utiliser les commandes vocales préréglées sans enregistrer votre propre voix, assurez-vous que “VOICE WORD” est réglé sur “STANDARD” (réglage initial).
STOP PLAY Procédure de base 1,2 4 ATT/STR* * ATT signifie “atténuation” et STR “store (mémorisation)”. 1 FRANÇAIS Télécommande vocale Mettez l’appareil sous tension. L’affichage s’allume et le panneau de commande sort. 2 Mettez en service le système de reconnaissance vocale. “SPEAK” clignote sur l’affichage après la navigation vocale “Please speak now” (ou un bip).
STOP PLAY 4 Ajustez le volume. Pour coupez le volume instantanément FRANÇAIS Appuyez sur ATT (STR) lors de l’écoute de n’importe quelle source. “ATT” clignote sur l’affichage et le volume est coupé instantanément. Pour rétablir le niveau de volume précédent, appuyez de nouveau sur la touche. Utilisation de l’autoradio en mode Mots personnalisés En mode Mots personnalisés, vous pouvez utiliser 13 Commandes de fonctionnement et 12 Commande d’accès.
STOP PLAY Procédure d’enregistrement EXEMPLE: Enregistrement du mot “Éteindre” pour la Commande de fonctionnement 01. 5,11 1,4 1 3 2 7 Télécommande vocale Maintenez pressé SEL (sélection) pendant plus de 2 secondes de façon qu’un des éléments PSM apparaisse sur l’affichage (référez-vous à la page 44). 2 Choisissez “VOICE WORD”. 3 Réglez-le sur “USER”. FRANÇAIS 6 • Pour plus d’informations, référez-vous à la page 39. 4 5 Terminez le réglage.
STOP PLAY FRANÇAIS 6 Choisissez le numéro de commande vocale préréglé (VOICE 01). 7 Appuyez sur STR (ATT) pour préparer le système à l’enregistrement de votre voix. “SPEAK” (parlez) clignote sur l’affichage après la navigation vocale “Please speak now”. 8 Prononcez le ou les mots que vous souhaitez enregistrer pendant que “SPEAK” clignote sur l’affichage. (Dans cet exemple, prononcez “Éteindre”.
STOP PLAY 9 Répétez le ou les mêmes mots pendant que “REPEAT” clignote sur l’affichage. (Dans cet exemple, prononcez “Éteindre”.) FRANÇAIS “CHECK” apparaît sur l’affichage pendant l’enregistrement de votre voix. “OK” apparaît quand l’enregistrement est terminé. “ ” sur l’affichage signifie que votre voix est enregistrée pour cette commande vocale. Si l’enregistrement échoue Un bip sonore se fait entendre et l’affichage retourne à celui de l’étape 6.
STOP PLAY Préréglage des Commandes d’accès FRANÇAIS Vous pouvez mémoriser opérations utilisées fréquemment dans les Commandes d’accès et enregistrer votre voix pour le système exécute les Commandes d’accès. • Vous pouvez mémoriser les opérations suivantes dans les Commandes d’accès: – Sélection de la source (CD et appareil extérieur). – Sélection de la fréquence (FM et AM). – Sélection d’un CD dans le changeur de CD. Avant de commencer... • Réglez “VOICE WORD” sur “USER”.
STOP PLAY 2 Choisissez l’opération que vous souhaitez mémoriser pour la Commande d’accès. (Dans ce cas, choisissez “FM 89,5 MHz”.) Remarques: Le numéro de préréglage ne peut pas être mémorisé mais seulement les fréquences des stations pour les commandes d’accès. 3 Maintenez pressé VOICE jusqu’à ce que la Commande d’accès (VOICE 14) apparaisse sur l’affichage. 4 FRANÇAIS Si vous souhaitez mémoriser le mode sonore en même temps Choisissez le mode sonore souhaité. (Référez-vousà la page 19.
STOP PLAY 6 Répétez le ou les mêmes mots pendant que “REPEAT” clignote sur l’affichage. (Dans cet exemple, prononcez “Jazz 89”.) FRANÇAIS “CHECK” apparaît sur l’affichage pendant l’en registrement de votre voix. “OK” apparaît quand l’enregistrement est terminé. 7 Maintenez de nouveau pressé VOICE pour terminer l’enregistrement.
STOP PLAY Procédure d’enregistrement (Seconde Commande d’accès à la suite de la première) EXEMPLE: Mémorisation de la “sélection du disque numéro 01 du changeur de CD” et enregistrement du mot “Classiques” comme Commande d’accès pour cette opération dans la Commande d’accès 15. 3 1 Télécommande vocale FRANÇAIS 2,6 Choisissez l’opération que vous souhaitez mémoriser pour la Commande d’accès. (Dans ce cas, choisissez “disque numéro 01 dans le changeur de CD”.
STOP PLAY 4 Prononcez le ou les mots que vous souhaitez enregistrer pendant que “SPEAK” clignote sur l’affichage. (Dans cet exemple, prononcez “Classiques”.) FRANÇAIS • Si le système reconnaît votre ou vos mots, “REPEAT” clignote sur l’affichage après la navigation vocale “Please repeat”. • Si le système ne reconnaît pas votre ou vos mots, il vous demandera de les répéter. Dans ce cas, prononcez à nouveau votre ou vos mots. 5 Répétez le ou les mêmes mots pendant que “REPEAT” clignote sur l’affichage.
STOP PLAY Pour commander le système en mode Mots personnalisés 1 Appuyez sur VOICE pour mettre l’autoradio sous tension. 2 Appuyez de nouveau sur VOICE pour mettre en service le système de reconnaissance vocale. 3 Prononcez une des Commandes de fonctionnement ou d’accès que vous avez mémorisé, dans le microphone pendant que “SPEAK” clignote sur l’affichage. • Par exemple, pour utiliser la Commande d’accès numéro 14, dites “Jazz 89” (que vous avez enregistré précédemment).
STOP PLAY Pour changer le contenu d’une Commande d’accès FRANÇAIS Vous pouvez changer le contenu suivant des commandes: – Mot(s) enregistré(s) (ex: nom de disque, nom de fréquence) – Mot(s) enregistré(s) et opération (ex: disque numéro 01 du changeur de CD = disque numéro 03 du changeur de CD, Changeur de CD = FM 89,5 MHz) Si vous souhaitez changer le contenu d’une commande d’accès, suivez la procédure cidessous.
STOP PLAY Pour effacer les commandes vocales Si vous souhaitez effacer les Commandes d’accès (VOICE 14 à VOICE 25) déjà mémorisées, ou si vous souhaitez effacer les voix enregistrées pour les Commandes de fonctionnement (VOICE 01 à VOICE 13), réalisez la procédure suivante. • Une commande de fonctionnement ne peut pas être effacée. Seule la voix associée peut l’être. FRANÇAIS 1 Maintenez pressé VOICE jusqu’à ce qu’un des Commandes d’accès apparaisse sur l’affichage.
STOP PLAY Autres fonctions pratiques du système de reconnaissance vocale Vous pouvez utiliser les fonctions décrites à la page suivante pour le système de reconnaissance vocale. FRANÇAIS Procédure de base 1,4 1 2 3 2 Maintenez pressé SEL (sélection) pendant plus de 2 secondes de façon qu’un des éléments PSM apparaisse sur l’affichage (référez-vous à la page 44). Choisissez la fonction que vous souhaitez régler ou ajuster — VOICE LANG, VOICE/BEEP, VOICE WORD ou VOICE VOL.
STOP PLAY Pour choisir la langue de navigation vocale — VOICE LANG Pour choisir la navigation vocale ou le bip sonore — VOICE/BEEP Quand le module de commande vocale est connecté à l’autoradio, vous pouvez choisir la navigation vocale (voir ci-dessus) ou un bip de confirmation entendu en réponse des commandes données. À l’expédition de l’usine, “VOICE” est choisi. • VOICE: Une navigation en anglais, français ou espagnol est entendue en réponse des commandes données.
AUTRES FONCTIONS PRINCIPALES Réglage de l’horloge FRANÇAIS 1,4 1 2 2,3 2,3 Maintenez pressée SEL (Sélection) pendant plus de 2 secondes de façon que l’un des éléments PSM apparaisse sur l’affichage. (Voir page 44.) 1 2 Réglez les heures. 1 Choisissez “CLOCK HOUR” s’il n’apparaît pas sur l’affichage. 2 Ajustez les heures. 3 1 2 Réglez les minutes. 1 Choisissez “CLOCK MINUTE”. 2 Ajustez les minutes. 4 Terminez le réglage.
Vous pouvez choisir le mode de croisière correct pour votre voiture. Cet appareil change le volume automatiquement (sur 3 niveaux possibles) en fonction de la vitesse du véhicule en détectant la fréquence génératrice de l’alternateur (Croisière audio). Si vous souhaitez utiliser ce mode, suivez les procédures ci-dessous. A l’expédition de l’usine, ce mode est réglé sur “CRUISE OFF”. • CRUISE 1: Choisissez ce réglage si votre voiture est relativement silencieuse.
Quand cette fonction est en service (l’indicateur CRUISE s’allume sur l’affichage), le niveau de volume correct est automatiquement choisi parmi 3 niveaux possibles en fonction de la vitesse du véhicule et le niveau choisi est montré sur l’affichage. Quand la vitesse augmente. FRANÇAIS Quand la vitesse diminue.
Modification des réglages généraux (PSM) Vous pouvez modifier les éléments de la liste de la page suivante en utilisant la commande PSM (Preferred Setting Mode — Mode de réglage préféré). 1,4 1 2 3 2 FRANÇAIS Procédure de base Maintenez pressée SEL (Sélection) pendant plus de 2 secondes de façon que l’un des éléments PSM apparaisse sur l’affichage. Choisissez l’élément PSM que vous souhaitez ajuster. (Voir page 44.) 3 Ajustez l’élément PSM choisi ci-dessus. 4 Terminez le réglage. 43 FR40-50.
2 1 3 Choisissez. CLOCK HOUR Réglage des heures FRANÇAIS CLOCK MINUTE Réglage des minutes Réglez. – Préréglages d’usine Voir page + Recule Avance Recule Avance 1:00 40 SCM LINK Liaison mémoire de commande du son SCM LINK OFF SCM LINK ON SCM LINK ON 45 CLOCK DISP Affichage de l’horloge CLK DISP OFF CLK DISP ON CLK DISP ON 45 LEVEL METER Affichage du niveau DIMMER MODE Mode d’affichage 6 types (Voir page 45.
Sélection de l’affichage de l’horloge — CLOCK DISP Vous pouvez régler l’horloge de façon à ce qu’elle apparaisse dans la partie inférieure de l’affichage quand l’appareil est sous tension. À l’expédition de l’usine, l’horloge est réglée pour apparaître sur l’affichage. • CLK DISP ON: L’horloge apparaît sur l’affichage. • CLK DISP OFF: L’horloge n’apparaît pas sur l’affichage. Quand “CLK DISP OFF” est choisi, le réglage du mode sonore actuel (voir page 20) apparaît dans la partie inférieure de l’affichage.
Pour mettre en/hors service l’amplificateur de puissance — P.AMP SWITCH FRANÇAIS Vous pouvez mettre hors service l’amplificateur intégré et envoyer les signaux audio uniquement à un ou plusieurs amplificateurs extérieurs afin d’obtenir un son plus clair et d’éviter tout échauffement interne de l’appareil. À l’expédition de l’usine, l’amplificateur de puissance est enservice de façon qu’il puisse être utilisé. • P. AMP ON: Choisissez ce mode lorsque vous n’utilisez pas d’amplificateur extérieur. • P.
A l’expédition de l’usine, l’intervalle entre les canaux est réglé sur 10 kHz pour la bande AM et sur 200 kHz pour la bande FM (réglage AREA US). Vous devrez changer l’intervalle entre les canaux si vous utilisez cet appareil ailleurs qu’en Amérique du Nord ou du Sud. • AREA EU: Choisissez ce réglage si vous utilisez cet appareil ailleurs qu’en Amérique du Nord ou du Sud.
Attribution de noms aux sources Vous pouvez attribué des noms aux fréquences de station, aux CD et à l’appareil extérieur connecté aux fiches LINE IN. Après avoir attribué un nom, il apparaît sur l’affichage quand le CD ou l’appareil extérieur est choisi.
3 Choisissez le caractère que vous souhaitez pendant que “ ” clignote. Chaque fois que vous appuyez sur la touche, le jeu de caractères change comme suit: ) Lettres Small letter ( minuscules Nombresand et symboles Numbers symbols ( 4 ) ) Choisissez un caractère. Référez-vous à la page 50 pour les caractères disponibles. 5 6 FRANÇAIS Lettres Capital letter ( majuscules Déplacez le curseur sur la position de caractère suivante (ou précédente).
Caractères disponibles Lettres majuscules A B C D E F G H I J K L M N O P Q R S T U V W X Y Z espace FRANÇAIS Lettres minuscules a b c d e f g h i j k l m n o p q r s t u v w x y z espace Nombres et symboles 0 1 2 3 4 5 6 7 8 9 ! ” # $ % & ’ ( ) + , – . / : ; < = * > ? @ _ ` espace Remarques: • Si vous essayez d’attribuer un nom à un 41e disques, “NAME FULL” apparaît sur l’affichage.
FONCTIONNEMENT DE LA TELECOMMANDE Capteur de télécommande Avant d’utiliser la télécommande: • Pointez la télécommande directement sur le capteur de télécommande de l’appareil principal. Assurezvous qu’il n’y a pas d’obstacle entre les deux. • Ne pas exposer la télécommande à un éclairage puissant (en plein soleil ou un éclairage artificiel). Lorsque la portée ou l’efficacité de la télécommande diminue, remplacez la pile. 1. Retirez le porte-pile.
Utilisation de la télécommande 1 5 6 2 7 3 FRANÇAIS 4 8 52 FR51-52.KD-LX50[J]/f 52 1 • Appuyez brièvement pour mettre l’appareil sous tension. • Maintenez pressée jusqu’à ce que “SEE YOU” apparaisse sur l’affichage pour mettre l’appareil hors tension. • Coupe le volume momentanément si maintenu pressée pendant plus d’une seconde pendant l’écoute de n’importe quelle source. 2 • Fonctionne comme la touche BAND en écoutant la radio. Chaque fois que vous appuyez sur cette touche, la bande change.
FONCTIONNEMENT DE L’APPAREIL EXTÉRIEUR Reproduction d’un appareil extérieur 1 2 1 2 2 Choisissez l’appareil extérieur. Chaque fois que vous appuyez sur la touche, la source change comme décrit à la page 6. FRANÇAIS Lors de la connexion d’un appareil extérieur tel qu’un magnétoscope (KZ-V10) aux fiches LINE IN à l’arrière de l’autoradio, vous pouvez choisir cet appareil comme source sonore. Vous pouvez aussi connecter le téléviseur à cet appareil. Utilisez l’appareil extérieur.
FONCTIONNEMENT DU CHANGEUR DE CD FRANÇAIS Nous vous recommandons d’utiliser un appareil de la série CH-X (ex: CH-X1200) avec votre appareil. Si vous possédez un autre changeur automatique de CD, consultez votre revendeur autoradio JVC pour les connexions. • Par exemple, si votre changeur automatique de CD appartient à la série KD-MK, vous avez besoin d’un câble (KS-U15K) pour le connecter à l’appareil.
Pour avancer rapidement ou inverser une plage Maintenez ¢ pressé, pendant la reproduction d’un CD, pour avancer rapidement la plage. Maintenez 4 pressé, pendant la reproduction d’un CD, pour inverser la plage. Appuyez brièvement sur ¢ pendant la lecture d’un CD pour avancer au début de la plage suivante. Chaque fois que vous appuyez répétitivement sur la touche, le début de la plage suivante est localisé et reproduit.
Sélection des modes de lecture de CD FRANÇAIS MODE INT RPT RND Pour reproduire les plages dans un ordre aléatoire (Lecture aléatoire) 1 Appuyez sur MODE pendant la lecture d’un CD. “MODE” apparaît sur la partie inférieure de l’affichage et les touches numériques peuvent être utilisées comme touches de fonctions variées. 2 Appuyez sur RND (aléatoire) pendant que “MODE” apparaît sur l’affichage, de façon que l’indicateur RND s’allume sur l’affichage.
Pour lire uniquement des introductions (Balayage des introductions) INTRO 1 INTRO 2 Annulé Canceled Mode Indication Lit les débuts (15 secondes) INTRO 1 Le numéro de piste clignote. De toutes les plages sur tous les disques insérés. INTRO 2 Le numéro de disque De la première plage sur chaque disque clignote aussi (quand il inséré. apparaît sur l’affichage). FRANÇAIS 1 Appuyez sur MODE pendant la lecture d’un CD.
ENTRETIEN Manipulation des CD COMPACT Cet appareil a été conçu pour reproduire les CD portant la marque Les autres disques ne peuvent pas être reproduits. et . DIGITAL AUDIO Manipulation des CD Pour retirer un CD de son boîtier, faites pression sur le support central du boîtier et retirez le CD en le tenant par ses arêtes. • Tenez toujours le CD par ses arêtes. Ne touchez pas la surface enregistrée.
DEPANNAGE Ce qui apparaît comme un problème n’est pas toujours très sérieux. Vérifier les points suivants avant d’appeler un centre de réparation. Causes Remèdes • Le CD ne peut pas être reproduit. Le CD est inséré à l’envers. Insérez-le correctement. • Le son du CD est interrompu par moment. Vous conduisez sur une route accidentée. Arrêtez la lecture du CD quand vous conduisez sur une route accidentée. Le CD est rayé. Changez le CD. Les connexions sont incorrectes.
Symptômes Causes FRANÇAIS • Vos commandes vocales (Commandes de fonctionnement ou d’accès) n’ont pas d’effet sur l’autoradio. Remèdes Le microphone n’est pas connecté. Connectez-le correctement. Le module de commande vocale n’est pas connectée. Connectez-la correctement. Votre voix n’atteint pas le microphone. Attachez le microphone à l’endroit indiqué dans le manuel d’installation/connexion (document séparé). • Vous ne pouvez pas utilisez toutes les Commandes de fonctionnement.
SPECIFICATIONS Puissance de sortie maximum: Avant: 45 W par canal Arrière: 45 W par canal Puissance de sortie en mode continu (efficace): Avant: 17 W par canal pour 4 Ω, 40 Hz à 20.000 Hz à moins de 0,8% de distorsion harmonique totale. Arrière: 17 W par canal pour 4 Ω, 40 Hz à 20.000 Hz à moins de 0,8% de distorsion harmonique totale. Impédance de charge: 4 Ω (4 Ω à 8 Ω tolérés) Plage de commande de la tonalité: Graves: ±10 dB à 100 Hz Aigus: ±10 dB à 10 kHz Réponse en fréquence: 40 Hz à 20.
Having TROUBLE with operation? Please reset your unit Refer to page of How to Reset Still having trouble?? USA ONLY Call 1-800-252-5722 http://www.jvcservice.com We can help you! VICTOR COMPANY OF JAPAN, LIMITED EN, SP, FR EN00-00.KD-LX50[J]/f V J 2 C 0300MNMMDWJEIN 00.3.