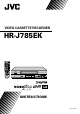
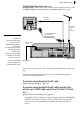
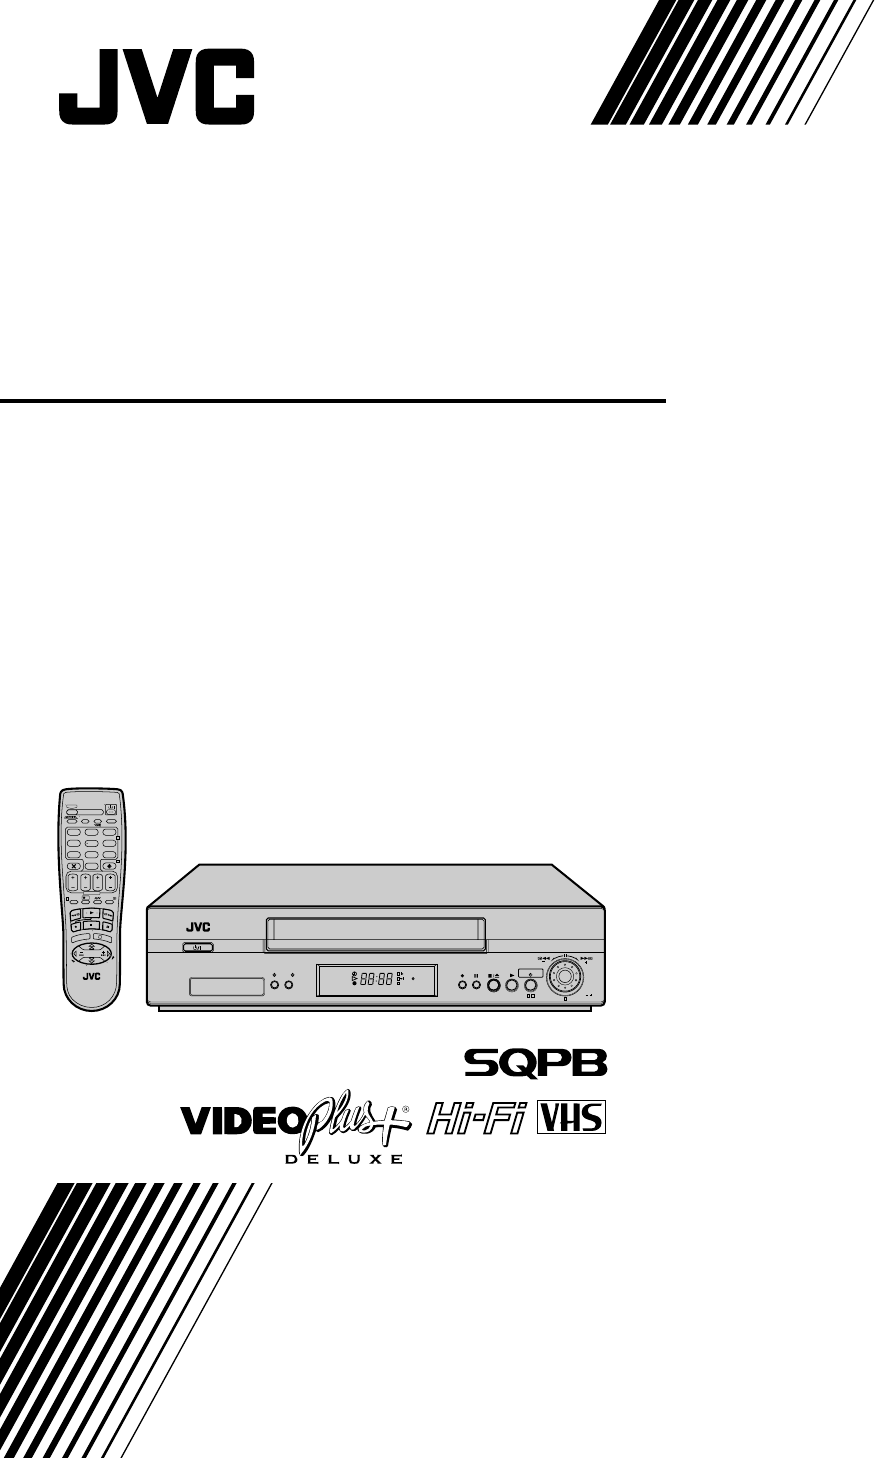
VIDEO CASSETTE RECORDER HR-J785EK TV TV/VCR – –:– – AUDIO 1 2 4 5 3 2 VPS/PDC 6 DAILY/QTDN.
safety first Safety Precautions The rating plate and the safety caution are on the rear of the unit. WARNING: DANGEROUS VOLTAGE INSIDE WARNING: TO PREVENT FIRE OR SHOCK HAZARD, DO NOT EXPOSE THIS UNIT TO RAIN OR MOISTURE. IMPORTANT ■ Please read the various precautions on pages 2–4 of this instruction manual before installing or operating the recorder.
safety first The STANDBY/ON o button does not completely shut off mains power from the unit, but switches operating current on and off. “y ” shows electrical power standby and “ z” shows ON. Video tapes recorded with this video recorder in the LP (Long Play) mode cannot be played back on a single-speed video recorder. When the equipment is installed in a cabinet or a shelf, make sure that it has sufficient space on all sides to allow for ventilation (10 cm or more on both sides, on top and at the rear.
safety first Some Do’s And Don’ts On The Safe Use Of Equipment This equipment has been designed and manufactured to meet international safety standards but, like any electrical equipment, care must be taken if you are to obtain the best results and safety is to be assured. DO DO read the operating instructions before you attempt to use the equipment.
Contents Diagrams of Equipment ................................ 6 Equipment Key ............................................. 7 Welcome to JVC ............................................8 Three-Step Quick Start ............................... 10 Basic Features ............................................ 13 Advanced Features ..................................... 29 Subsidiary Information .............................. 57 List of Terms ..............................................
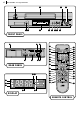
diagrams of equipment 2 1 3 4 24H EXPRESS VCR SAT SAT REVIEW 1 PR / PUSH / TURN 3 2 7 56 8 90!@ front panel 2 3 1 CONTROLEUR SAT (L-2) AV2 ENTREE/DECODEUR IN/DECODER SAT CONTROL (L-1) AV1 ENTREE/SORTIE IN/OUT ENTREE ANT. IN SORTIE OUT R AUDIO ANTENNE SORTIE RF OUT L 4 67 5 rear panel 76 VCR SAT REVIEW display 4 TV TV/VCR – –:– – AUDIO 1 2 3 4 5 6 2 VPS/PDC DAILY/QTDN.
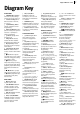
equipment key 7 Diagram Key FRONT PANEL 1 STANDBY/ON o Button turns VCR on/off (loading a cassette also turns power on). 2 Cassette Loading Slot is where cassette is inserted; door closes. 3 24H EXPRESSc Button enables 24H Express Timer Programming. 4 Advanced JOG Dial enables picture search, preset position selection or 24H Express Timer Programming. 5 c Button engages timer standby mode. 6 SATc Button enables/ disables the Auto Satellite Programme Recording mode.
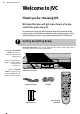
welcome to jvc Welcome to JVC Thank you for choosing JVC. We hope that you will get many hours of enjoyment from your new unit. In just three easy steps you will be ready to enjoy the exceptional performance of your new VCR. More detailed instructions begin on page 10. They will explain how to use the many sophisticated features this VCR boasts. Getting Everything Ready beforyusta check the contents Unpack the box and place the VCR on a flat, stable surface. Check that you have the items shown below.
welcome to jvc GETTING EVERYTHING READY (continued) connect cables Connect the cables as indicated in the diagram (below), using the TV Ariel Cable, the RF Cable and the 21-pin SCART Cable (not provided). RF Cable (provided) TV Aerial Cable (not provided) 21-pin SCART Cable (not provided) scart and rf SCART is a recommended option because its use improves the quality of the picture. If connecting to a stereo TV you will need a SCART cable. There are several types of SCART cables, fullywired and others.
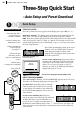
three-step quick start Three-Step Quick Start – Auto Setup and Preset Download Auto Setup before you start Check that the VCR is turned off and no cassette is inserted Load the batteries into the Remote Control START AUTO SETUP Press the o button. If ‘Auto’ appears on the display panel, press OK (or E). what will happen? The display panel on the front of the VCR will show the word ‘Auto’. Do not press any button on the VCR or the Remote Control.
three step quick start 11 FINISH AUTO SETUP Press O and move on to Step 2 to check the results. oops! If there is a power cut or you accidentally press a button during Auto Setup, turn the VCR off and then on again. Re-perform Auto Setup.
three-step quick start Check the Results When Auto Setup or Preset Download finishes, you will see one of the three following examples on the VCR display panel: The Preset Positions and the Clock have been set successfully Go straight to Step 3 (20:00 used as example only). The Preset Positions have been set successfully but the Clock has not Perform Clock Set on page 55. Go to Step 3.
Basic Features Playback..................................................... 14 Playback Features ...................................... 16 Recording ................................................... 18 VIDEO Plus+® Timer Programming ............ 21 Express Timer Programming ...................... 24 24H Express Timer Programming ...............
basic features Playback Playback is the most basic operation possible with your VCR. Audio-visual information recorded on a cassette will be played back on your TV screen just like a broadcast programme. Load a Video Cassette before you start Turn the TV on Tune the TV to your Video Channel or to its AV mode Make sure that the window side of the cassette is facing up and the spine label is facing away from the VCR. Insert the cassette as shown in the diagram below; don’t use too much force.
basic features 15 Rewind and Fast Forward rewind Press the < button on the Remote Control or turn the JOG Dial to the left. fast forward Press the > button on the Remote Control or turn the JOG Dial to the right. SQPB This VCR is equipped with SQPB (S-VHS QUASI P AYBACK) that lets you watch tapes recorded in the S-VHS format and the SP mode, with regular VHS resolution. NOTES: • SQPB does not deliver Super VHS resolution. • S-VHS recording is not possible with this VCR.
basic features Playback Features Advanced JOG Dial The JOG Dial can be found on the front right of the VCR. It has various functions, such as picture search (墌 this page and pg. 17), selecting preset position (墌 pg. 18), 24H Express Timer Programming (墌 pg. 26), etc. Pause During Playback There are two ways to view a still picture during playback: method one Push the center part of the JOG Dial. method two Press the | button on the VCR or the Remote Control.
basic features + TV PR + TV TV – T V PR – 17
basic features Recording TV signals being received by the recorder’s built in tuner can be recorded onto a video tape. You can ‘capture’ a TV programme using your VCR. Choose a Programme before you start Turn the TV on Tune the TV to your Video Channel or to its AV mode Choose a blank cassette which has the record safety tab still in place Record Safety Tab Load the cassette into the VCR (see page 14) 1 PROG ? There are two ways to select a preset position of the VCR.
basic features TV PR(+.5351 456.262 1.7735 14.632 76.793 5235.1 60 526.0 g((1.56 65 0070.43 077 1.65.7 2 77.175 5 597.250 521.8V)Tj1.56 52 -79.3 0740943 074.51 79.021 5421.200 5281.)Tj1.55 66 80886 -0.1882 05036 1 7903648 28 4250 52197R)Tj1. 535/F11.5599 431.6.6y50.0 - c60.72 71584 531.12 50 59.09(1.5660 cs98-1626.05 16284.70cs. 096 523..1 30 88658V)Tj1. 565/F11.5599 26 30- c7m0 c7m2361 23.6628 215.0405126 1.
basic features Recording Resume Function If there is a power cut during recording (or Instant Timer Recording or timer recording), the recording will resume automatically when power is restored to the VCR unless the VCR’s memory backup has expired. Instant Timer Recording This method allows you to quickly set the VCR to record in 30 minute increments. start recording Press T on the VCR once. If left in this state, the VCR will keep recording until the tape runs out.
basic features VIDEO Plus +® Timer Programming before you start Make sure that the VCR’s clock is set correctly The VIDEO Plus+ system uses the code numbers – called PlusCodes – printed after each programme in your TV listings guide. These are a kind of shorthand for video recorders and using them automatically sets your VCR to record the correct programme, channel and time.
basic features Check the Results 1 PROG -P1PLUSCODE NO. START 21:00 SP DATE 25.12 4 VPS/PDC 7 0000 k: OK TV/VCR AU 56781234 STOP 22:00 VPS/PDC OFF TV PROG 1 BBC1 Press O. The VIDEO Plus+ Program screen appears. Make sure that the preset number displayed is the one that you want. If it is incorrect, the wrong programme will be recorded. If it is incorrect see the section titled Guide Program Numbers. (墌 pg.
basic features 23
basic features Express Timer Programming before you start If you do not know the PlusCode for the programme that you wish to record, follow the instructions below to manually set your VCR to record. Make sure that the VCR’s clock is set correctly Get to the Programme Screen Insert a cassette with the safety tab in place Press p then press START +/–. – P1 – Turn on the TV and select the Video channel or the AV Mode START - -:- SP DATE - -.
basic features TV TV/VCR 1 – –:– – AUDIO 2 3 5 6 2 4 VPS/PDC DAILY/QTDN.
basic features 24H Express Timer Programming You can program a timer recording that starts within 24 hours using the 24H EXPRESS c button and the Advanced JOG Dial on the VCR. before you start enter program mode Press the 24H EXPRESS c button on the VCR. The Set the tape speed Programme Start Time indicator starts blinking on the display panel.
basic features Check, Cancel & Change Programmes Press c, then press o to disengage the timer mode. review the programmes Press C. The TV screen will display a list of the programmes set for timer recording (screen A). 1 2 3 4 5 6 7 8 [ START 8:00 10:00 11:30 STOP 10:00 10:45 13:00 CH 3 2 1 DATE 24.12 25.12 25.12 ]: NEXT Pressing C again will cycle through each of the entries in the VCR’s memory (screen B). Screen A cancel a programme Press x to cancel a programme.
basic features When Programmes Overlap Each Other If PROGRAM OVERLAPPED appears, you have another programme overlapping the programme you have just made. confirm overlapping programmes The Program Check screen appears and conflicting programmes will start blinking. Example: Programme 1 (you have just made) and Programme 4 overlap each other. START 1 8:00 2 10:00 3 11:30 4 9:00 5 6 7 8 [1] a k [PROG]: EXIT STOP 10:00 10:45 13:00 10:00 CH 3 2 1 92 DATE 24.12 25.12 25.
Advanced Features Picture Quality ........................................... 30 The B.E.S.T. Picture System ...................... 31 Sound Modes ............................................ 32 Finding Specific Scenes ............................ 33 T-V Link Functions..................................... 34 Satellite Receiver Control Settings ........... 36 Auto Satellite Programme Recording ........ 39 Editing ....................................................... 41 Other Functions .....................
advanced features Picture Quality Manual Tracking Your VCR is equipped with automatic tracking control. This will be adequate for most tapes and will automatically adjust the tracking to suit the particular tape in use but if you insert an old or worn tape, it may be necessary to manually adjust the tracking in order to get the best picture.
advanced features about b.e.s.t. Works in SP and LP modes Does not work with Auto Satellite Prog Recording Works before Timer Recording B.E.S.T. data is lost when tape is ejected Pressing the T button on VCR does not start Instant Timer Recording while B.E.S.T. is turned ON a pause of 7 seconds a During B.E.S.T. B.E.S.T.
advanced features Sound Modes NICAM Stereo and Bilingual Broadcasts before you start Set On Screen Display (O.S.D.) to ON This VCR is equipped with a digital stereo sound decoder (NICAM) which makes the reception of stereo and bilingual broadcasts possible. When the VCR is tuned to a different preset, the type of broadcast will be displayed on the TV screen for a few seconds. select stereo Press AUDIO until HIFI L l L R appears on the TV screen.
advanced features Finding Specific Scenes Skip Search Press 3 up to 4 times. Each press of the 3 button will cause the VCR to go into fast-motion playback for a period of 30 seconds. Normal playback resumes automatically. • To return to normal playback during a Skip Search, press .. Index Search Each time you record a programme, this VCR puts an index marker at the point that you started recording.
advanced features T-V Link Functions When you connect the VCR and your TV via both the RF cable and the fullywired 21-pin SCART cable ( pg. 9), the following functions are available. You can use these functions only with a TV offering T-V Link, etc.* For details, refer to the instruction manual for your TV. * Compatible with TVs offering T-V Link, EasyLink, Megalogic, SMARTLINK, Q-Link, DATA LOGIC or NexTView Link via fully-wired 21-pin SCART cable.
advanced features 35 Direct Rec You can start recording the programme that you are watching on your TV with simple operation. Press and hold T and press . on the Remote Control, or press T on the VCR. Follow the procedure below to use this function. get to the mode set screen Press m. Move the highlight bar to MODE SET using the A and B buttons and press O (or E). select direct rec mode Move the highlight bar to DIRECT REC using the A and B buttons. Press O (or E) to select ON or OFF.
advanced features Satellite Receiver Control Settings The following procedure is required if you receive satellite channels through a satellite receiver. Around 20 seconds before the VIDEO Plus+ timer recording or Manual timer recording starts, the VCR sets its input mode to L-2 and automatically switches the satellite receiver’s channels using the provided Satellite Controller.
advanced features 37 Setting satellite receiver’s brand After installation, set the satellite receiver’s brand correctly and perform test; otherwise, the Satellite Controller cannot work correctly. turn on satellite receiver Turn on the satellite receiver’s power. get to the mode set screen Press m. Move the highlight bar to INITIAL SET using the A and B buttons and press O (or E). get to the sat control set screen Move the highlight bar to SAT CONTROL SET using the A and B buttons. Press O (or E).
advanced features Check Result of Test If the satellite receiver’s channel number has been changed to the same channel as you set ... Press the A and B buttons to move the highlight bar to CHANGED TO ..., then press O (or E) to finish the Sat Control Set mode. SAT CONTROL SET SAT PROG : 111 CHANGED TO 111 F [1] a k [MENU]: EXIT If the satellite receiver’s channel number has not been changed correctly ... Press the A and B buttons to move the highlight bar to NOT CHANGED, then press O (or E).
advanced features 39 Auto Satellite Programme Recording Auto Record from Satellite Receiver This facility allows a programme timer-recorded using the satellite receiver to be recorded on the VCR. connect up Connect your satellite receiver, TV and VCR (see diagram below). Outdoor Unit 21-pin AV Input Connectors (SCART) TV Aerial Aerial Connector Back of TV TV Aerial Cable Satellite Cable Satellite Receiver ANT.
advanced features programme satellite receiver Enter the details of the programme into your satellite receiver (see receiver manual) and put a tape in the VCR. get to the mode set screen Press m. Move the highlight bar to MODE SET using the A and B buttons and press O (or E). select l-2 select mode Move the highlight bar to L-2 SELECT using the A and B buttons. Press O (or E) to select L-2 or SAT. Then press m. set tape speed Press / on the Remote Control to set the tape speed to either SP or LP.
advanced features 41 Editing L-2 SELECT Setting Set L-2 SELECT to the appropriate mode depending on the type of unit connected to the rear panel AV2 (L-2) IN/DECODER connector of this VCR. get to the mode set screen Press m. Move the highlight bar to MODE SET using the A and B buttons and press O (or E). select l-2 select mode Move the highlight bar to L-2 SELECT using the A and B buttons.
advanced features
advanced features Editing from a Camcorder connect up Connect the Camcorder’s AUDIO/VIDEO OUT connecter to the VCR’s rear panel AV1 (L-1) IN/OUT or the AV2 (L-2) IN/DECODER connecter, via an optional cable adapter. set input mode Press AUX or PR so that L-1 (for AV1 (L-1) IN/OUT connecter) or L-2 (for AV2 (L-2) IN/DECODER connecter) appears in the place of a preset posi- tion number. set edit mode See Picture Control on page 30. start camcorder Engage the camcorder’s PLAY mode. start recorder Press T.
advanced features Other Functions On-Screen Display (O.S.D.) This function allows you to turn the on-screen information ON or OFF. get to the mode set screen Press m, move the highlight MODE SET B.E.S.T. PICTURE CONTROL AUTO TIMER F O.S.D. DIRECT REC AUTO SP a LP TIMER POWER SAVE NEXT PAGE bar to MODE SET using the A and B buttons and press O(or E). enable/disable osd The default setting for OSD is ON.
advanced features Power Save Mode You can reduce the power consumption while the VCR is turned off. get to the mode set screen Press m. Move the highlight bar to MODE SET using the A and B buttons and press O (or E). select power save mode Move the highlight bar to POWER SAVE using the A and B buttons. Press O (or E) to select ON or OFF. return to normal screen Press m.
advanced features Repeat Playback start repeat playback Press ., then press and hold . again for over 5 seconds, then release. The Play indicator (#) will flash on the display panel and the VCR will automatically playback and rewind the tape 100 times and then stop. stop playback Pressing S, ., < or > stops repeat playback. Next Function Memory play To playback immediately after rewinding, press < and then . within 2 seconds.
advanced features Connection to a Stereo System It is possible to connect your VCR to a suitably equipped stereo system and listen to the soundtrack through the stereo system. connect up Connect the AUDIO OUT L and R connecters on the VCR to the AUX IN or TAPE MONITOR connecters on your stereo. See diagram below.
advanced features Video Channel Set before you start The power cord must be plugged in and connected to the VCR The VCR must be turned off and no cassette inserted The Remote Control must have batteries inserted The TV set must be turned on The VCR can send picture signals to the TV set in one of two ways; RF (ordinary cable included with this VCR) and AV (via a 21-pin SCART cable available from TV and Hi-Fi dealers).
advanced features 49 Tuner Set The VCR needs to find, identify and memorise all available stations in your area in order to record programmes correctly. Once done, pressing the A or B buttons enables you to jump to the available channels without going via any vacant channels. This channel search can be done either automatically or manually.
advanced features Manual Channel Setup get to the confirmation screen Press m. Move the highlight bar to MANUAL CH SET using the A and B buttons and press O (or E).
advanced features Change Station Name get to the confirmation screen Press m. Move the highlight bar to MANUAL CH SET using the A and B buttons and press O (or E). select position Use the M button on the Remote Control to move the highlight bar to the preset position you want then press O twice. select character Press E until the first letter of the station name begins blinking.
advanced features Change Station Preset Position get to the confirmation screen Press m. Move the highlight bar to MANUAL CH SET using the A and B buttons and press O (or E). select item Use the M M button to move the station to the new preset position, ID –––– –––– –––– –––– –––– –––– –––– PR 01 02 03 04 05 06 07 button on the Remote Control until the item you want to move begins blinking then press O. The station name (ID) and its channel (CH) number begin blinking.
advanced features 53 Fine-Tuning Stored Channels get to the confirmation screen Press m. Move the highlight bar to MANUAL CH SET using the A and B buttons and press O (or E). M select item Use the button on the Remote Control to move the highlight bar to the channel that you wish to fine-tune then press O twice. fine tuning Press the E button to move to the Fine Tuning ‘+/–’ and use the A and B buttons to fine-tune the channel. A ‘+’ or a ‘–’ symbol will appear during this process.
advanced features TV Station Channel Number Guide Region London & South-East Transmitter BBC1 BBC2 ITV CH4 CH5 Bluebell Hill Crystal Palace Dover Heathfield Oxford 40 26 50 49 57 46 33 56 52 63 43 23 66 64 60 65 30 53 67 53 — 37 — — 49 Beacon Hill Caradon Hill Huntshaw Cross Redruth Stockland Hill Channel Islands Fremont Point 57 22 55 51 33 63 28 62 44 26 60 25 59 41 23 53 32 65 47 29 — — 67 37 — 51 44 41 47 — Hannington Midhurst Rowridge 39 61 31 45 55 24 42 58 27 66 68 21
advanced features 55 Clock Set You should only need to perform this function if: • Auto Clock Set was not performed correctly by Auto Setup, Preset Download or Auto Channel Set • The VCR’s memory backup has expired • You want to change the Just Clock setting Setting the Clock get to the initial set screen Press m. Move the highlight bar to INITIAL SET using the A and B buttons and press O (or E).
advanced features Guide Program Numbers Guide Program Numbers are used by the VIDEO Plus+ system to identify the correct preset to record. You should only need to perform this function if: • using a PlusCode does not identify a preset number automatically • you add a channel after Auto Setup or Preset Download has been performed • you wish to use the VIDEO Plus+ system to record a satellite programme Manually Setting Guide Program Numbers get to the guide prog set screen Press m.
subsidiary information Question and Answers PLAYBACK Q: What happens if the end of the tape is reached during playback or search? A: The tape is automatically rewound to the beginning. Q: Can the VCR indefinitely remain in the still mode? A: No. It stops automatically after 5 minutes to protect the heads. Q: During search, slow, still and frame-by- frame playback, I can’t hear any audio. What’s the problem? A: This is normal.
subsidiary information Troubleshooting SYMPTOM POSSIBLE CAUSE CORRECTIVE ACTION • The mains power cord is disconnected. Connect the mains power cord. 2. The clock is functioning properly, but the VCR cannot be powered. • c is displayed on the display panel with AUTO TIMER set to OFF. Press the c button to turn the c indicator off. 3. The Remote Control won’t function. • The batteries are discharged. Replace the dead batteries with new ones. • The VCR is in the RECORD PAUSE MODE. Press .
subsidiary information SYMPTOM 59 POSSIBLE CAUSE CORRECTIVE ACTION • There is no cassette loaded, or the cassette loaded has had its record safety tab removed. Insert a cassette, or using adhesive tape, cover the hole where the tab was removed. 2. TV broadcasts cannot be recorded. • L-1, L-2 or SAT has been selected as the input mode. Set to the desired preset. 3. Tape-to-tape editing is not possible. • The source (another VCR, camcorder) has not been properly connected.
subsidiary information SYMPTOM POSSIBLE CAUSE CORRECTIVE ACTION OTHER PROBLEMS 1. Whistling or howling is heard from the TV during camcorder recording. • The camcorder’s microphone is too close to the TV. • The TV’s volume is too high. Position the camcorder so its microphone is away from the TV. Turn the TV’s volume down. 2. When scanning channels, some of them are skipped over. • Those channels have been designated to be skipped. If you need the skipped channels, restore them. 3.
list of terms 61 List of Terms A N Auto Channel Setup ................................................ 49 Auto Satellite Programme Recording ...................... 39 Auto Setup ................................................................ 10 Auto SP a LP Timer ................................................ 45 Auto Timer ............................................................... 45 Next Function Memory .......................................... 46 NICAM Stereo and Bilingual Broadcasts .......
MEMO
MEMO
specifications HR-J785EK general Power requirement : AC 220 V – 240 V Ó, 50 Hz/60 Hz Power consumption : on : 16 W, off : 4.0 W Operating Temperature : 5°C to 40°C Storage Temperature: –20°C to 60°C Operating position : Horizontal only Dimensions (WxHxD) : 400 mm x 94 mm x 278 mm Weight : 3.4 kg Format : VHS PAL standard Maximum recording time : (SP) : 240 min. with E-240 video cassette (LP) : 480 min.