
Operation Manual


Table Of Contents
- Beginner’s Guide
- Useful Shooting Techniques
- Getting Started
- Recording
- Playback
- Editing
- Copying
- Menu Settings
- Name of Parts
- Indications on the LCD Monitor
- Troubleshooting
- Battery Pack
- Recording
- Card
- Playback
- PC
- Screen/Image
- Other Problems
- Error Message?
- CHECK LENS COVER
- COMMUNICATION ERROR
- FORMAT ERROR!
- MEMORY CARD ERROR!
- NOT FORMATTED
- RECORDING FAILURE
- VIDEO MANAGEMENT FILE IS DAMAGED, RECOVERY IS REQUIRED TO RECORD/PLAYBACK, RECOVER?
- UNSUPPORTED SCENE!
- THIS FILE IS PROTECTED
- CHECK CARD’S WRITE PROTECTION SWITCH
- INSUFFICIENT AVAILABLE SPACE
- MAXIMUM QUANTITY RECORDING FOLDERS/FILES HAS BEEN REACHED
- NUMBER OF FOLDERS OVERFLOW
- FILE QUANTITY LIMIT EXCEEDED
- Maintenance
- Specifications
4
Select the region where you live with the +/- button and press OK.
.
●
The city name and time difference are displayed.
●
Press OK after the color of the selected region changes.
Memo:
●
The clock can be reset again later.
"Resetting the Clock" (A P.14)
●
When using this unit overseas, you can set it to the local time for re-
cording.
"Setting the Clock to Local Time when Traveling" (A P.16)
●
You can turn on or off the clock display during playback mode.
"ON-SCREEN DISPLAY" (A P.51)
Resetting the Clock
Set the clock with “CLOCK ADJUST” from the menu.
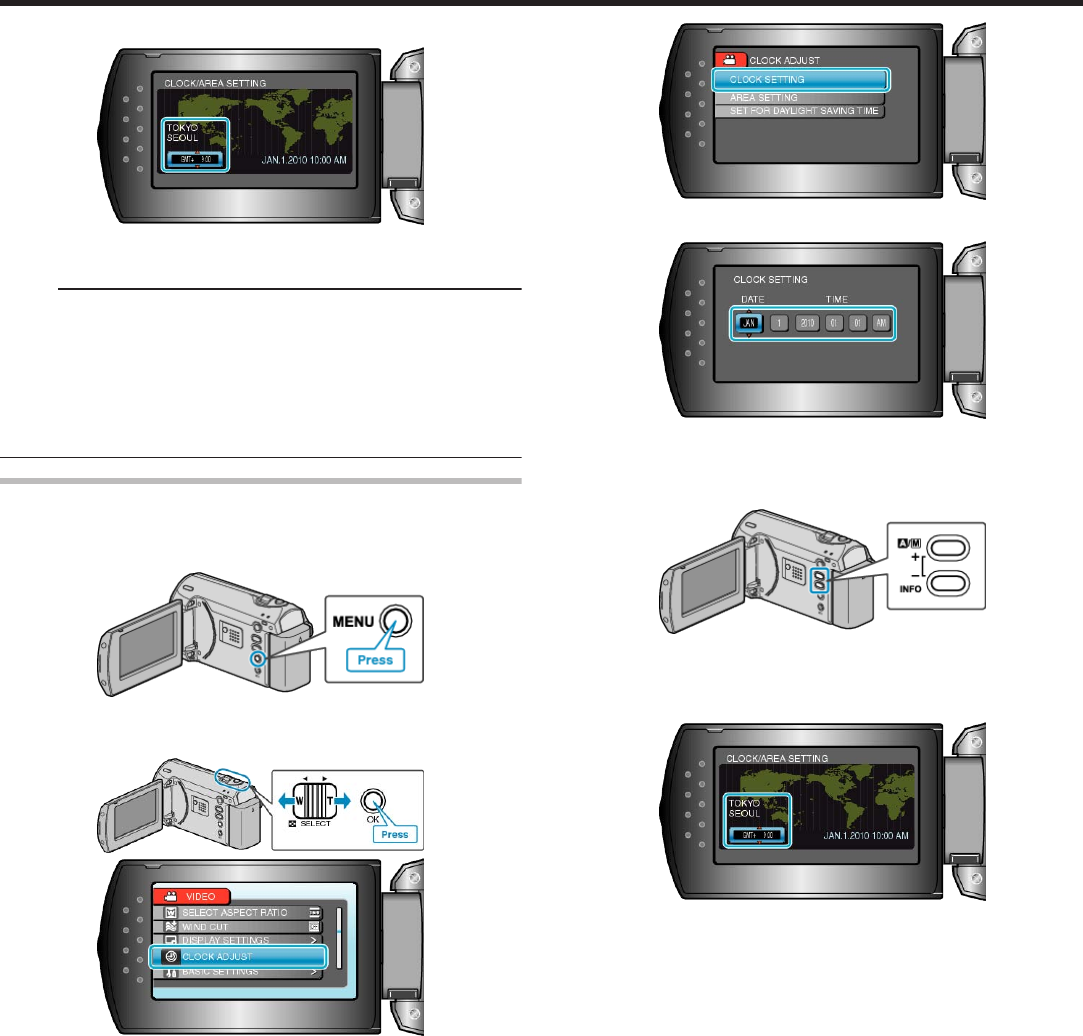
1
Press MENU to display the menu.
.
2
Select “CLOCK ADJUST” with the ZOOM/SELECT lever and press
OK.
.
.
3
Select “CLOCK SETTING” and press OK.
.
4
Set the date and time.
.
●
Use the +/- button to adjust the year, month, day, hour, and minute in
order.
・ +: Increases the number.
・ -: Decreases the number.
.
●
Use the ZOOM/SELECT lever to move the cursor.
●
After setting the date and time, press OK.
5
Select the region where you live with the +/- button and press OK.
.
●
The city name and time difference are displayed.
●
Press OK after the color of the selected region changes.
Getting Started
14