
Manual


UsingAVCOMPULINK
When the TV set or device to be connected is a
JVC product equipped with the AV COMPU LINK-
[[ or -[]! jack, connecting them to the AV COMPU
LINK jack on the system will allow you to control
the other devices by operating one device.
Connection with a TV set and an AV
amplifier
• Also read manuals of the
AV amplifier.
NOTE
• Refer to "Others" (,_page 30) to set the AV
COMPU LINK mode.
• Also carefully readmanuals of devices to be
connected.
Connection with a TV set
• Connect to the Video 3 (DVD) input jack on your
TV set. If Video 3 is for DV/Movie input, read the
following descriptions:
Connection with a TV set and a VCR
4,
@j Connection cord
(sold separately)
"AV COMPU
LINKql
v
JVC-made VCR
TV input jack AV COMPU LINK mode F/emote-control code of VCR
Video 1 DVD 2 B
DVD 3 A
• When using with initial settings, connect to Video
3 (if not set to DV/Movie input). Set the remote-
control code to "A".
Main unit
(soldseparately) ,_.c0_F.u_._ j
IInput jack of AV amplifier AM COMPU LINK mode ]
DVD _ DVD 1 ]
NOTE
• Connecting DVD sound output to a sound input jack
for any device other than a DVD disables proper
operation.
• When connecting component video output to a TV
set, change setting of the A V COMPU LINK mode in
this system to "DVD 1". Do not connect to the S-
video jack on the A V amplifier.
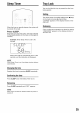
1
2
3
Turn on the main power of the
TV set.
Insert a disc or videotape into
the source device (the system
or a VCR).
Press the play button on the
source device.
• The TV set will be turned on.
• TV input will be switched to external input
(Video 1,2 or 3) of the source device.
• The AV amplifier will be turned on.
• The source of the AV amplifier will be
switched to the device on which the play
button has been pressed.
36