
JUN-X8 DC Battery Charger Manual

X8
Mini Balance Charger/Discharger/DC Power
- 33 -
X8 Firmware Upgrades
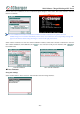
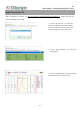
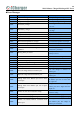
Firmware Upgrades via Junsi Console
First, connect Junsi Console for X8 as the last chapter; then do as the follow steps to finish the update:
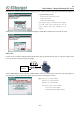
Note: If there is any mistake during update, please keep the power supplying for X8 and try again.
If the charger cannot start normally for the updating (e.g.: in the event of an unexpected power outage during
the update process), enter into BOOT mode firstly, and then update again.
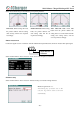
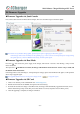
Firmware Upgrades via Boot Mode
Press the <> and connect the power supply of the charger, and hold for 4 seconds. After hearing a “beep” sound,
release the button.
Then press the <> and hold for 4 seconds, the charger will into Boot mode once there is three “beep” sound, and
the button can be released now.
If the charger fails to start normally (ex. Unexpected power outage), please enter the Boot mode again, it will repeat the
above steps to upgrade again.
Note: Upgrade failed in the case of not power outages, click " " to upgrade again;
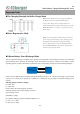
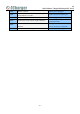
Firmware Upgrades via SD Card
1. Create a new directory in the available SD card: X:\Junsi\Upgrade ;
2. Rename the firmware file to X8.BIN, and copied to the new directory;
3. Insert the SD card into the charge to enter Boot mode, the charger will automatically upgrade the firmware, and it
finishes after hearing a beep sound. (The process lasts about 15 seconds, and please not turn off the power)
4. After the upgrading is complete, the charger will reboot.