
User manual
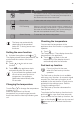

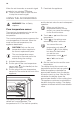

1. When the appliance is activated, touch
then touch it again and hold for
three seconds.
The display shows SET1 and "1" flashes.
2. Touch or to set the setting.
3. Touch .
4. Touch
or to change the value of
the setting.
5. Touch .
To exit the Settings menu, touch or
touch and hold .
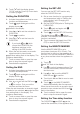
Automatic Switch-off
For safety reasons the appliance
deactivates automatically after some time if
an oven function operates and you do not
change any settings.
Temperature (°C) Switch-off time
(h)
30 - 115 12.5
120 - 195 8.5
200 - 230 5.5
After the Automatic switch-off, touch a
sensor field to operate the appliance again.
The Automatic switch-off does
not work with the functions:
core temperature sensor, Light,
Slow Cooking, Duration, End,
Time delay.
Brightness of the display
There are two modes of display brightness:
• Night brightness - when the appliance is
deactivated, the brightness of the
display is lower between 10 PM and 6
AM.
• Day brightness:
– when the appliance is activated.
– if you touch a sensor field during the
night brightness (apart from ON /
OFF), the display goes back to the
day brightness mode for the next 10
seconds.
– if the appliance is deactivated and
you set the Minute Minder. When the
Minute Minder function ends, the
display goes back to the night
brightness.
Cooling fan
When the appliance operates, the cooling
fan activates automatically to keep the
surfaces of the appliance cool. If you
deactivate the appliance, the cooling fan
can continue to operate until the appliance
cools down.
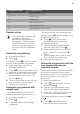
HINTS AND TIPS
WARNING! Refer to Safety
chapters.
The temperature and baking
times in the tables are guidelines
only. They depend on the
recipes and the quality and
quantity of the ingredients used.
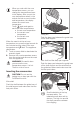
Cooking with steam
• Use only heat and corrosion resistant
cookware or chrome steel food
containers (for some models only).
• The correct shelf positions are in the
table below. Count the shelf positions
from the bottom to the top.
• When you cook longer than 30 minutes
or when you cook large quantities of
food, add water if it is necessary.
• Put the food into the correct cooking
containers and put the containers on the
19