
User Manual

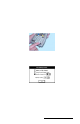


Table Of Contents
- Allegro CE™ Owner's Manual
- Table of Contents
- Chapter 1 Introduction
- Chapter 2 Hardware Components
- Chapter 3 Memory Configuration and Data Storage Options
- Chapter 4 Windows CE Operating System
- Chapter 5 Technical Reference
- Chapter 6 Software Developer’s Guide for Allegro CE 3.0 and CE .NET
- Chapter 7 FCC Information, Warranty, and Software License Agreement
- Chapter 8 Expansion Pods
- Index
- Table of Contents
- Chapter 1 Introduction
- Chapter 2 Hardware Components
- Case Design
- Keyboard
- Display
- System Tray Indicators
- Batteries
- Main Power Source
- Setting Battery Charge
- Battery Life
- Recharging the NiMH Battery Pack
- Battery Gauging Explained
- Battery Status Icons
- When the Battery Voltage Drops
- Power Management Feature
- Changing NiMH Battery Pack
- Alkaline Battery Holder: Inserting Batteries and Usage Information
- Storing the Allegro CE During Inactive Periods
- NiMH Battery Pack's Useful Life
- Spare NiMH Battery Packs
- Short-Term Backup Supply
- Real Time Clock
- Main Power Source
- Communication Ports
- USB/Power Dock
- PC Cards
- Expansion Pods
- Chapter 3 Memory Configuration and Data Storage Options
- Chapter 4 Windows CE Operating System
- Windows CE Overview
- CE .NET Viewers
- ActiveSync Transfer
- Downloading ActiveSync from the Internet
- Installing ActiveSync
- Establishing a First Time ActiveSync Connection
- Establishing Additional ActiveSync Connections
- New Partnership Set Up
- USB MultiSync
- USB MultiSync Connections
- Transferring Files Between the Allegro CE and the Desktop PC
- Windows Explorer
- Storing Files and Programs
- System Save/Restore Utilities
- Application Command Bars
- PTab Spreadsheet Program
- Pocket Word/WordPad
- Internet Explorer and Inbox
- Calculator Program
- Terminal Program
- Chapter 5 Technical Reference
- Chapter 6 Software Developer’s Guide for Allegro CE 3.0 and CE .NET
- Chapter 7 FCC Information, Warranty, and Software License Agreement
- Chapter 8 Expansion Pods
- Index

Page 2-28 Hardware Features
The battery gauging is an estimate. It works well in applications
where the Allegro is used heavily and charged every day. When it is
not used much and goes several days between charges, the gauging
may not be as accurate in reflecting the true charge of the battery
pack. The accumulated error can be as much as 5% per day.
To avoid errors, keep the Allegro attached to the AC charging adapter
or in the USB/Power Dock when you are not going to use it for a few
days. This practice prevents the battery pack from self-discharging.
The battery stays fully charged and the battery gauging reflects the
correct status of the battery pack.
How Battery Gauging Works When Using Alkaline Batteries
Alkaline batteries have a better slope to the voltage discharge curve
than NiMH batteries. Because of this, the voltage can be read directly
to gauge the battery charge percent.
The gauging may vary depending on the grade and brand of the
batteries being used. For best results, we recommend that you use the
new types of alkaline batteries such as the Duracell Ultra
™
and
Energizer Titanium
™
.
Temperature and loading affect alkaline battery voltage and may
cause the gauging to behave differently in different environmental
conditions. When moving from a cold environment to a warm one, the
battery charge status bar indicators may actually move up instead of
down. This happens because in cold temperatures the alkaline
batteries actually have less capacity than in warm temperatures and
this is reflected in the voltage output.
Battery Status Icons
There is a battery indicator in the system tray that shows the amount
of power left on the battery. The indicator gives a percentage of the
charge left in the battery, as shown below:
❖ Note: The system tray indicators are meant to give only an approximate
indication of battery charge remaining, not an exact reading.