
- Juniper Router Hardware Guide

Provide Power to t
he Router
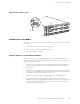
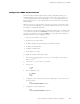
Figure 24: Attach Cable to a PIC
1334
PIC
PIC cable
Provide Power to the Router
Connect th
e router to external power sources and power it on by performing the following
procedures:
• Connect P ower to an AC-Powered Router on page 65
• Connect Po
wer to a DC-Powered Router on page 66
• Power On the Router on page 67
Connect Power to an AC-Powered Router
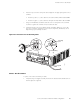
Connect AC power to the router by plugging the power cord supplied with each power
supply into the appliance inlet on the power supply faceplate and into an AC power source
receptacle. Follow this procedure:
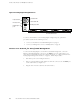
1. Locate the power cords shipped with the router, which should have a plug appropriate
for your geographical location (see “AC Grounding and Power Cord Specifications”
on page 45).
2. Attach an electrostatic discharge (ESD) grounding strap to your bare wrist and connect
the strap to one of the ESD points on the chassis. Fo r more information about ESD, see
“Prevent Electrostatic Discharge Damage” on page 134.
3. Verify that the switch o n each power supply faceplate is in the OFF (O) position.
4. For each power supply, insert the appliance coupler en d of a power cord into the
appliance inlet on a power supply faceplateandinserttheplugintoanACpowersource
receptacle. Verify that the power cord does not block access to router components
or drape where people could trip on it.
Connect the Router and Perform Initial Configuration
65