
User's Manual


2. INSTALLATION
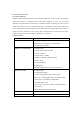
1) EQUIPMENT SETUP
(1) Transmitter
Unwrap all sending unit components. Plug the power supply with the large tip into a
standard outlet and plug it into charger base for transmitter. Stack the transmitters on
the charger base. The red indicator will be lighted on and it means the transmitters are
charged properly. We recommend some type of surge suppressor on the power supply
for protection. Power surges are not covered under system warranty.
(2) Pager
Locate the charger base in a sturdy, out of the way location. Connect the charger base
with TX charger base using included jump wires. Be sure to plug the jump wires & power
supply jack in all the way.
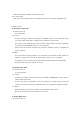
Insert the pagers on the charger base. The pager number will always face top and the
red charging indicator will be lighted.
You should check a charging indicator appear on each pagers. This light indicates proper
charging is taking place.
On the top of each pager is your pager number.
2) PLACEMENT
(1) Transmitter
Place the tablecall transmitter on the proper location of table. Be sure that transmitter
will not be dropped by mistaken and check the transmitter number is match with the
table number.
(2) Pager
Attach the pager on the waiter(manager)’s belt using its belt clip. Be sure that the
message “READY” is displayed on the screen. If the message is not displayed, then the
pager is now turned off. So please press and hole the side button until it is turned on.
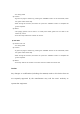
3. OPERATION
1) To page Waiter
- When you press WAITER button shortly, it transmits and displays “TABLE – Number” to
the waiter pager.
- After transmitting is finished, red LED blinks once.
2) To page Manager
- When you press MANAGER button shortly, it transmits and displays “TABLE – Number”
to the manager pager