
User manual


Export 16.02.2018 Copyright by Joy-IT 11
3
Talking-Pi Maker-Case
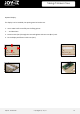
Cabling:
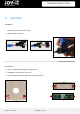
Now connect the enclosed cable to the buon (LED) and the Talking Pi (BUTTON).
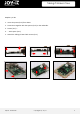
The microphone, loudspeaker and display can also be connected.
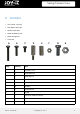
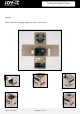
A: LED
B: Buon
C: LED
D: Buon
If the LED does not
light up, plug A and C
must be replaced.
A B C D
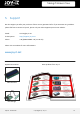
A
B
C
D
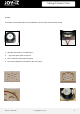
Buon/LED
Microphone
Speaker