Handheld Thermal Monocular user manual UD16526B
Legal Information User Manual ©2019 Hangzhou Hikvision Digital Technology Co., Ltd. All rights reserved. About this Manual The Manual includes instructions for using and managing the Product. Pictures, charts, images and all other information hereinafter are for description and explanation only. The information contained in the Manual is subject to change, without notice, due to firmware updates or other reasons. Please find the latest version of this Manual at the Hikvision website ( https://www.
A MANNER THAT DOES NOT INFRINGE ON THE RIGHTS OF THIRD PARTIES, INCLUDING WITHOUT LIMITATION, RIGHTS OF PUBLICITY, INTELLECTUAL PROPERTY RIGHTS, OR DATA PROTECTION AND OTHER PRIVACY RIGHTS.
Regulatory Information FCC Information Please take attention that changes or modification not expressly approved by the party responsible for compliance could void the user’s authority to operate the equipment. FCC compliance: This equipment has been tested and found to comply with the limits for a Class B digital device, pursuant to part 15 of the FCC Rules. These limits are designed to provide reasonable protection against harmful interference when the equipment is operated in a commercial environment.
Warning This is a class B product. In a domestic environment this product may cause radio inter-ference in which case the user may be required to take adequate measures.
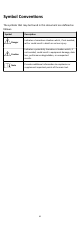
Symbol Conventions The symbols that may be found in this document are defined as follows. Symbol Description Danger Indicates a hazardous situation which, if not avoided, will or could result in death or serious injury. Caution Indicates a potentially hazardous situation which, if not avoided, could result in equipment damage, data loss, performance degradation, or unexpected results. Note Provides additional information to emphasize or supplement important points of the main text.
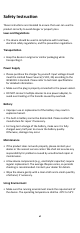
Safety Instruction These instructions are intended to ensure that user can use the product correctly to avoid danger or property loss. Laws and Regulations • The device should be used in compliance with local laws, electrical safety regulations, and fire prevention regulations. Transportation • Keep the device in original or similar packaging while transporting it. Power Supply • Please purchase the charger by yourself.
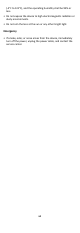
(-4°F to 131°F), and the operating humidity shall be 95% or less. • Do not expose the device to high electromagnetic radiation or dusty environments. • Do not aim the lens at the sun or any other bright light. Emergency • If smoke, odor, or noise arises from the device, immediately turn off the power, unplug the power cable, and contact the service center.
Manufacture Address No.555 Qianmo Road, Binjiang District, Hangzhou 310052, China Hangzhou Hikvision Digital Technology Co.
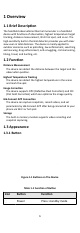
1 Overview 1.1 Brief Description The handheld observational thermal monocular is a handheld device with functions of observation, highest temperature target tracking, distance measurement, Wi-Fi hot spot, and so on. The high-sensitivity built-in thermal detector provides you with clear view even in total darkness. The device is mainly applied to outdoor scenarios such as patrolling, law enforcement, searching and rescuing, drug enforcement, anti-smuggling, criminal seizing, hiking, travel, and hunting, etc.
Icon Button Function Hold: power on/off Capture Press: capture Hold: recording Mode Press: palettes Hold: menu Zoom Press: digital zoom Hold: FFC 1.3.2 Interface Figure 1-2 Overview of Interfaces • Lens Cover: protect the lens from dust or scratch. • Diopter Adjustment Knob: adjust the view according to your degree of myopia. • USB Interface: charge the device or export files with the supplied USB cable. • Tripod Screw: connected to tripod. 2 Preparation Take out the device and accessories.
USB Cable × 1 User Manual × 1 Wrist Strap × 1 Thermal Camera × 1 No-Dust Cloth × 1 2.2 Charge Device After the device starts up, the OSD (on-screen display) shows the battery status. When the battery is low, charge the device and ensure it works properly. Before You Start • The charging temperature should be from 0 °C to 45 °C (32 °F to 113 °F). • Charge the device with the delivered USB cable. Steps 1. Lift the USB cover. 2. Plug in the USB cable and charge the device.
Power Off When the device is turned on, hold off the device. for 2 seconds to power 2.4 Menu Description When the device powers on, hold to display the menu. Figure 2-2 Menu Description • Press to move the cursor up. • Press to move the cursor down. • Press to confirm and hold it to exit the menu. 3 Image Settings You can set palettes, brightness, scenes, FFC (flat field corrrection), and DPC (defective pixel correction) to display the best image effect. 3.
Figure 3-2 Adjust Diopter 3.2 Adjust Brightness Select and press to adjust brightness. In white hot mode, the higher the value of brightness is, the brighter the image is. The image effect in white hot mode is showed as picture below and effect in black hot mode is opposite. Figure 3-3 Adjust Brightness in White Hot Mode 3.3 Adjust Contrast Select and press to adjust image contrast. 3.4 Select Scene You can select proper scene according to environment temperature to improve the display effect.
Black Hot The hot part is black-colored in view. The higher the temperature is, the more black the color is. Red Hot The hot part is red-colored in view. The higher the temperature is, the redder the color is. Fusion From high temperature to low temperature, the image is colored in from white, yellow, red, pink to purple. 3.6 Adjust Digital Zoom You can zoom the image by using this function. Press in the view mode, the live view switches between 1 ×, 2 ×, and 4 ×. 3.
- Auto: The device performs FFC automatically according to the set schedule when switching on the camera. - External: Cover the lens cover, then hold in live view to correct the non-uniformity of display. Figure 3-4 Flat Field Correction 3. Hold to save the settings and exit. 3.8 Correct Defective Pixel The device can correct the defective pixels on the screen which are not performed as expected. Steps 1. Hold to show the menu. 2. Select . 3. press to select the offset.
Note The available height ranges from 0.1 m to 9.9 m. 3) Press to confirm. 3. Align the center of top mark with the edge of target top. Press . Figure 4-1 Set the Edge of Target Top The cursor blinks on the top edge of the target. 4. Align the center of bottom mark with the edge of target bottom. Press . Figure 4-2 Set the Edge of Target Bottom Result The left top of the image displays the distance measurement result and the height of the target.
When the function is enabled, displays in the spot of highest temperature. When the scene changes, the moves. 6 Picture and Video You can manually record video or capture picture when displaying live view. 6.1 Capture Picture On the main live view page, press to capture picture. Note • When capturing succeeds, the image freezes for 1 second and a prompt shows on the display. • For exporting captured pictures, refer to Export Files. 6.2 Record Video Steps 1.
Before You Start Install the Hik-Connect APP on your phone first. Steps 1. Hold to show the menu of device. 2. Press to enable hot spot function. 3. Turn on the WLAN of your phone and connect to the hot spot. • Hot Spot Name: HIK-IPTS Serial No. • Hot Spot Password: the last 9 digits of serial No. 4. Open the APP and connect your phone with the device. You can view the interface of device on your phone. Note The hot spot function will be turned off automatically when power is less than 15%.
9.1 Why does the charge indicator flash improperly? Check the following items. 1. Check whether the device is charged with standard power adapter and the charging temperature is above 0 °C (32 °F). 2. The device is equipped with built-in charging protection module. Charge the device in power off status. 9.2 Why is the power indicator off? Check whether the device is off-battery. Check the indicator after charging the device for 5 minutes. 9.
10.2 Device Communication Matrix Scan the following QR code to get device communication matrix. Note that the matrix contains all communication ports of Hikvision thermal cameras.