
Beginner's Guide
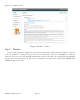


In order to avoid problems with access rights and possibly turned on PHP Safe Mode, you have the
possibility to use the FTP functions of PHP for the upload and file handling. This is not necessary in a
local installation. If you have installed Joomla on a virtual server with your provider, you can enter the
FTP data provided by your ISP. If your provider allows this function, it is advisable for security reasons,
to create different FTP accounts for users and for the Joomla installation. Activate the FTP account just
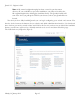
for that Joomla directory (Figure 5).
Figure 5: Installer – FTP-configuration
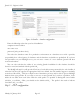
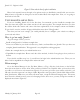
Step 6 - Configuration
The main configuration is divided into three steps.
In the first part of the configuration the name of your site is requested. This name will appear in the
title bar of the browser window when someone accesses your site. The name is also used at various other
places, such as in confirmation emails to registered users. For our example page, I'll use the name Joomla
(Figure 6). In the second part, the name, e-mail address and administrator password are requested.
Writing down the password on a piece of paper is probably best (but do not stick it on the screen or
under the keyboard :-)).
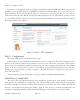
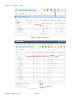
In the third part, you specify the type of data your Joomla installation should contain.
Installation of sample data
The data is the most important thing in your installation. Joomla allows (and strongly recommends
for beginners) the installation of sample data. You will be provided with a small manual about Joomla
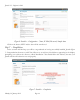
and many examples to experiment safely. Click the button install sample data. The installer will load the
data into your database and change the display (Figure 6). This process is somewhat unimpressive but
necessary for installing sample data. The button will disappear and a small text box will be visible.
Joomla! 2.5 - Beginner’s Guide
Monday, 30 January 2012! Page 43