
Installation Guide


Table Of Contents
- Applications
- North American Emissions Compliance
- United States
- Canada
- Installation
- Parts included
- Dimensions
- Accessories
- General precautions
- Setup and adjustments
- Installing the Johnson Controls Vibration Diagnostics Service mobile application on your mobile device
- Assembling the hardware
- Operation
- Recording
- Charging
- Using other sensors
- Maintenance
- Cleaning
- Storing
- Troubleshooting
- Depleted battery
- Repair information
- Technical specifications
- Johnson Controls Vibration Diagnostics Service
Johnson Controls Vibration Diagnostics Service Installation Guide
4
Assembling the hardware
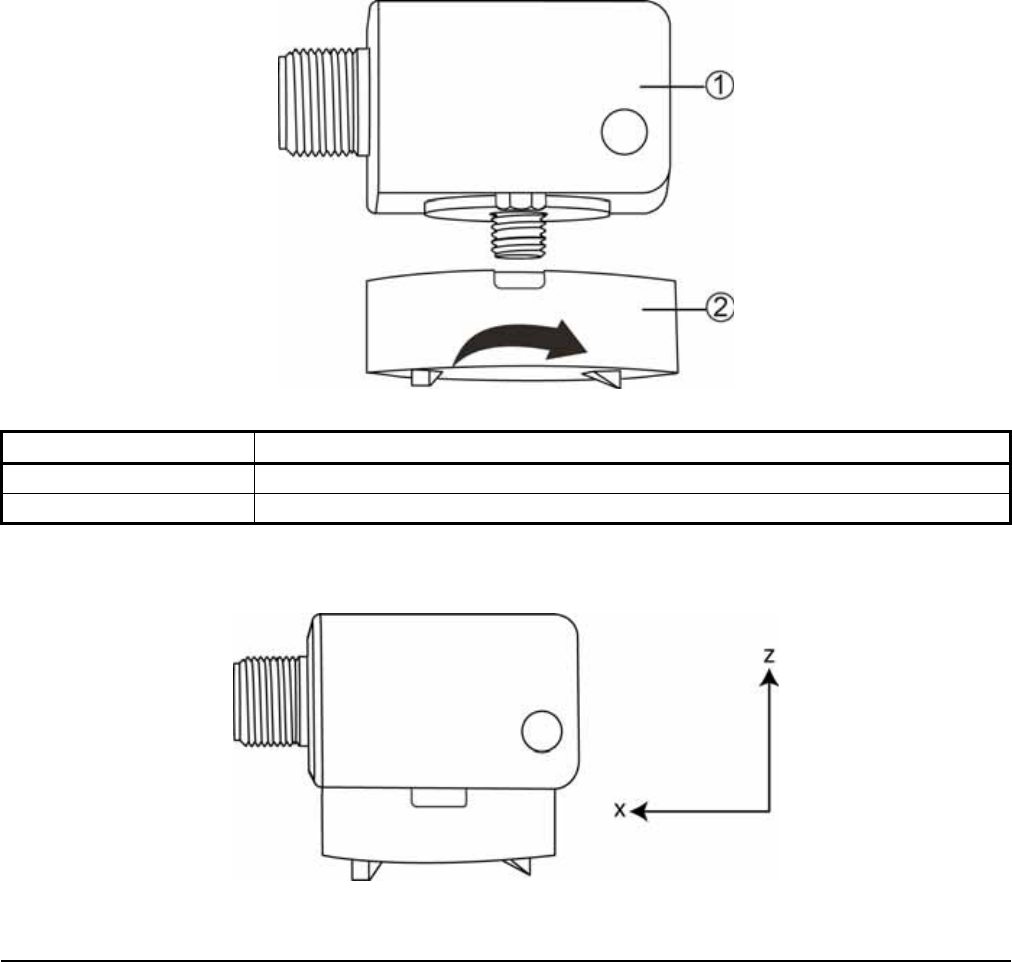
1. Screw on and tighten the sensor magnet to the tri-axial accelerometer. See Figure 1.
Notes:
• Align the standoff on the outer edge of the base of the sensor with the cutout on the surface of the magnet, so
that the base of the sensor sits flush with the top surface of the magnet.
• When mounting the sensor to a mounting pad, remove the standoff from the sensor so that the sensor sits flush
with the mounting pad.
• To mount the tri-axial accelerometer to a mounting pad that is pre-installed on the equipment, do not attach the
sensor magnet.
• The tri-axial accelerometer senses data in three axes. For orientation, see Figure 2 and Figure 3.
Table 1: Connecting the sensor magnet to the tri-axial accelerometer
Callout Description
1 Tri-axial accelerometer
2 Sensor magnet
Figure 1: Connecting the sensor magnet to the tri-axial accelerometer
Figure 2: Orientation of the tri-axial accelerometer and sensor magnet (side view)