
Use and Care Manual


38
t
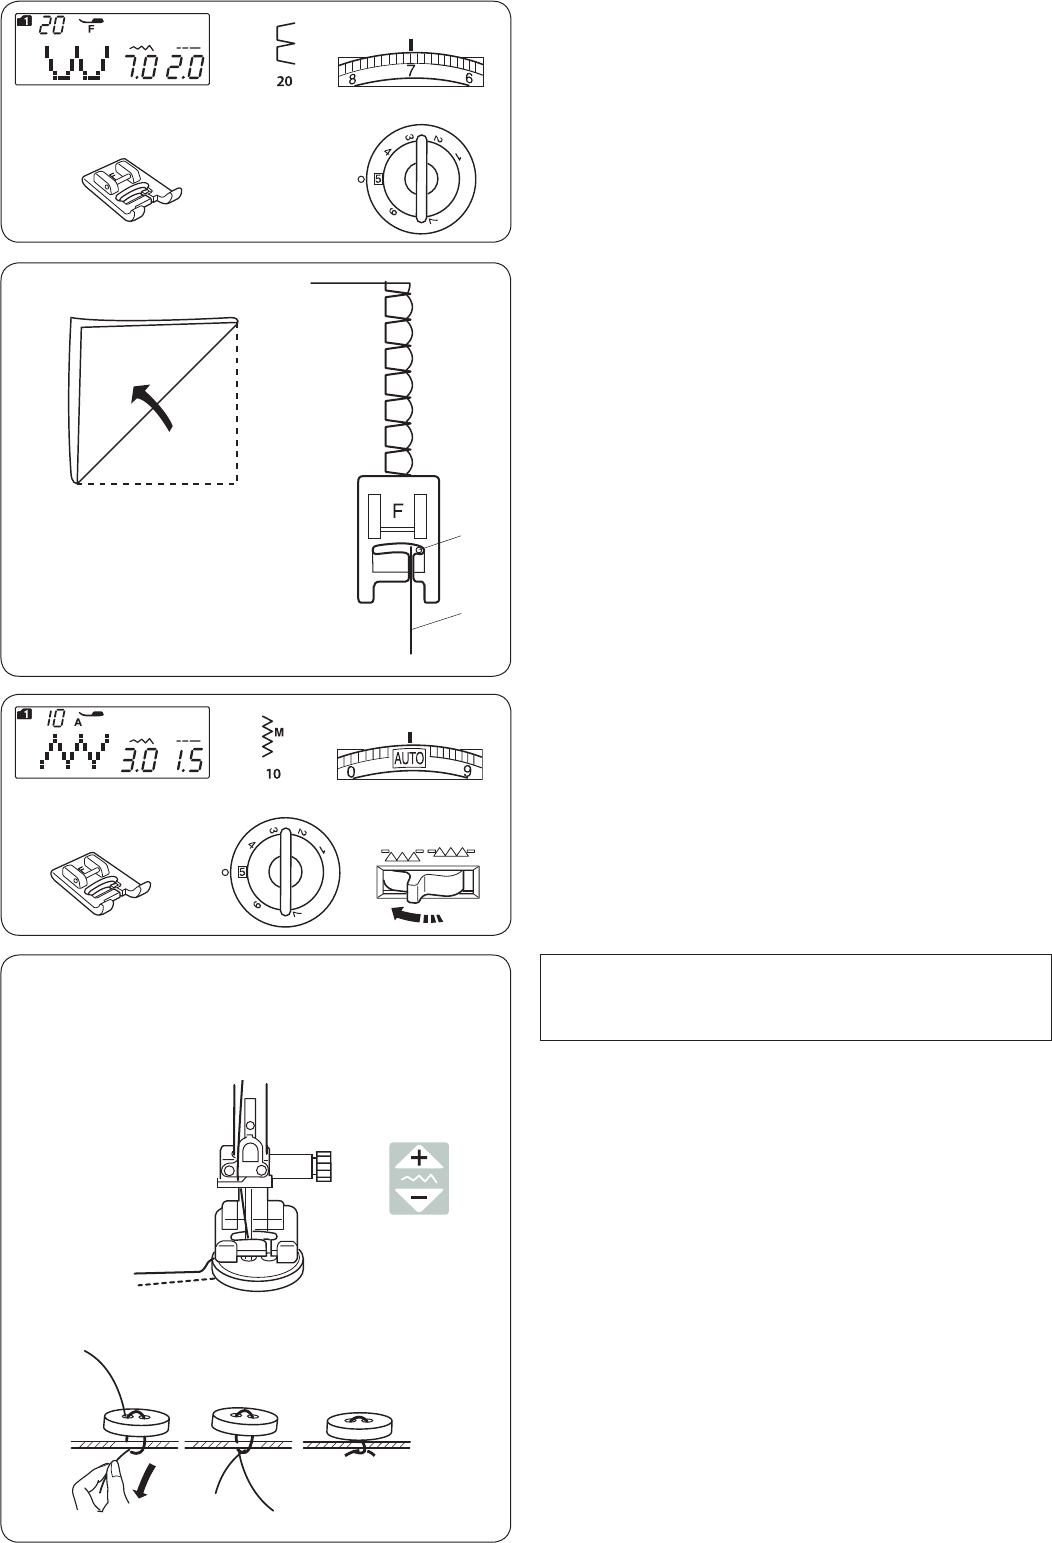
Use a light weight fabric (tricot, for example). Fold the
fabric as shown and stitch on the fold.
Allow the needle to just clear the folded edge to create
ashellededge.Youmayneedtoincreasetheneedle
thread tension.
q Folded edge
w Right needle drop position
If you sew rows of shell stitches, space the rows at least
1.5 cm (5/8˝) apart.
Youcanalsosewshellstitchesonknitsorsoftsilky
woven fabrics in any direction.
Shell Tuck
Machine settings
q Pattern: MODE 1: 20
w Thread tension: 6−8
e Presser foot: Satin stitch foot F
r Foot pressure: 5
q
w
q
e
w
r
NOTE:
Do not use the thread cutter button to cut the threads.
Otherwise, you cannot tie the threads.
Button Sewing
Machine settings
q Stitch pattern: MODE 1:10
w Thread tension: AUTO
e Presser foot: Satin stitch foot F
r Foot pressure: 5
t Feed dog: Lowered
Lower the feed dog.
Match the holes of button to the horizontal slot on the
presser foot.
Lower the foot to hold the button in place.
Adjust the stitch width so the needle will enter the left
hole of the button.
Turn the handwheel so that the needle will enter the right
hole of the button. Readjust the stitch width if necessary.
Stitch several times.
After you finish sewing, cut the threads but leave 7.5 cm
– 10 cm (3˝–4˝) of threads at the end.
Pull the bobbin threads to bring the needle threads down
to the wrong side of the fabric.
Tie the threads together.
* After the button sewing is completed, raise the feed dog
for normal sewing.
e
q w
r