
Use and Care Manual


9
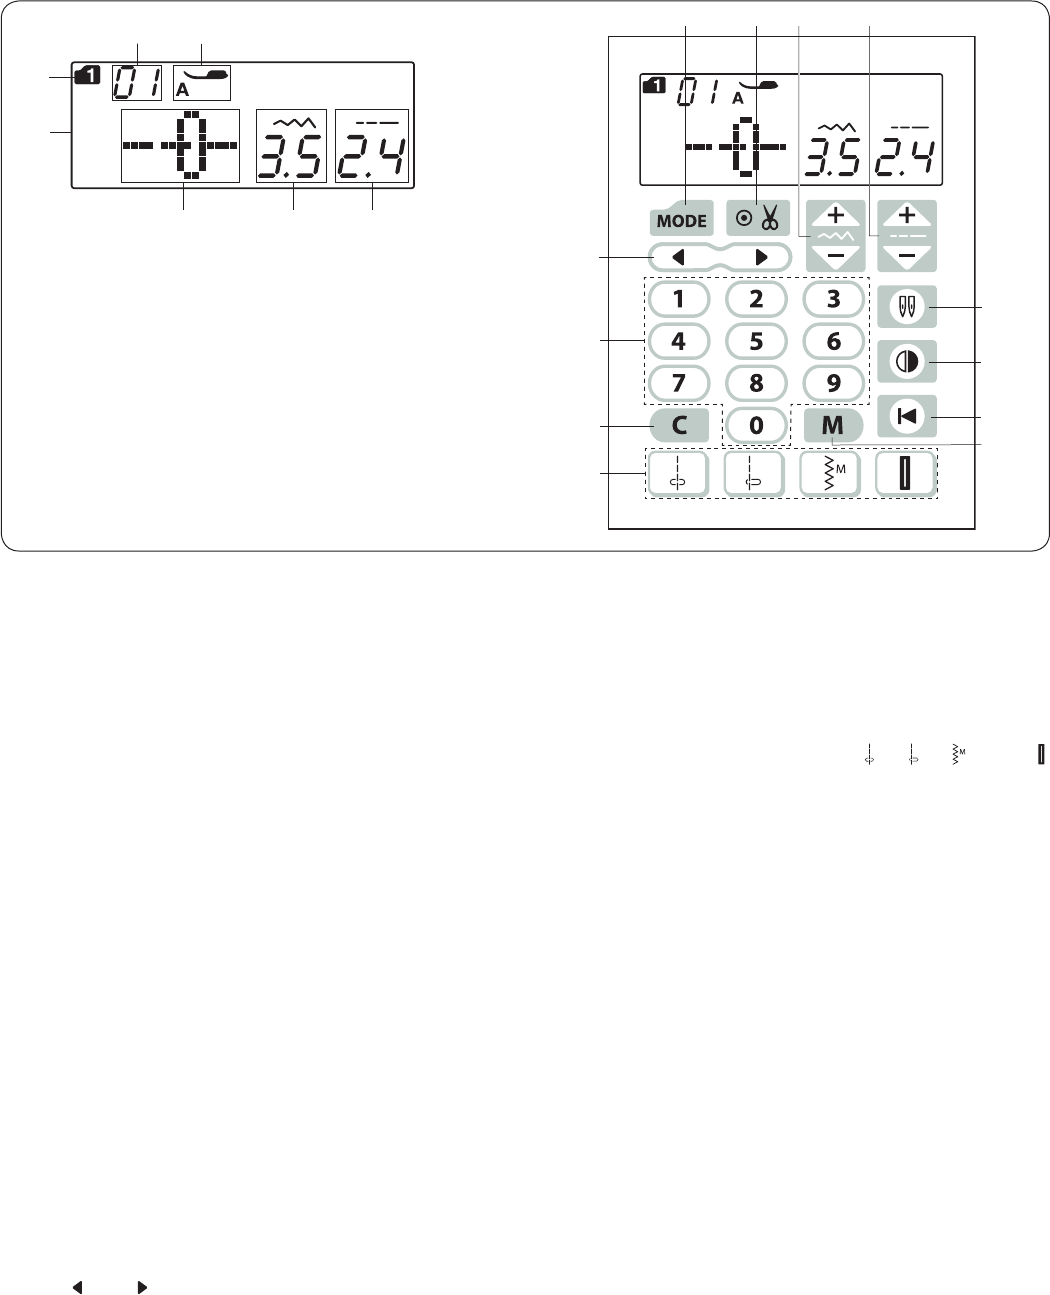
!4 Clear key (refer to pages 22, 69)
Press the clear key to clear the memorized stitch pattern.
Press and hold this key until the buzzer sounds to delete
the whole pattern combination.
!5 Direct pattern selection keys (refer to page 20)
Youcanselectthestitchpatterns01,04,10,and24
in mode 1 directly.
!6 Twin needle key (refer to page 58)
Press this key when sewing with a twin needle.
!7 Mirror image key (refer to page 63)
Press this key to sew a mirror image of the selected
pattern.
!8 Startover key (refer to page 64)
Press this key to sew a pattern combination from the
beginning.
!9 Memory key (refer to page 60)
Press this key to register programmed pattern
combinations.
Up to 50 stitch patterns combination can be memorized.
uw
Function Keys
q LCD screen
The LCD screen shows the following information when the
machine is turned on:
w Stitch pattern
e Mode
r Stitch pattern number
t Recommended type of presser foot
y Stitch width
u Stitch length
i Mode key (refer to pages 20, 21)
Press the mode key to select the mode.
When the power is turned on, the pattern selection mode 1
is set automatically.
o Auto thread cutting key (refer to page 62)
Press this key if you wish to cut the threads automatically
after finish sewing with a locking stitch.
When programming a pattern combination, press this key
to cut the threads automatically after finish sewing.
!0 Stitch width adjusting key (refer to pages 26, 33, 43)
Press this key to alter the stitch width.
!1 Stitch length adjusting key (refer to pages 26, 33, 43)
Press this key to alter the stitch length.
!2 Cursor key (refer to page 68)
Press “ ” or “ ” to move the cursor to check or edit the
pattern combination.
!3 Number keys (refer to page 20)
Enter a 2-digit pattern number to select the desired stitch
pattern in modes 1 to 5.
i
!0 !1
!3
y
e
r
q
!2
!6
!9
!4
!7
!8
!5
o
t