
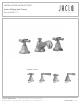
Installation Sheet


j a c l o i n d u s t r i e s | 129 Dermody Street Cranford, NJ 07016
p 908.653.4433 | 800.852.3906 f 908.653.1717 | 800.852.4133
REVISED 9.1.2016
JACLO.COM
|
PG 4
Drain Assembly
1. Remove drain plug (1) and top
ange (2) from drain body (6).
2. Apply appropriate silicon/putty
under lip of top ange (2).
3. From underneath, insert drain body
(6) through basin and attach top
ange (2).
4. Push sink gasket (3) and plastic
washer (4) up snug to bottom of
basin hole and raise mounting nut
(5) nger tight.
5. Test the length needed for the drain
plug so the eyelet is visible through
side port of drain body.
6. Insure proper alignment of top
ange (2) and tighten nut securely.
7. Test t ball rod (10) without seats to
ensure it goes through the eyelet
of the drain plug. Adjust length
by loosening metal nut on drain
plug and adjust eyelet height by
tightening or loosening eyelet, then
secure nut back up to bottom of
plug.
8. Put one ball rod seat (8) before ball
in ball rod, one after ball (concave
sides to ball) slide ball rod nut (9)
onto back, push through side port
ensuring that the ball rod goes
through the eyelet of the drain plug
and tighten nut.
9. Pushing ball rod down raises
the drain plug. Test and adjust if
necessary.
10. Attach lift rod strap to lift rod in
faucet.
11. Push down on ball rod, put one
end of spring clip (12) on, then put
through appropriate hole in lift rod
strap (11). Test again and attach
other end of spring clip onto lift rod
strap.
12. Attach tail piece to drain body by
wrapping with teon tape.
Handle Installation
1. Install handle onto stem in desired "off"
position.
2. Conrm handle is not binding with
escutcheon. Adjust if necessary.
3. Handles are fastened with a set screw or
top screw. Figure 6.
4. If set screw type, screw, tighten then
press in decorative cap with o-ring.
5. If top screw type, screw, tighten then
press in decorative cap with o-ring.
FIGURE 6
1 ½”Ø