
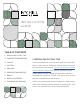
Installation Guide

is latex- or polymer-modied and compliant with A118.4 should be used for glass and marble ma-
terial. If sanded, grout must be used for technical or aesthetic reasons (such as with mosaics with
larger grout joints), gentle application of grout with a soft rubber oat is recommended to minimize
the possibility of surface scratching. A mockup or test installation can ensure the best results.
8. INSTALL OVERVIEW
The instructions below are for reference only. Please follow manufacturer’s instructions when work-
ing with grout. Many tiles are naturally porous. We suggest using a grout release, which will make
your grout easier to clean. Grout joints should be a minimum 1/16 of an inch.
1. Mix the grout according to instructions.
2. Remove spacers as needed.
3. Grout with a grout oat positioned at a 45-degree angle to press in and ll all the grout joints. Be
careful to keep grout in the joints and off the tile.
4. Drag the grout oat across the top of the tile at a 90-degree angle as you would with a squee-
gee.
5. Once the joints are full, clean up with a sponge or scrub pad.
6. After 15-20 minutes, wipe clean once again with clean water and sponge, before allowing to
cure.
7. After the grout has dried, there will be a haze that can be removed by bufng with a dry cloth. If
more help is needed to remove the haze, you can use an acid-free remover such as Deterdek
to remove it. Acids should never be used for cleaning grout haze.
8. Limit use until fully cured, usually 24 hours.
Installer Tech Tips:
• Clean what you just grouted in a timely manner.
• Clean sponge often. Swipe once, ip the sponge over, and swipe again before rinsing the sponge
clean and repeating the process until the area is completely clean.
• Make sure the joints do not have dust or debris in them. Any Thinset that has squeezed up will
need to be removed.
• All installations must have movement joints. Use a color-matched acrylic or silicone sealant to
provide movement protection. Movement joints are for all transitions: the base as well as inside
and outside corners.
• Expansion joints should be installed in all places where tile meets restraining surfaces. Silicone