
Installation Guide

2. SUBSTRATE PREPARATION
An installation is only as good as the structure it rests on. While the preparation for installation will
depend on whether the substrate is gypsum board (dry wall), cement board, concrete masonry
units, or plywood, all substrates must be structurally sound and free from any sealers or contami-
nants—for both vertical and horizontal installations. Avoid plywood, as it will warp and is less water-
proof, even after tiling.
Installer Tech Tips:
• Try the drip test. Drip water on your substrate. If water is absorbed, your mortar adhesive will
have a mechanical and chemical bond. If the water beads up, there is a bond breaker, possibly
wax or sealer, on your substrate, which must be removed.
• Use a straight edge and level. According to ANSI A108.02, deviations of atness on the sub-
strate should not exceed 1/4 inch of change in 10 feet, 1/8 inch for most tiles, with no bump
greater than 1/16 inch.
• Always check your adhesive instructions, noting the suitable substrates and limitations.
3. LAYOUT
Take careful measurements of your space and develop a layout plan. To ensure the nal look will
meet your expectations, dry-lay your tile or create a mockup prior to installation to conrm your -
nal layout, cut locations, grout joint size, and overall look. Use proper equipment—wet saw, drill bits,
snap cutter, or grinder—to cut your tiles. Be sure to follow all safety precautions and protections
recommended by manufacturers.
Installer Tech Tips:
• Grout may discolor tiles. To minimize discoloration, set tiles with a 3/8-inch grout joint and use
a grout bag.
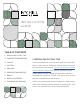
• Lay out your mosaic sheets in a brick pattern, if possible. This should help conceal the sheets’
perimeters and make the installation appear more seamless.
• The amount of adhesive needed will depend on tile size.
• Tiles larger than 3-by-3 inches should be back-buttered with a continuous layer of Thinset ap-
plied with the at side of the trowel.