
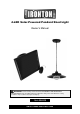
Product Manual


Page 8 of 12
Maintenance
Maintain the light by adopting a program of conscientious repair and maintenance in accordance with
the following recommended procedures
Maintenance Interval
Maintenance Point
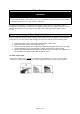
First Use
Allow the solar panel to charge the light for two sunny days.
Observe the solar panel once installed for one day. Ensure
that it is not shaded at any time during daylight.
Observe the light once installed during the evening. Ensure
there is no alternate light source that will interfere with the
light’s sensors.
Seasonally
Visually inspect the solar panel and light to ensure both are
clear of debris and dirt.
Observe the solar panel during one sunny day to ensure that
as the suns position has changed in the sky, the solar panel is
still receiving optimal sunlight throughout the day.
During the Winter
Check the solar panel. Ice should not be allowed to form on
the solar panel as the freezing can damage waterproof seals.
Adjust the angle of the solar panel to the sun’s lower position
in the sky. This will maximize the amount of sunlight received
and help allow any water or snow that accumulates on the
panel to slide off.
Troubleshooting
Use the table below to troubleshoot problems before contacting service personnel or your local
dealer. If the problem continues after troubleshooting, call your local dealer for assistance.
Failure
Possible Cause
Corrective Action
The light does
not turn on.
The batteries are not charged.
Ensure the solar panel is in a location
where it will receive the maximum
sunlight during daytime hours.
Turn the light to the OFF position and
allow the solar panel to charge the
batteries for two sunny days.
Clean the solar panel with a clean,
damp cloth.
The switch is in the wrong position.
Move the switch to position ONE or
TWO.
In the ONE position, the light will only
turn on when it is dark out.
In the TWO position, the light will be
controlled by the hand-held remote.