
Operation Manual


Section 3: Basic Document Processing
21
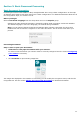
Step 2: Select your scanner
(Note: if you selected image files in the previous step, proceed to Step 3).
If you have already configured your scanner, your scanner model is displayed here. If it is not, see
Configuring your scanner and Selecting the Scanner Settings.
Figure Step 2
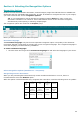
Step 3: Select the Document Language of your documents.
The default document language is set to the language you selected during installation. Click Change
to select a different language.
Note: selecting the correct language is extremely important in order to obtain good recognition
results.
Figure Step 3
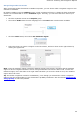
Step 4: Select the Output Format and (Cloud) Destination.
Your documents are saved as .docx files by default. Click Change to select a different output format
or destination application.
For more information about the different output formats and their options, see the section Saving
Documents and Selecting the Formatting Options.
Figure Step 4
When you are done selecting the settings, click Next and then click Go to start processing documents.