
Quick Start Guide


3. Getting Started with the IRISPen
TM
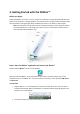
Before you begin:
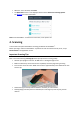
Charge the IRISPen
TM
for 5 hours. To do so, plug it into a computer using the provided USB cable and
power on the computer, or plug the IRISPen
TM
into a power outlet. The green battery led blinks slowly
when the battery is being charged. When the battery led stays on, the battery is fully charged.
Note: the battery life in usage is about 4 hours. When the battery is almost dead, the battery
led starts blinking fast. The recharge time is about 2.5 hours. Note that the battery status is
also indicated inside the IRISPen
TM
app.
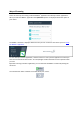
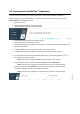
Step 1: Start the IRISPen
TM
application and connect the IRISPen
TM
Double-click the IRISPen
TM
shortcut on the Desktop.
When you start the IRISPen
TM
for the first time and you haven't connected the pen yet, you are
prompted to do so. The IRISPen Air
TM
7 can be connected in two ways: via the provided USB cable or
via Bluetooth.
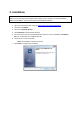
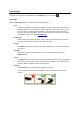
Via USB cable
Plug the IRISPen
TM
in a free USB (2.0) port. When you do this for the first time, the driver is
installed automatically. When the installation is complete a balloon message appears in the
bottom corner of the Desktop.
Press the scanning tip for 3 seconds to power on the pen.