IRISPen Air 7 Quick User Guide (iOS - iPad)
This Quick User Guide helps you get started with the IRISPen Air 7. Please read this guide before operating this scanner and its software. All information is subject to change without prior notice. TM Table of Contents 1. Introduction 2. Installation of the IRISPen app TM 3. Quick Setup of the IRISPen TM 4. Scanning 5. Troubleshooting 6. Specifications 7. Compliance 1. Introduction IRISPen Air 7 is a Smart wireless pen scanner that allows you to scan lines of text to the IRISPen app on your iOS device.
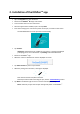
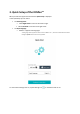
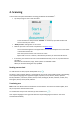
2. Installation of the IRISPenTM app Important: to install the IRISPen app you need a wireless Internet connection. TM Open the App Store on your iOS device. Search for the IRISPen Air 7 app and install it. To do so follow the on-screen instructions. Once the app has been installed, open it and tap Start. Press the scanning tip for 3 seconds to power on the pen, as shown on the screen. TM The blue Bluetooth led on the pen starts to blink slowly. Tap Connect.
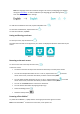
3. Quick Setup of the IRISPenTM When you start the app for the first time the Quick Setup is displayed. In the Quick Setup you can select: The Scanning hand: Select Right hand to scan lines from left to right. Select Left hand to scan lines from right to left. The Input language IRISPen supports 130* languages. TM *130 languages will be supported in the final version of IRISPenTM Air 7, which clients will be able to download through the Update feature in the current application.
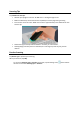
Scanning Tips Tap Continue to scan tips. Hold the pen upright to scan text. Do not scan in a 45 degree angle or less. Make sure both sharp ends of the scanner tip always touch the page during scanning. Scan one line of text at a time. Make sure the line is approximately in the middle of the two scanner tips. Avoid scanning too slowly. Slide the IRISPen smoothly, in a fluid motion. Avoid applying excessive pressure. Otherwise, the scanning may result in jerky, uneven motions.
4. Scanning In this section we explain the different scanning possibilities of the IRISPen . TM Tap the plus sign to start a new document. A new document is always named "untitled". To rename it, tap inside the title and enter a name of your choice. "Ready to scan" now appears on the screen. Slide the pen over a line of text as explained in the Quick Setup. The scanned text appears in the application. You can add multiple lines to a document until the document if full.
Note: the language on the left cannot be changed. This is the input language you selected during the Quick Setup. To select a different input language go to the Settings menu ( Then start a new document in the app. To read the translated text out loud, tap the loudspeaker icon ( To share the translated text, tap the Share icon ( ). ). ). To save the translation, tap Save. Saving and Sharing your Scans To share your scans, tap the Share icon ( ).
5. Troubleshooting Should you experience issues when using the IRISPen Air 7, tap the Settings icon ( left corner. Then scroll down and tap Help and Support. TM ) in the bottom Tip: for a list of compatible devices, click the links to go to the IRISPen Air 7 section of the I.R.I.S. Technical Support website and scroll down to Compatibility. TM 6. Specifications Product Specifications Scanner sensor CMOS Scanner Size ( H x L x D) 3,5 x 15 x 2,5 cm ( 1.37 x 5.51 x 0.
Battery Specifications Type Single cell lithium-polymer (LiPo) Model GSP051050 Rated capacity 200mAh Rated voltage 3.7 V Maximum voltage 4.2 V Max discharge current 200 mA Dimensions of battery (H x L x D) 5,0 x 10 x 50 mm Weight 6 g max All software and drivers are available for download at www.irislink.com/softwaredownload. 7.