
Operation Manual


Table Of Contents
- 1. Introduction
- 2. Using the Scanner Properties Dialog Box (Setup)
- 2.1 A Glance at the Scanner Properties Dialog Box
- 2.2 Buttons on the Scanner Properties Dialog Box
- 2.3 The Image Tab
- 2.4 The Compression Tab (Windows PC only)
- 2.5 The Color Dropout Tab
- 2.6 The Paper Tab
- 2.7 The Preview Tab
- 2.8 The Options Tab
- 2.9 The Setting Tab
- 2.10 The Imprinter Tab
- 2.11 The Information Tab
- 3. Legal Information
1. Introduction
With the Capture Tool, you can perform simple scans and view the captured images.
On a Windows PC:
1. Start the Capture Tool from Start>All Programs>IRIScan Express 4 Scanner.
2. Select your driver type and scanner model and click OK. The Capture Tool dialog box will be
displayed.
On a Mac computer:
1. Click the Capture Tool icon on the Desktop.
Interface
1. Choose your desired file format from the File Format drop down list box. The choices include
JPEG, TIFF, MTIFF, PDF, MPDF, GIF, and BMP. The supported file formats vary depending on
your scanner model.
2. Type your desired folder name and file name in the File Path box.
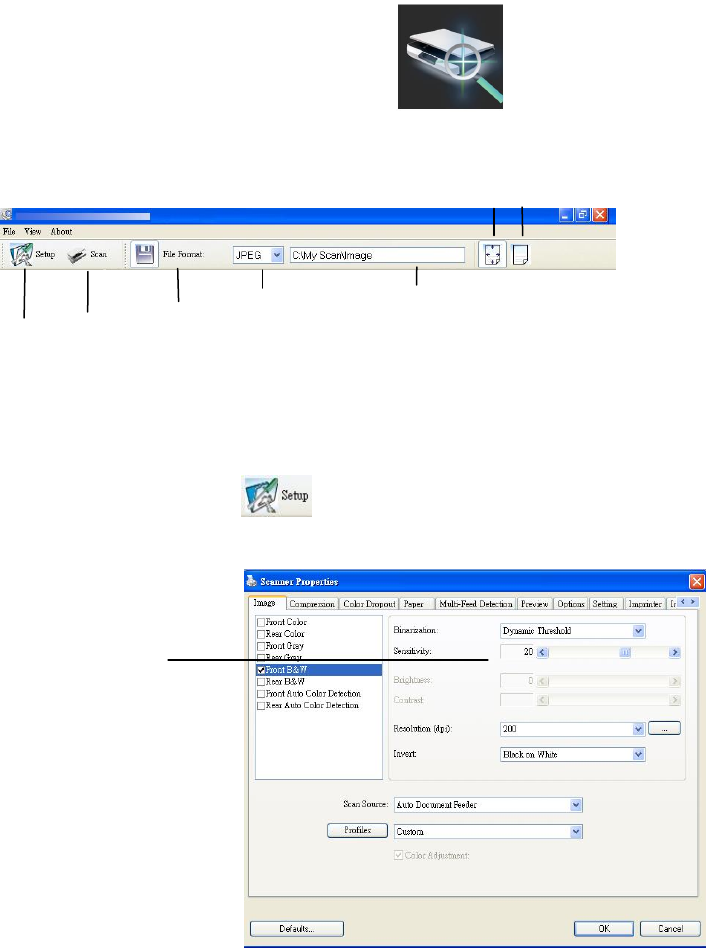
3. Click the Setup button ( ) or choose Setup from the File menu to prompt the Scanner
Properties dialog box.
4. From the Image Selection Box, choose your desired image type for your scanned image.
(Default is Front B&W) If you have a duplex scanner, choose Front and Rear to scan both
sides of your document.
5. Click OK to quit the Scanner Properties dialog box.
6. Place your document face up in the feeding slot.
Image
Selection
Box
Setup
Actual Size
Fit Page
Scan
File Format
Save File Path