
Operation Manual


Table Of Contents
- 1. Introduction
- 2. Using the Scanner Properties Dialog Box (Setup)
- 2.1 A Glance at the Scanner Properties Dialog Box
- 2.2 Buttons on the Scanner Properties Dialog Box
- 2.3 The Image Tab
- 2.4 The Compression Tab (Windows PC only)
- 2.5 The Color Dropout Tab
- 2.6 The Paper Tab
- 2.7 The Preview Tab
- 2.8 The Options Tab
- 2.9 The Setting Tab
- 2.10 The Imprinter Tab
- 2.11 The Information Tab
- 3. Legal Information
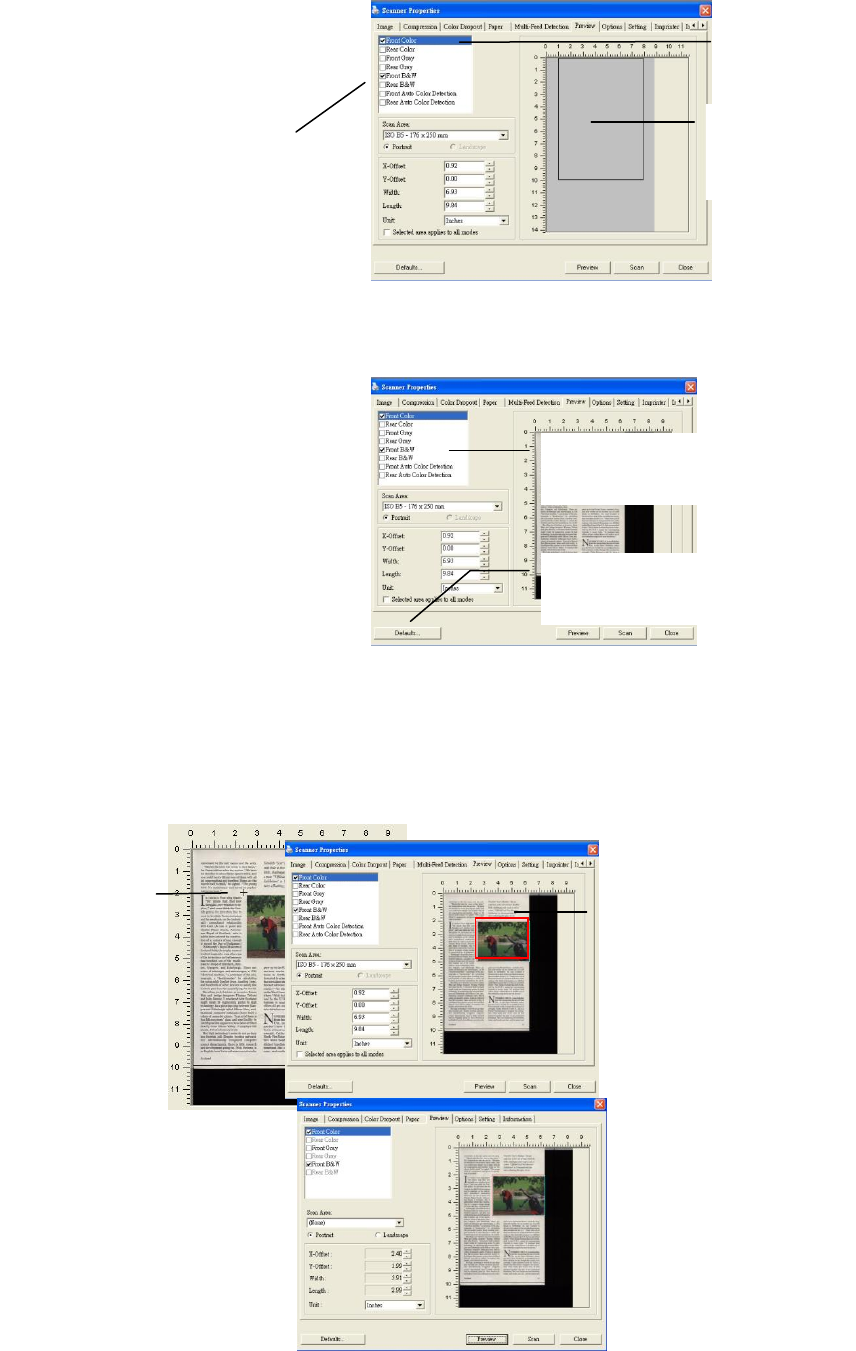
3. Click the Preview tab to display the Preview window. A black rectangular box appears to
indicate the max. scan size your have just selected.
4. Click the Preview button to view the entire image in low resolution to correctly crop your
relative scan area.
5. Select image type from the Image Selection box. The selected image will appear in
highlighted color. (For example, Front Color)
6. Place your cursor on the Preview window and click your left mouse button. A cross sign will
appear as illustrated. Create your relative scan size diagonally by dragging the left mouse
button to your preferable size. The selected area will appear in a red box as illustrated.
7. Check the B&W image from the Image Selection box to scan the entire document.
8. Click the Scan button to start scanning the document in two image types and sizes. (See
the result in below.)
A black
rectangular
box
The selected
image
The
Relative
Area
The Preview
Image
A Cross
Sign
The Preview
Button
The Image Selection
Box