
Operation Manual


Table Of Contents
- 1. Introduction
- 2. Using the Scanner Properties Dialog Box (Setup)
- 2.1 A Glance at the Scanner Properties Dialog Box
- 2.2 Buttons on the Scanner Properties Dialog Box
- 2.3 The Image Tab
- 2.4 The Compression Tab (Windows PC only)
- 2.5 The Color Dropout Tab
- 2.6 The Paper Tab
- 2.7 The Preview Tab
- 2.8 The Options Tab
- 2.9 The Setting Tab
- 2.10 The Imprinter Tab
- 2.11 The Information Tab
- 3. Legal Information
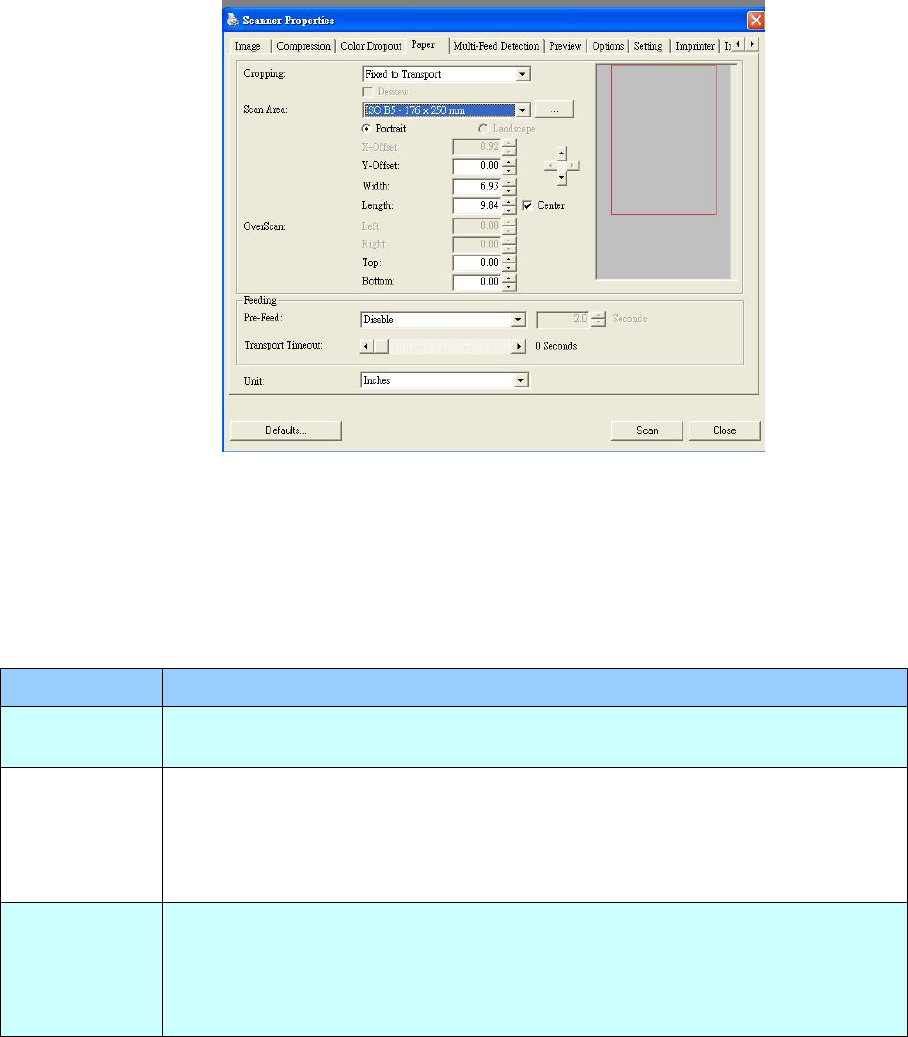
2.6 The Paper Tab
The Paper tab allows you to define values relating to image output (i.e., Auto Crop or not, Scan
Area, OverScan, Multi-Feed Detection).
The Paper tab dialog box
2.6.1 Cropping
Cropping allows you to capture a portion of the document being scanned. Choice:
Automatic, Fixed to Transport, EOP (End of Page) Detection, Relative to
Documents.
Options
Description
Automatic
Automatic adjusts the cropping window according to different
document sizes. Use this option for batches of mixed-sized documents.
Fixed to
Transport
This feature allows you to define the area or zone to be imaged. Use
for batches of same-sized documents. If you select this option, you
can use the arrow keys to define the x and y offset values, width and
length to redefine your scanned area. The Display window will show
image placement as you change the values.
EOP (End of
Page)
Detection
This feature allows you to define the area or zone to be imaged. Use
for batches of same-width but different length documents. If you
select this option, you can use the arrow keys to define the x and y
offset values, width and length to redefine your scanned area. The
Display window will show image placement as you change the values.