
Users Manual Part 6


Clinical User’s Guide
IBA | 46-19|
Volume 1 - Treatment Session
|Part XI
- Patient Positioning and Alignment Introducing Patient Positioning and Alignment
|
The Typical Alignment Correction Process
A typical alignment correction procedure is as follows:
1. Position the patient on the couch.
2. Move the PPS into the prescribed Setup position.
3. Verify patient alignment at Setup position:
a. Take one Digital Radiograph (DR) for every relevant radiographic axis.
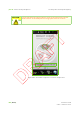
If you are using a gating system, follow the procedure described in Section
“Triggering Procedure” on page 48-16. Check the X-ray triggering display
(see Figure 48-2) to see that the correct gating system has been selected.
WARNING In a gantry treatment room equipped with a gantry rolling floor, patient
loading should only be performed with the nozzle positioned in the
upper part of the gantry, between 90° and 270°.
WARNING Make sure that the DID flat panel arms are fully retracted before
attempting to move Patient Positioning Devices (PPDs) that can collide
with the flat panels.
WARNING As a Radiation Therapy Technologist (RTT), do evaluate the longest
acceptable exposure time considering that taking the X-ray image may
finish after the end of the triggering cycle.
WARNING As a Radiation Therapy Technologist (RTT), check the gating signal with
respect to the presence of the X-ray beam. In case a mismatch occurs,
do NOT use the resulting X-ray images for patient alignment.