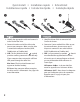
™ eGo Portable Hard Drive, Mac Edition FireWire 800 / FireWire 400 / USB 2.
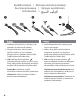
Quick Install • Installation rapide • Schnellstart Installazione rapida • Instalación rápida • Instalação rápida 1. Identify the appropriate cable and connect it to the back of the drive. 1. Identifiez le bon câble et connectez-le à l’arrière du lecteur. 2. Connect the other end of the cable to the port on your computer. Make sure the drive is connected to only one interface (USB, FireWire 400, or FireWire 800). 2. Connectez l’autre extrémité du câble au port de votre ordinateur.
1. Wählen Sie das richtige Kabel aus, und verbinden Sie es mit einem Anschluss auf der Rückseite des Laufwerks. 1. Individuare il cavo appropriato e collegarlo alla connessione situata nella parte posteriore dell’unità. 2. Verbinden Sie das andere Ende des Kabels mit dem Anschluss des Computers. Vergewissern Sie sich, dass das Laufwerk nur an eine Schnittstelle (USB, FireWire 800 oder FireWire 400) angeschlossen ist. 2. Collegare l’altra estremità del cavo alla porta del computer.
Snelle installatie • Snabbinstallation • Hurtig installation Rask installering • Pika-asennus • Gyors telepítés 1. Neem de geschikte kabel en sluit die aan op de connector op de achterkant van de drive. 1. Lokalisera rätt kabel och anslut den till uttaget på baksidan av enheten. 2. Sluit het andere uiteinde van de kabel aan op de poort van de computer. Controleer of de drive slechts op één interface (USB, FireWire 800 of FireWire 400) is aangesloten. 2.
1. Find det korrekte kabel, og slut det til stikket på bagsiden af drevet. 1. Finn frem den riktige kabelen og koble den til på baksiden av stasjonen. 2. Slut den anden ende af kablet til porten på computeren. Kontroller, at drevet kun er tilsluttet en grænseflade (USB, FireWire 800 eller FireWire 400). 2. Koble den andre enden av kabelen til porten på datamaskinen. Kontroller at stasjonen er koblet til bare ett grensesnitt (USB, FireWire 800 eller FireWire 400). 3.
Rychlá instalace • Skrócona instrukcja insalacji Быстрая установка • Γρήγορη εγκατάσταση Hızlı Kurulum • 1. Vyhledejte příslušný kabel a připojte jej do konektoru na zadní straně jednotky. 1. Znajdź odpowiedni kabel i podłącz go do złącza z tyłu napędu. 2. Připojte druhý konec kabelu k portu v počítači. Ujistěte se, zda je jednotka připojena pouze k jednomu rozhraní (USB, FireWire 800 nebo FireWire 400). 2. Podłącz drugi koniec kabla do portu w komputerze.
1. Возьмите соответствующий кабель и подключите его к задней панели диска. 2. Подключите другой конец кабеля к порту на компьютере. Убедитесь, что диск подключен только к одному интерфейсу (USB, FireWire 400 или FireWire 800). 3. USB. Кабель дополнительного питания с символом необходим при подключении к компьютерам, которые не обеспечивают достаточного питания USB через основной кабель. Для пользователей Mac: Диск должен устанавливаться и отображаться на рабочем столе Mac.
Using the Drive Disconnecting the Drive CAUTION! To prevent data loss, do not disconnect the drive during data transfer (activity light flashing). Always use the safe removal procedure for your operating system when disconnecting the drive. Using FireWire Pass-through The drive includes two FireWire ports – one FireWire 800 and one FireWire 400. When the drive is connected via either FireWire port, the other port can be used to connect another FireWire device to your system.
4. When the Wizard opens, click Next at each screen to select the default options and format the drive NTFS. NOTE: If you want to use the drive with other operating systems, use the Iomega FAT32 Formatter to change the format to FAT32. The software and instructions are available from the support area on www.iomega.com. Troubleshooting Drive does not appear in My Computer or Windows Explorer or on the Mac Desktop • Try restarting your computer.
Utilisation du lecteur Déconnexion du lecteur ATTENTION ! Pour éviter toute perte de données, ne déconnectez pas le lecteur pendant un transfert de données (voyant d’activité du lecteur clignotant). Utilisez toujours la procédure de retrait sécurisée de votre système d’exploitation lors de la déconnexion du lecteur. Utilisation du transfert FireWire Le disque dur comporte deux ports FireWire : un port FireWire 800 et un port FireWire 400.
3. Le disque apparaît comme Non attribué et la barre doit être noire. Cliquez avec le bouton droit sur la barre noire et sélectionnez Nouveau volume simple (Windows Vista), Nouvelle partition (Windows XP) ou Créer une partition (Windows 2000). 4. Lorsque l’assistant s’ouvre, cliquez sur Suivant sur chaque écran pour sélectionner les options par défaut et formater le disque au format NTFS.
Das Laufwerk verwenden Trennen des Laufwerks vom System ACHTUNG! Um Datenverluste zu vermeiden, trennen Sie das Laufwerk während der Datenübertragung nicht vom Computer (Kontrolllämpchen am Laufwerk blinkt). Zum Abklemmen des Laufwerks sollten Sie immer die Option zum sicheren Entfernen der Hardware wählen. Verwendung von FireWire-Pass-Through Das Laufwerk ist mit zwei FireWire-Anschlüssen (1 x FireWire 800 sowie 1 x FireWire 400) ausgestattet.
Dateisystem angezeigt wird. Klicken Sie mit der rechten Maustaste auf den Laufwerksnamen und wählen Sie dann Datenträger initialisieren (Windows XP) oder Signatur schreiben (Windows 2000). Klicken Sie anschließend auf OK. 3. Das Laufwerk wird dann als Nicht zugeordnet angezeigt und der Balken schwarz dargestellt. Klicken Sie mit der rechten Maustaste auf den schwarzen Balken und wählen Sie Neues einfaches Volume (Windows Vista), Neue Partition (Windows XP) oder Partition erstellen (Windows 2000). 4.
Der PC lässt sich nicht starten Wenn sich Ihr PC mit dem angeschlossenen Laufwerk nicht starten lässt, besteht möglicherweise ein BIOS-Konflikt mit Wechseldatenträgern mit hoher Speicherkapazität. Sie können dieses Problem umgehen, indem Sie das Laufwerk beim Starten des Computers ausschalten. Nach dem Starten des Computers schalten Sie das Laufwerk ein. Benutzerhandbuch (vollständig) Im Bereich “Support” unter www.iomega.com steht Ihnen ein vollständiges Benutzerhandbuch im HTMLFormat zur Verfügung.
2. Utenti di Windows Vista: Selezionare MBR (Record di avvio principale, Master Boot Record) come stile della partizione, quindi fare clic su OK. Utenti di Windows XP/2000: Se viene avviata la Procedura di inizializzazione guidata disco, fare clic su Avanti. Selezionare il disco, fare clic su Avanti, quindi su Fine. Se la procedura guidata non viene avviata, individuare l’unità nell’elenco più in basso. Cercare un disco senza lettera di unità o file system.
Se all’unità continua a non essere assegnata alcuna lettera, visitare l’area Assistenza nel sito Web www.iomega.com. Il computer non si avvia Se il PC non si avvia quando l’unità è collegata, è possibile che esista un conflitto tra il BIOS del computer e i dischi rimovibili a elevata capacità. Per risolvere il problema, spegnere l’unità quando si accende il computer. Accendere l’unità dopo l’avvio del computer.
Formateo de la unidad para Windows PRECAUCIÓN: Al volver a dar formato a la unidad, se borrarán todos los datos existentes. 1. Abra Administración de discos de Windows (haga clic con el botón derecho del ratón en Mi PC, seleccione Administrar y, a continuación, haga clic en Administración de discos). 2. Usuarios de Windows Vista: Seleccione Registro de arranque maestro como estilo de partición y haga clic en Aceptar. Usuarios de Windows XP/2000: Si se abre el asistente para discos, haga clic en Siguiente.
Usuarios de Mac: • Abra las preferencias de Finder y asegúrese de que la casilla Discos externos (o Discos duros) está marcada. Si aún no se le ha asignado una letra a la unidad, visite el área de soporte del sitio www.iomega.com. El PC no arranca Si su PC no se inicia cuando la unidad está conectada, puede que la BIOS de su ordenador tenga un conflicto con las unidades extraíbles de gran capacidad. Para solucionar este problema, apague la unidad cuando arranque el equipo.
Compatibilidade com Time Machine Todas as unidades Iomega formatadas como HFS+ são compatíveis com Time Machine (disponível no Mac OS X, versão 10.5. Formatação da unidade para Windows CUIDADO! A reformatação da unidade apagará todos os dados existentes! 1. Abra o Gerenciamento de Disco do Windows (clique com o botão direito do mouse em Meu Computador, selecione Gerenciar e clique em Gerenciamento de Disco). 2.
Usuários de PC: • Certifique-se de que a unidade esteja formatada para uso com o Windows. Consulte as instruções acima. • Caso esteja conectado a uma placa PCI, certifique-se de que os drivers adequados para a placa estejam instalados e sejam reconhecidos pelo sistema operacional. • Caso esteja conectando a USB, verifique sua BIOS para verificar se o USB está ativado. Consulte o guia ou manual do usuário do computador para obter instruções.
van uw gegevens, zodat u er altijd op kunt vertrouwen dat uw kritieke gegevens zijn veiliggesteld. De regelmaat waarmee u back-ups maakt, stemt u het beste af op het belang van uw gegevens. U kunt uw gegevens eenvoudig beschermen door kopieën van uw bestanden naar de drive te verslepen of door gebruik te maken van back-upsoftware om regelmatig back-ups te plannen. WAARSCHUWING! Elk apparaat voor gegevensopslag kan defect raken.
• Controleer of de drive slechts op één interface op de computer (USB, FireWire 400 of FireWire 800) is aangesloten. Pc-gebruikers: • Zorg dat de drive geformatteerd is voor gebruik met Windows. Raadpleeg de instructies hierboven. • Als u aansluit op een PCI-kaart, moeten de juiste stuurprogramma’s voor de kaart geïnstalleerd zijn en door uw besturingssysteem worden herkend. • Als u aansluit op een USB-poort, controleert u in het BIOS of USB is ingeschakeld.
Резервное копирование на диск Iomega рекомендует периодически архивировать всю систему и более часто архивировать важные данные, чтобы гарантировать их защиту. Периодичность резервного копирования данных должна зависеть от важности данных. Чтобы защитить данные, можно просто перетащить копии важных файлов на дисковод или использовать ПО для резервного копирования для планирования регулярных операций архивации. ВНИМАНИЕ! Любое устройство хранения данных может выйти из строя.
• Для осуществления соединения USB попробуйте подключить кабельные соединения к другим портам USB на компьютере. • Убедитесь, что диск подключен только к одному интерфейсу компьютера (USB, FireWire 400 или FireWire 800). Пользователям ПК: • Убедитесь в том, что диск отформатирован для использования в ОС Windows. См. инструкции выше. • Если осуществляется подключение к карте PCI, убедитесь, что были установлены соответствующие драйверы карты, и она распознается операционной системой.
Limited Warranty • Garantie Limitée Eingeschränkte Garantie • Garanzia limitata Garantía limitada • Garantia limitada • Beperkte garantie Ограниченная гарантия Iomega warrants this hardware product to be free from defects in materials and workmanship for the warranty period. This non-transferable, limited warranty is only to you, the first end-user purchaser.
pecific legal rights and you may also have other rights that vary from jurisdiction to jurisdiction. Any suit for breach of any warranty on your Product must be filed within one (1) year of the first date the suit could have been brought. Iomega garantit que ce produit est exempt de tout vice de fabrication ou de malfaçon pendant toute la période de garantie. Cette garantie limitée n’est pas transférable et ne s’applique qu’à l’utilisateur final.
énoncées ci-dessus peuvent ne pas être applicables dans votre cas. Cette garantie vous donne certains droits spécifiques, mais vous pouvez également bénéficier de droits supplémentaires en fonction de la législation de votre état. Toute poursuite pour défaut de garantie sur votre produit devra être déposée dans un délai d’un an à compter du premier jour à partir duquel la poursuite peut être engagée.
Einschränkungen BEI DER OBIGEN GARANTIE HANDELT ES SICH UM EINE AUSSCHLIESSLICHE GARANTIE, DIE ANSTELLE ALLER WEITEREN GARANTIEN, AUSDRÜCKLICHER ODER STILLSCHWEIGENDER NATUR, GÜLTIGKEIT HAT. Innerhalb des gesetzlich zulässigen Rahmens SCHLIESST IOMEGA AUSDRÜCKLICH JEGLICHE STILLSCHWEIGENDEN GARANTIEN AUS, EINSCHLIESSLICH JEGLICHER STILLSCHWEIGENDER GARANTIE HINSICHTLICH DER MARKTGÄNGIGKEIT BZW. DER EIGNUNG FÜR EINEN BESTIMMTEN ZWECK.
1900 West, Roy, UT 84067. Le informazioni sui contatti dell’Assistenza clienti di Iomega in Europe sono disponibili sul sito Web del Supporto tecnico all’indirizzo www.iomega.com/europe/support.
de Iomega en Europa, visite nuestra página Web de asistencia: www.iomega.com/europe/support. Si tiene derecho a que su producto reciba servicio de garantía, se le pedirá que lo devuelva a Iomega, junto con la identificación adecuada, un número de autorización de devolución obtenido del sitio Web de Iomega o proporcionado por el representante, y una prueba de compra. Iomega no protegerá, recuperará o devolverá datos durante el servicio de garantía, por lo que debe duplicarlos antes del envío.
South 1900 West, Roy, UT 84067. Informações de contato para o atendimento ao cliente da Iomega na Europa podem ser obtidas em nosso website de Suporte em www.iomega.com/europe/support. Caso o produto tenha direito ao serviço de garantia, será necessário devolvê-lo à Iomega, acompanhado da identificação apropriada: o número da autorização de retorno obtido no website da Iomega ou fornecido pelo representante da Iomega e uma comprovação de aquisição.
aangepast aan de veranderende technologie en marktsituatie. Bezoek Iomega op www.iomega.com/supportpolicy.html voor meer informatie over het huidige beleid van Iomega of schrijf naar: Iomega Customer Service, 4059 South 1900 West, Roy, UT 84067, VS. U vindt de contactinformatie voor de klantenservice van Iomega in Europa via onze website voor ondersteuning: www.iomega.com/europe/support.
ВОЗМОЖНОСТИ ТАКИХ ПОВРЕЖДЕНИЙ ИЛИ ПОТЕРЬ. Ни при каких обстоятельствах ответственность компании Iomega не может превышать продажной стоимости проигрывателя или диска. Законодательство некоторых стран не допускает исключения или ограничения на ответственность за случайные или последующие повреждения, поэтому вышеназванные ограничения могут быть не применимы в вашей стране.
Begrænset garanti Kunder, der registrerer deres nye produkter på www.iomegareg.com maks. 90 dage efter købet, vil få en forlænget garanti, så den samlede garantiperiode bliver tre (3) år i alle regioner. BEMÆRK: Du skal registrere med et tilgængeligt sprog. Forlængelse af garantiperioden gælder ikke for istandsatte produkter. Besøg www.iomega.com/support for at se en komplet beskrivelse af garantibetingelserne. Begrenset garanti Kunder som registrerer sine nye produkter på www.iomegareg.
POZNÁMKA: Registraci musíte provézt v jednom z dostupných jazyků. Repasované výrobky nemají nárok na prodloužení záruky. Úplné záruční podmínky naleznete na stránce www.iomega.com/support. Gwarancja ograniczona Klienci, którzy w ciągu 90 dni od nabycia dokonają rejestracji nowego produktu pod adresem www.iomegareg.com otrzymają przedłużenie gwarancji; w związku z tym całkowity okres gwarancyjny dla tych produktów we wszystkich powyższych regionach będzie obejmował trzy (3) lata.
Regulatory Information Informations relatives à la réglementation Gesetzliche Bestimmungen • Informazioni sulle regolamentazioni Información reglamentaria • Informações regulamentares Regulatieve informatie • Сведения о нормативных требованиях Manufacturer/Responsible Party Iomega Corporation 4059 South 1900 West Roy, UT 84067 USA This equipment complies with Part 15 of the FCC Rules.
For more information concerning the correct disposal of this product, please contact your local authority or the retailer where this product was purchased. Canadian Verification This Class B digital apparatus meets all requirements of the Canadian Interference-Causing Equipment Regulations (ICES003, Class B). CE (Union européenne) Ce produit Iomega est certifié conforme aux normes et directives européennes suivantes : Application de la directive du Conseil : 2004/108/EC.
CE (Unione Europea) Questo prodotto Iomega è conforme alle direttive e agli standard europei: Applicazione della direttiva comunitarie: 2004/108/EC. Dichiarazione di conformità agli standard: EN55022, EN55024, EN61000-3-2, EN61000-3-3. Nome importatore: Iomega International, S.A. Tipo di apparecchiatura: dispositivo informatico.
CE (Europese Gemeenschap) Dit Iomega-product voldoet aan de volgende Europese Richtlijn(en) en Norm(en): Toepassing van Richtlijn: 2004/108/EC van de Europese Commissie. Normen waarmee de conformiteit wordt verklaard: EN55022, EN55024, EN61000-3-2, EN61000-3-3 en EN60825-1. Naam van importeur: Iomega International, S.A. Type apparatuur: Informatietechnologieapparatuur.
English For service and support for your Iomega product, visit us at www.iomega.com. Français Pour obtenir du service et de l’assistance pour votre produit Iomega, visitez notre site à l’adresse suivante : www.iomega.com. Deutsch Servicedienstleistungen und Kundendienst für Ihr Iomega Produkt finden Sie unter www.iomega.com. Italiano Per ottenere assistenza e supporto per il prodotto Iomega in uso, visitare il sito Web all’indirizzo www.iomega.com.